European ASP.NET 4.5 Hosting BLOG

BLOG about ASP.NET 4, ASP.NET 4.5 Hosting and Its Technology - Dedicated to European Windows Hosting Customer

European ASP.NET Core Hosting - HostForLIFE :: Compare Core APIs with Code using ASP.NET SOAP Services

clock February 17, 2025 07:51 by author Peter

In enterprise application development, SOAP (Simple Object Access Protocol) services have long been an integral part of enterprise application development, especially in industries such as financial services, healthcare, and government, where structured communication is required. Ziggy Rafiq compares two critical approaches to SOAP service implementation in the .NET ecosystem: ASMX and CoreWCF for ASP.NET Core SOAP APIs. The purpose of this article is to help developers choose the best SOAP implementation for their application by providing practical examples of the two SOAP implementations.

The following are some of the things you will learn from this article:

  • Maintenance and enhancement of legacy SOAP services are done through the use of ASMX.
  • With CoreWCF, you can create ASP.NET Core APIs that are scalable, cross-platform, and compatible with multiple platforms.
  • Make sure you select the right framework for your application based on its requirements.

The guide is invaluable for developers integrating modern SOAP solutions with REST and gRPC or transitioning to modern SOAP solutions.

The ASP.NET SOAP Web Services (ASMX)
ASP.NET SOAP Web Services (ASMX), as part of the ASP.NET Framework, provide a method for exposing methods as SOAP services that clients can consume over HTTP; these services were the go-to solution for SOAP-based communication in early ASP.NET applications for SOAP-based communication over the internet.

ASMX Features
Built-in support for SOAP: ASMX services support SOAP by automatically generating SOAP envelopes and annotating methods with the [WebMethod] attribute.
Auto-generated WSDL: When you create an ASMX service, a WSDL file is automatically generated, which clients can use to understand how the service works.
Platform limitations: In cross-platform environments, ASMX services are less flexible because they require IIS (Internet Information Services) to host them, making them more limited.

ASMX Web Service Code Example
The following steps will guide you through creating an ASMX web service in the .NET Framework:
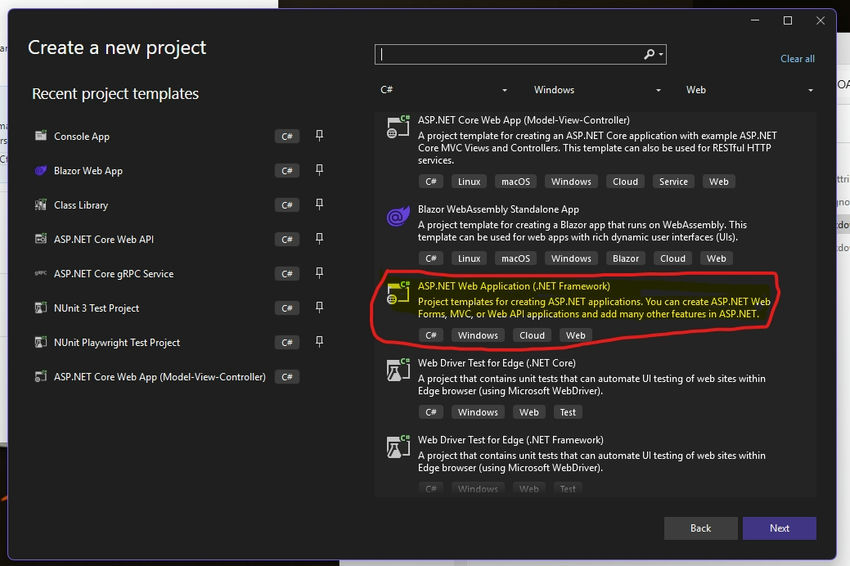
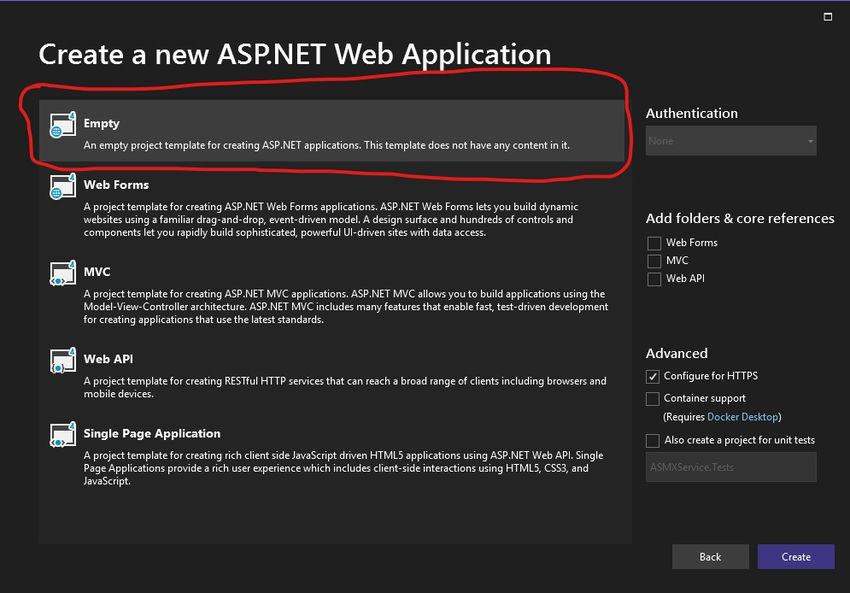
1. Visual Studio should be used to create an ASP.NET Web Forms project.

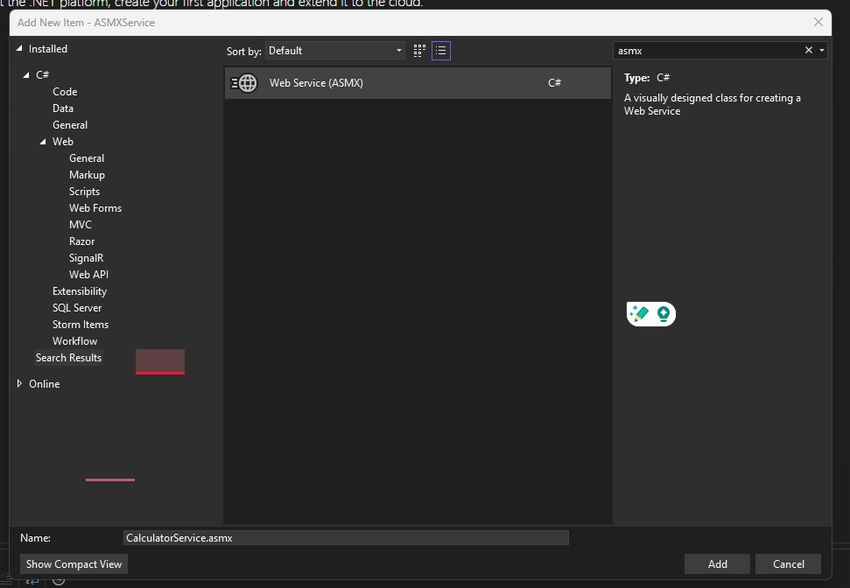
2. Assemble a calculator service by adding a .asmx file to your project (such as CalculatorService.asmx).


3. The service should be implemented with the [WebMethod] attribute.
An example of a simple calculator service is as follows:
using System.Web.Services;

namespace ASMXService
{
    /// <summary>
    /// Summary description for CalculatorService
    /// </summary>
    [WebService(Namespace = "http://tempuri.org/")]
    [WebServiceBinding(ConformsTo = WsiProfiles.BasicProfile1_1)]
    [System.ComponentModel.ToolboxItem(false)]
    // To allow this Web Service to be called from script, using ASP.NET AJAX, uncomment the following line.
    // [System.Web.Script.Services.ScriptService]
    public class CalculatorService : System.Web.Services.WebService
    {

        [WebMethod]
        public int Add(int a, int b)
        {
            return a + b;
        }

        [WebMethod]
        public int Subtract(int a, int b)
        {
            return a - b;
        }

    }
}


How to Create and Run a Program?

  • Visual Studio should be used to create an ASP.NET Web Forms project.
  • Make sure your project contains an ASSMX file.
  • The above code should be added to your service.
  • You can view the auto-generated WSDL by visiting the .asmx file in the browser after running the project.

How Do ASP.NET Core SOAP APIs Work?
In ASP.NET Core, Microsoft's cross-platform framework, SOAP services aren't built in, but developers can use CoreWCF to create SOAP-based APIs. The CoreWCF project brings WCF-like functionality to .NET Core, allowing developers to develop SOAP APIs in a modern, scalable, and cross-platform environment.

CoreWCF SOAP APIs for ASP.NET Core

  • Requires CoreWCF for SOAP implementation: In contrast to ASMX, ASP.NET Core does not come with SOAP support by default but can be added using CoreWCF.
  • Cross-platform support: CoreWCF services can be run on Windows, Linux, and macOS, making them suitable for modern cloud-native applications.
  • Integration with modern features: ASP.NET Core features such as middleware, dependency injection, and performance scalability are integrated into CoreWCF.

ASP.NET Core SOAP API Code Example
The following steps will help you create a SOAP API in ASP.NET Core using CoreWCF:

Step 1. The following NuGet packages are required to install CoreWCF:
dotnet add package CoreWCF
dotnet add package CoreWCF.Http


Step 2. Use the [ServiceContract] and [OperationContract] attributes to define the service contract:
using CoreWCF;

namespace CoreWCFService.Contracts.Interfaces;

[ServiceContract]
public interface ICalculatorService
{
    [OperationContract]
    double Add(double a, double b);

    [OperationContract]
    double Subtract(double a, double b);

    [OperationContract]
    double Multiply(double a, double b);

    [OperationContract]
    double Divide(double a, double b);

}

Step 3. Creating a class that inherits from the service contract is the first step toward implementing the service:
using CoreWCFService.Contracts.Interfaces;

namespace CoreWCFService.Contracts;
public class CalculatorService : ICalculatorService
{
    public double Add(double a, double b) => a + b;
    public double Subtract(double a, double b) => a - b;
    public double Multiply(double a, double b) => a * b;
    public double Divide(double a, double b) => b != 0 ? a / b : throw new DivideByZeroException("It cannot be divide by zero.");

}

Step 4. Program.cs should be configured with CoreWCF. Configure CoreWCF by adding the following lines:
using CoreWCF;
using CoreWCF.Configuration;
using CoreWCFService.Contracts;
using CoreWCFService.Contracts.Interfaces;

var builder = WebApplication.CreateBuilder(args);

builder.Services.AddServiceModelServices();
builder.Services.AddServiceModelMetadata();

builder.Services.AddSingleton<CalculatorService>();


builder.Services.AddOpenApi();

var app = builder.Build();


((IApplicationBuilder)app).UseServiceModel(builder =>
{
    builder.AddService<CalculatorService>();
    builder.AddServiceEndpoint<CalculatorService, ICalculatorService>(
        new BasicHttpBinding(), "/CalculatorService");
});


app.MapGet("/calculate/add/{a}/{b}", (double a, double b, CalculatorService service) =>
{
    return Results.Ok(new { Result = service.Add(a, b) });
}).WithName("AddNumbers");

app.MapGet("/calculate/subtract/{a}/{b}", (double a, double b, CalculatorService service) =>
{
    return Results.Ok(new { Result = service.Subtract(a, b) });
}).WithName("SubtractNumbers");

app.MapGet("/calculate/multiply/{a}/{b}", (double a, double b, CalculatorService service) =>
{
    return Results.Ok(new { Result = service.Multiply(a, b) });
}).WithName("MultiplyNumbers");

app.MapGet("/calculate/divide/{a}/{b}", (double a, double b, CalculatorService service) =>
{
    if (b == 0)
        return Results.BadRequest("Cannot divide by zero.");

    return Results.Ok(new { Result = service.Divide(a, b) });
}).WithName("DivideNumbers");


if (app.Environment.IsDevelopment())
{
    app.MapOpenApi();
}

app.UseHttpsRedirection();
app.Run();

# CoreWCFService.http Example
@CoreWCFService_HostAddress = http://localhost:5071

GET {{CoreWCFService_HostAddress}}/calculate/add/15/10
Accept: application/json

###
{
  "Result": 25
}

GET {{CoreWCFService_HostAddress}}/calculate/subtract/20/5
Accept: application/json

###
{
  "Result": 15
}

GET {{CoreWCFService_HostAddress}}/calculate/multiply/20/5
Accept: application/json

###
{
  "Result": 100
}

GET {{CoreWCFService_HostAddress}}/calculate/divide/20/4
Accept: application/json

###
{
  "Result": 5
}

GET {{CoreWCFService_HostAddress}}/calculate/divide/50/0
Accept: application/json

###
{
  "Error": "It cannot be divide by zero."
}


Step 5. Test the SOAP API. After running the application, navigate to /CalculatorService?wsdl to view the WSDL. Then, use tools like Postman or SOAP UI to test the SOAP service.

Differentiating ASMX from ASP.NET Core

Feature ASP.net SOAP Web Services (ASMX) ASP.net Core SOAP APIs (CoreWCF)
Framework .Net Framework ASP.net Core
Cross-Platform Support No Yes
Middleware and DI Support No Yes
Performance Moderate High
SOAP Support Built-In Require CoreWCF
Ideally User Case When looking after Legacy/Old Applications and System. Modern applications and systems are built in the current day.

When to Choose Which?

When to Choose Which?

  • In the following situations, you should use ASP.NET SOAP Web Services (ASMX):
  • ASMX is heavily used in legacy applications you maintain.

For your project, migrating to ASP.NET Core isn't feasible or cost-effective.

ASP.NET Core SOAP APIs (CoreWCF) are recommended if:

  • The SOAP-based services you are building are being developed.
  • A cross-platform solution must be scalable and support multiple platforms.
  • Modern technologies such as REST, gRPC, or message queues can be integrated with SOAP.

Summary

While ASMX Web Services can still be used to maintain legacy applications, ASP.NET Core SOAP APIs, which are driven by CoreWCF, provide greater performance, flexibility, and support for contemporary development techniques. CoreWCF is the ideal option for contemporary enterprise applications since it can produce scalable, cross-platform SOAP services. By using CoreWCF, developers can easily combine their SOAP solutions with more recent technologies like REST and gRPC, future-proofing their systems.

The code for this article can be found on Ziggy Rafiq's GitHub Repository https://github.com/ziggyrafiq/SOAP-Services-Comparison  This is for developers who need to maintain legacy SOAP services while transitioning to modern, scalable SOAP solutions or integrating SOAP into a broader ecosystem of modern web services.

HostForLIFE ASP.NET Core Hosting

European Best, cheap and reliable ASP.NET hosting with instant activation. HostForLIFE.eu is #1 Recommended Windows and ASP.NET hosting in European Continent. With 99.99% Uptime Guaranteed of Relibility, Stability and Performace. HostForLIFE.eu security team is constantly monitoring the entire network for unusual behaviour. We deliver hosting solution including Shared hosting, Cloud hosting, Reseller hosting, Dedicated Servers, and IT as Service for companies of all size.


European ASP.NET Core Hosting - HostForLIFE :: Configuring Dynamic CORS with JSON in.NET Core

clock February 10, 2025 06:26 by author Peter

A crucial component of online applications is Cross-Origin Resource Sharing (CORS), which permits or prohibits the sharing of resources between several origins (domains). The client and server of a contemporary web application are frequently housed on separate domains. When the client sends HTTP requests to the server, this may result in CORS problems. We'll look at how to set up CORS to dynamically permit numerous origins from your appsettings in this post.in a.NET Core JSON file.

Configure CORS in the appsettings.JSON

We must first specify the permitted origins in the appsettings.json file in order to permit multiple origins. The list of URLs (origins) from which cross-origin requests are permitted will be stored here.

{
  "Cors": {
    "AllowedOrigins": [
      "https://example1.com",
      "https://example2.com",
      "https://example3.com"
    ]
  }
}


Read the Configuration in Program.cs
var builder = WebApplication.CreateBuilder(args);
// Get allowed origins from appsettings.json
var allowedOrigins = builder.Configuration
    .GetSection("Cors:AllowedOrigins")
    .Get<string[]>();
// Add CORS policy
builder.Services.AddCors(options =>
{
    options.AddPolicy("AllowSpecificOrigins",
        builder => builder.WithOrigins(allowedOrigins) // Apply multiple origins dynamically
                          .AllowAnyMethod()
                          .AllowAnyHeader());
});
// Add services to the container (e.g., AddControllers)
builder.Services.AddControllers();
var app = builder.Build();
// Use CORS policy
app.UseCors("AllowSpecificOrigins");
// Configure the HTTP request pipeline
app.MapControllers();
app.Run();


Apply CORS Policy in the Middleware

// Apply the CORS policy globally
app.UseCors("AllowSpecificOrigins");
// Other middleware (e.g., UseRouting, UseEndpoints)


Conclusion
Using appsettings.json to manage CORS settings in your .NET Core 9 application allows for greater flexibility and better maintainability. You can easily add or remove origins without changing your application's code. This is particularly useful when deploying your application to different environments (development, staging, production) with different origin policies. By following these steps, you can dynamically configure and manage multiple allowed origins for your application.

HostForLIFE ASP.NET Core Hosting

European Best, cheap and reliable ASP.NET hosting with instant activation. HostForLIFE.eu is #1 Recommended Windows and ASP.NET hosting in European Continent. With 99.99% Uptime Guaranteed of Relibility, Stability and Performace. HostForLIFE.eu security team is constantly monitoring the entire network for unusual behaviour. We deliver hosting solution including Shared hosting, Cloud hosting, Reseller hosting, Dedicated Servers, and IT as Service for companies of all size.


European ASP.NET Core Hosting - HostForLIFE :: KnightMoves.SqlObjects: An Improved.NET SQL Builder

clock February 5, 2025 05:47 by author Peter

KnightMoves.A.NET NuGet package library called SqlObjects implements an object-based SQL builder. This package uses a different approach than other SQL compilers, which rely on string manipulation techniques like concatenation and interpolation. This package wraps the syntax of the SQL language with C# objects instead of printing SQL strings, making a SQL query entirely composed of objects. In comparison to string manipulators, this enables a far more potent experience and set of capabilities.

Syntax Matching
Some ORMs and SQL builders use method names that are similar but different from the SQL language. This library matches the SQL syntax almost exactly, with some minor exceptions. The strategy for this library is that when you're using the SQL builder, you are able to think and code in SQL instead of trying to remember the new terminology of the SQL builder.

Let's dive in with some examples.

Examples
First, create a simple Console application in Visual Studio and add KnightMoves.SqlObjects NuGet package library from https://nuget.org.

Once you have a basic console application generated, you can add your code to the Main() method of the Program.cs file.

Start with importing the namespace.
using KnightMoves.SqlObjects;

Next, you add the code below to the Main() method.

The fluent SQL builder is available through the static TSQL class so you can begin there and code as much as though you’re coding in SQL.
var sql = TSQL

   .SELECT()
   .STAR()
   .FROM("Products")
   .Build()

;

Console.WriteLine(sql);

Run the application to see how the SQL is built. Here's the output:
SELECT
   *
FROM [Products]


That used a basic SELECT * but there are various ways to specify the columns of the select list. The most basic way is to use the COLUMN() method for each column you specify.

var sql = TSQL

   .SELECT()
     .COLUMN("ProductID")
     .COLUMN("ProductName")
   .FROM("Products")
   .Build()

;

Console.WriteLine(sql);


Here's the output:
SELECT
 [ProductID],
 [ProductName]
FROM [Products]


But we’re just getting started. You can provide a collection of column names and pass that to the COLUMNS() method (notice it is plural) and it will use those names to create the list of columns.

var columns = new List { "ProductID", "ProductName" };

var sql = TSQL

     .SELECT()
       .COLUMNS(columns)
     .FROM("dbo", "Products", "p")
     .Build()

;

Console.WriteLine(sql);


Output
SELECT
 [ProductID],
 [ProductName]
FROM [dbo].[Products] p


If you know SQL well, then you know that there are all manner of things you can do in the select list to make it a more robust query. This library handles them. Let’s start with a simple alias using .AS().

var sql = TSQL

   .SELECT()
     .COLUMN("ProductID").AS("Id")
     .COLUMN("ProductName")
   .FROM("Products")
   .Build()

;


Output
SELECT
 [ProductID] AS [Id],
 [ProductName]
FROM [Products]


You can see it correctly produces the line [ProductID] AS [Id]

Do you need to specify the schema and a multipart identifier? Easy. Suppose you’re using dbo as the schema and p as an alias for the Products table. Then you can do so like this.
var sql = TSQL

   .SELECT()
     .COLUMN("p", "ProductID", "Id")
     .COLUMN("p", "ProductName")
   .FROM("dbo", "Products", "p")
   .Build()

;

Console.WriteLine(sql);

Output
SELECT
 [p].[ProductID] AS [Id],
 [p].[ProductName]
FROM [dbo].[Products] p

You can also see an alternative to provide the alias. Instead of using .AS() you can provide the alias as a third parameter to the COLUMN() method.

It’s a pain to keep repeating the COLUMN() method call, and we know that we can use a collection of column names, but what if we need to prefix them with the table alias? Easy, we can do it like this.
var columns = new List { "ProductID", "ProductName" };

var sql = TSQL

     .SELECT()
       .COLUMNS("p", columns)
     .FROM("dbo", "Products", "p")
     .Build()

;

Console.WriteLine(sql);

Output
SELECT
 [p].[ProductID],
 [p].[ProductName]
FROM [dbo].[Products] p


The use of aliases becomes more important when you’re joining tables. So, let’s give that a try by joining Products and Categories.
var sql = TSQL

     .SELECT()
       .COLUMN("p", "ProductID")
       .COLUMN("c", "CategoryName")
     .FROM("dbo", "Products", "p")
     .INNERJOIN("dbo", "Categories", "c").ON("c", "CategoryID").IsEqualTo("p", "CategoryID")
     .Build()

;

Console.WriteLine(sql);


Output
SELECT
 [p].[ProductID],
 [c].[CategoryName]
FROM [dbo].[Products] p
INNER JOIN [dbo].[Categories] c ON [c].[CategoryID] = [p].[CategoryID]


If you need to join more tables, then all you have to do is slap another INNERJOIN() call exactly where you normally would if you’re coding in SQL with the schema and alias like so.
var sql = TSQL

 .SELECT()
   .COLUMN("p", "ProductID")
   .COLUMN("p", "ProductName")
   .COLUMN("c", "CategoryName")
   .COLUMN("s", "CompanyName")
 .FROM("dbo", "Products", "p")
 .INNERJOIN("dbo", "Categories", "c").ON("c", "CategoryID").IsEqualTo("p", "CategoryID")
 .INNERJOIN("dbo", "Suppliers", "s").ON("s", "SupplierID").IsEqualTo("p", "SupplierID")
 .Build()

;

Console.WriteLine(sql);

Output
SELECT
 [p].[ProductID],
 [p].[ProductName],
 [c].[CategoryName],
 [s].[CompanyName]
FROM [dbo].[Products] p
INNER JOIN [dbo].[Categories] c ON [c].[CategoryID] = [p].[CategoryID]
INNER JOIN [dbo].[Suppliers] s ON [s].[SupplierID] = [p].[SupplierID]


Notice that throughout this demo, you can see that when you're using this library, you can think in SQL terms. Some things will deviate slightly, such as the use of COLUMN() instead of just literally typing in the column name where it belongs and later you’ll see that we use a fluent method call for operators such as IsEqualTo() instead of the = string character, but the thought process is the same. You're thinking in SQL even though you're coding in C#.

For further assistance, because the library is SQL in C# dressing, its methods, and signatures pop up in the intelicode features of the IDE, where you can search through the options to find what you're looking for easily.


We are barely scratching the surface here. The library implements all DML statements of Microsoft's T-SQL language, which is fully documented here: KnightMoves.SqlObject Documentation. Head on over there to get started and see what you can do with the basics. Stay tuned for other articles in this series, where we’ll cover more and more features of this robust library. Thanks for reading this far. I sincerely hope you enjoy this library as much as I enjoyed making it.

HostForLIFE ASP.NET Core Hosting

European Best, cheap and reliable ASP.NET hosting with instant activation. HostForLIFE.eu is #1 Recommended Windows and ASP.NET hosting in European Continent. With 99.99% Uptime Guaranteed of Relibility, Stability and Performace. HostForLIFE.eu security team is constantly monitoring the entire network for unusual behaviour. We deliver hosting solution including Shared hosting, Cloud hosting, Reseller hosting, Dedicated Servers, and IT as Service for companies of all size.


About HostForLIFE

HostForLIFE is European Windows Hosting Provider which focuses on Windows Platform only. We deliver on-demand hosting solutions including Shared hosting, Reseller Hosting, Cloud Hosting, Dedicated Servers, and IT as a Service for companies of all sizes.

We have offered the latest Windows 2019 Hosting, ASP.NET 5 Hosting, ASP.NET MVC 6 Hosting and SQL 2019 Hosting.


Month List

Tag cloud

Sign in