European ASP.NET 4.5 Hosting BLOG

BLOG about ASP.NET 4, ASP.NET 4.5 Hosting and Its Technology - Dedicated to European Windows Hosting Customer

European ASP.NET Core Hosting - HostForLIFE :: An Example of a .NET core MAUI with a SQLite Database Login Page

clock May 26, 2025 09:11 by author Peter

We'll talk about creating a basic SQLite DB application with a login page here, using MAUI (Multi-platform App UI). The SQLite Database will be used to develop logic using a SQLite helper class. First, we'll use Visual Studio 2022 to build an MAUI App project. The project will produce a single home page similar to the one below.

Following that, some basic login and registration xaml pages will be created. The SQLiteHelper class for database activity will then be created. Install the NuGet package's Microsoft.Data.Sqlite package.

public class SQLiteHelper
{
    private string dbPath;
    public SQLiteHelper()
    {
        dbPath = Path.Combine(Environment.GetFolderPath(Environment.SpecialFolder.LocalApplicationData), "users.db");
        InitializeDatabase();
    }
    private void InitializeDatabase()
    {
        using var connection = new SqliteConnection($"Data Source={dbPath}");
        connection.Open();
        var command = connection.CreateCommand();
        command.CommandText =
        @"
            CREATE TABLE IF NOT EXISTS Users (
                Id INTEGER PRIMARY KEY AUTOINCREMENT,
                Username TEXT NOT NULL,
                Password TEXT NOT NULL
            );
        ";
        command.ExecuteNonQuery();
    }
}


Login page Example given below.
public partial class LoginPage : ContentPage
{
    private SQLiteHelper dbHelper = new();
    public LoginPage()
    {
        InitializeComponent();
    }
    private void OnLoginClicked(object sender, EventArgs e)
    {
        if (dbHelper.ValidateUser(UsernameEntry.Text, PasswordEntry.Text))
            DisplayAlert("Success", "Login successful!", "OK");
        else
            DisplayAlert("Error", "Invalid credentials.", "OK");
    }
    private void OnGoToRegisterClicked(object sender, EventArgs e)
    {
        Navigation.PushAsync(new RegisterPage());
    }
}

Go to App.xaml.cs page adds the Login page as main page like launch view as mention below example
namespace MauiApp1
{
    public partial class App : Application
    {
        public App()
        {
            InitializeComponent();

            //MainPage = new AppShell();
            MainPage = new NavigationPage(new LoginPage());
        }
    }
}


Output

HostForLIFE ASP.NET Core Hosting

European Best, cheap and reliable ASP.NET hosting with instant activation. HostForLIFE.eu is #1 Recommended Windows and ASP.NET hosting in European Continent. With 99.99% Uptime Guaranteed of Relibility, Stability and Performace. HostForLIFE.eu security team is constantly monitoring the entire network for unusual behaviour. We deliver hosting solution including Shared hosting, Cloud hosting, Reseller hosting, Dedicated Servers, and IT as Service for companies of all size.


European ASP.NET Core Hosting - HostForLIFE :: Using C# 13 to Create a "Pooled" Dependency Injection Lifetime

clock May 22, 2025 09:14 by author Peter

It supports the notion of Inversion of Control (IoC), which facilitates better testability, simpler code maintenance, and a clear division of responsibilities. A key component of the contemporary ASP.NET Core application architecture is dependency injection, or DI. Three common service lifetimes are supported by ASP.NET Core's lightweight, extensible container for injecting dependencies:

  • Transient: An instance of the service is created every time it is requested. This is suitable for lightweight, stateless applications.
  • Scoped: A single instance is created per HTTP request or per scope. This is ideal for services that maintain state throughout a single operation.
  • Singleton: Use singletons for stateless services that are more expensive to instantiate or manage shared state safely across threads.

These durations are adequate for the majority of situations, but you might require a hybrid behavior—a service that does not survive for the full application lifetime but avoids frequent allocations like a singleton. This is especially important in high-throughput systems where strict control over garbage collection pressure, memory allocation, and performance is required.

Through the ObjectPool and ObjectPoolProvider APIs in the Microsoft.Extensions,.NET presents the idea of object pooling in order to meet this requirement. namespace for ObjectPool. By keeping a pool of pre-allocated objects, object pooling enables you to reuse object instances effectively, lowering memory load and enhancing performance for frequently used resources.

In this article, we’ll go beyond the default service lifetimes and demonstrate how to implement a custom "Pooled" lifetime registration. We’ll explore how to integrate ObjectPool<T> with the ASP.NET Core DI system, taking advantage of new features in C# 13 and .NET 9 to build a robust, performant, and reusable solution. You'll learn how to:

  • Utilize object pooling to define a custom service lifetime.
  • Cleanly register and configure pooled services.
  • Pooling in multithreaded environments should follow best practices.
  • You should avoid common pitfalls such as thread safety issues and misuse of objects.
As a result of this course, you will be able to create performant services with hybrid lifetime behavior that bridge the gap between transient and singleton design patterns.

When to Use Object Pooling?

When creating and destroying objects frequently would result in excessive resource consumption and memory pressure, object pooling is an effective performance optimisation technique. We maintain a pool of reusable objects and serve them on demand instead of instantiating new objects repeatedly.

When the following conditions are met, use object pooling:
  • Object creation is expensive: A pool can significantly reduce CPU and memory overhead if an object involves non-trivial setup (e.g., allocating large arrays, loading configuration, or initialising resources).
  • Objects are short-lived and used frequently: Pooling can prevent constant allocation and garbage collection cycles when a particular type is repeatedly required during the application's lifespan, but only for short bursts (e.g., during each request, batch operation, or parsing cycle).
  • Objects that are thread-safe or can be reset easily: The objects should be stateless, thread-safe, or able to be safely reset to a clean state before reuse in order to ensure consistency and prevent unpredictable behavior.
Common Real-World Examples
Object pooling is highly effective in the following use cases:
  • StringBuilder instances: Creating new StringBuilder instances each time can be wasteful, especially in tight loops and logging.
  • Memory buffers (e.g., byte[] arrays): Network I/O, file I/O, and serialization processes use memory buffers for network I/O, file I/O, and serialization. The reuse of buffers reduces GC pressure and maintains throughput.
  • Parsers or serializer: When handling data streams or messages repeatedly, objects such as JsonSerializer, XmlReader, or custom parsers can benefit from pooling.
Best Practices
  • Reset before reuse: When returning objects to the pool, ensure they are reset to a known state before reuse. This prevents data leaks.
  • Avoid pooling complex dependencies: Objects with deep dependency trees or significant shared states should not be pooled unless explicitly designed to be so.
  • Benchmark before adopting: To validate object pools' benefits, benchmark their performance before and after introducing one.
In the right context-especially for high-throughput, memory-sensitive applications-object pooling can yield significant performance gains with minimal trade-offs.

Step-by-Step: Implementing Object Pooling in ASP.NET Core with DI
The use of object pooling is a proven strategy for reducing memory allocations and garbage collection overhead in .NET applications. Let's walk through how to set up and use object pooling in a clean, reusable manner using Microsoft.Extensions.ObjectPool.

Step 1: Install the Required NuGet Package

It is necessary to install Microsoft's official object pooling library before you can get started:
dotnet add package Microsoft.Extensions.ObjectPool

or if using NuGet Package Manager Console
NuGet\Install-Package Microsoft.Extensions.ObjectPool

In .NET applications, this package provides the foundational interfaces and default implementations for managing object pools.

Step 2: Define the Pooled Service
Suppose we have a service that performs intensive in-memory string operations using StringBuilder, which is expensive to allocate repeatedly.
using System.Text;

namespace PooledDI.Core.Services;
public class StringProcessor
{
    private readonly StringBuilder _builder = new();

    public string Process(string input)
    {
        _builder.Clear();
        _builder.Append(input.ToUpperInvariant());
        return _builder.ToString();
    }
}


Why Pool It?
When the StringBuilder object is used repeatedly at scale, internal buffers are allocated, which can be expensive. Pooling StringProcessor reduces these allocations and improves performance.

Step 3: Create a Custom PooledObjectPolicy<T>
An object pool must know how to create and reset objects. This is achieved through a custom PooledObjectPolicy<t> implementation:</t>
using Microsoft.Extensions.ObjectPool;
using PooledDI.Core.Services;

namespace PooledDI.Core.Policies;

public class StringProcessorPolicy : PooledObjectPolicy<StringProcessor>
{
    public override StringProcessor Create() => new StringProcessor();

    public override bool Return(StringProcessor obj)
    {

        return true;
    }


}


Best Practice
Ensure sensitive or inconsistent data is cleaned or reset before returning an object to the pool.

Step 4: Register the Pooled Service with Dependency Injection
Although ASP.NET Core's built-in DI container doesn't provide a "pooled" lifetime, we can achieve the same effect by injecting an ObjectPool<t>.</t>

In order to encapsulate the logic of registration, create an extension method as follows:
using Microsoft.Extensions.ObjectPool;

namespace PooledDI.Api.Services;

public static class ServiceCollectionExtensions
{
    public static IServiceCollection AddPooled<TService, TPolicy>(this IServiceCollection services)
        where TService : class
        where TPolicy : PooledObjectPolicy<TService>, new()
    {
        services.AddSingleton<ObjectPoolProvider, DefaultObjectPoolProvider>();
        services.AddSingleton<ObjectPool<TService>>(sp =>
        {
            var provider = sp.GetRequiredService<ObjectPoolProvider>();
            return provider.Create(new TPolicy());
        });

        return services;
    }
}


Register your pooled service in Program.cs  as follows:
builder.Services.AddPooled<StringProcessor, StringProcessorPolicy>();

Best Practice

Create a singleton pool to ensure consistent reuse across requests, while consumers can be scoped or transient.

Step 5: Consume the Pooled Service
Pooled objects should be injected into services where they are needed. Get() to fetch an object and Return() to add it back to the pool.
using Microsoft.Extensions.ObjectPool;

namespace PooledDI.Core.Services;

public class ProcessingService
{
    private readonly ObjectPool<StringProcessor> _pool;

    public ProcessingService(ObjectPool<StringProcessor> pool)
    {
        _pool = pool;
    }

    public string Execute(string input)
    {
        var processor = _pool.Get();

        try
        {
            return processor.Process(input);
        }
        finally
        {
            _pool.Return(processor);
        }
    }
}


Last but not least, register the service that consumes the data:
builder.Services.AddScoped<ProcessingService>();

Best Practice
When an exception occurs, always use a try-finally block to ensure the object is returned to the pool.

With just a few steps, you've implemented efficient object pooling

In ASP.NET Core, Microsoft.Extensions.ObjectPool provides:
  • Allotments for heavy or frequently used services have been reduced.
  • Implemented a clean, extensible integration pattern with the DI container.
  • Performance-sensitive applications benefit from improved throughput.
Best Practices for Using Object Pooling in .NET
When implemented thoughtfully and correctly, object pooling can yield significant performance improvements. To ensure your implementation is safe, efficient, and maintainable, follow these best practices:

Avoid Mutable Shared State
Why it Matters
If the object's internal state is not reset, it can lead to data leaks, race conditions, and unpredictable behavior.

Best Practice
If the object maintains state (such as a StringBuilder or buffer), clear or reset it explicitly before returning it to the pool.
using System.Text;

namespace PooledDI.Core.Services;

public sealed class ZiggyProcessor
{
    private readonly StringBuilder _sb = new();

    public void Append(string value) => _sb.Append(value);

    public string Finish()
    {
        var result = _sb.ToString();
        _sb.Clear();
        return result;
    }


    internal void Reset() => _sb.Clear();
}


Use Policies to Reset Objects Cleanly
Why it Matters
Pooled object policies give you the ability to control how objects are cleaned up before reuse.

Best Practice
Finish() should implement reset logic to ensure the object is returned to a safe, known state.
public string Finish()
{
    var result = _sb.ToString();
    _sb.Clear();
    return result;
}


Pool Only Performance-Critical or Expensive Objects
Why it Matters
Using pooling for cheap, lightweight objects may actually hurt performance due to its complexity and overhead.

Best Practice
Limit object pooling to high-cost objects that are instantiated frequently, such as large buffers, parsers, serializers, or reusable builders. Don't pool trivial data types or objects that are rarely used.

Ensure Thread Safety

Why it Matters
A pooled object that isn't thread-safe can cause race conditions or data corruption if multiple threads access it concurrently.

Best Practice
  • In most cases, pooled objects should be used in single-threaded, isolated scopes (e.g., for HTTP requests).
  • Ensure that shared objects are thread-safe or use locking mechanisms carefully if they must be shared across threads.
Use DefaultObjectPoolProvider
Why it Matters
Due to its efficient internal data structures, the DefaultObjectPoolProvider is optimized for high-throughput scenarios.

Best Practice
Use the DefaultObjectPoolProvider unless you have a very specific requirement for a custom implementation. It provides excellent performance for typical workloads out of the box.
builder.Services.AddSingleton<ObjectPoolProvider, DefaultObjectPoolProvider>();

Bonus Tips
Benchmark: Verify the performance gains of your application before and after introducing object pooling.
Monitor: Consider rethinking the pooling strategy if pooled objects are rarely reused or leak memory.
Combine: Use performance profilers like dotTrace or PerfView to understand hotspots in object allocation.

In ASP.NET Core applications, you can safely integrate object pooling to optimize resource utilization, reduce garbage collection pressure, and improve throughput by adhering to these best practices.

Advanced Technique: Pooling Services That Implement Interfaces
As in real-world applications, services are often registered by interface to provide abstraction, testability, and flexibility. But how can object pooling be integrated into this model?

You will learn how to wrap pooled objects behind an interface, enabling clean dependency injection while still benefiting from reuse and memory efficiency.

Step 1: Define a Service Interface

Defining an interface for your service contract is the first step:
namespace PooledDI.Core.Interfaces;
public interface IStringProcessor
{
    string Process(string input);
}

The interface allows you to inject the service rather than a concrete class, which is ideal for unit testing and clean coding.

Step 2: Create a Wrapper That Uses Object Pooling

A class implementing the desired interface needs to wrap the pool access logic since object pooling manages a concrete type (e.g., StringProcessor).
using Microsoft.Extensions.ObjectPool;
using PooledDI.Core.Interfaces;

namespace PooledDI.Core.Services;

public class PooledStringProcessor : IStringProcessor
{
    private readonly ObjectPool<StringProcessor> _pool;

    public PooledStringProcessor(ObjectPool<StringProcessor> pool)
    {
        _pool = pool;
    }

    public string Process(string input)
    {
        var processor = _pool.Get();
        try
        {
            return processor.Process(input);
        }
        finally
        {
            _pool.Return(processor);
        }
    }
}

Best Practice
If an exception occurs, always wrap pooled object access in a try-finally block to ensure it is returned to the pool.

Step 3: Register the Interface Wrapper with DI
The wrapper implementation should be registered as the concrete type for your interface:
builder.Services.AddScoped<IStringProcessor, PooledStringProcessor>();

The pool itself should also be registered using the utility method you used earlier or manually:
builder.Services.AddPooled<StringProcessor, StringProcessorPolicy>();


Why This Matters
  • Testability: Your classes depend on IStringProcessor instead of the pooled implementation, making them easier to test.
  • Encapsulation: By encapsulating the object pooling logic, consumers remain unaware of the object pooling logic.
  • Reuse with Safety: A wrapper ensures that pooled objects are properly managed throughout their lifecycle.
Optional: Factory-Based Approach for Complex Cases
For most scenarios, the wrapper approach shown above is the best method for managing pooled objects or adding lazy resolution. If you need to manage more than one type of pooled object or introduce lazy resolution, you can inject a factory or delegate for the interface.

For scalable enterprise .NET applications, wrapping pooled objects behind interfaces maintains clean architecture, testability, and performance.

Summary

With the introduction of modern language features in C# 13 and the continued evolution of .NET 9, developing memory-efficient, high-performance applications has never been simpler. The built-in Dependency Injection (DI) container in ASP.NET Core does not natively support a "pooled" object lifetime, but the Microsoft.Extensions.ObjectPool package fills that void.

You can benefit from object pooling by integrating it into your service architecture in the following ways:
  • Memory allocations for expensive or frequently-used objects should be reduced.
  • Performance-critical workloads can improve throughput and responsiveness.
  • Maintain control over the object lifecycle, ensuring safe reusability through PooledObjectPolicy<t>.</t>
In a number of scenarios, this technique excels, including:
  • Manipulating strings with StringBuilder
  • In-memory data transformation
  • Our parsers and serializers are tailored to your needs
  • Using computational helpers or reusable buffers
In conjunction with solid architectural patterns (such as DI and interface-based design), object pooling can become a powerful optimisation tool.

Final Thoughts
  • Consider pooling for objects that are expensive, short-lived, and reusable.
  • Reset and cleanup logic should always be implemented properly.
  • For clean, testable code, wrap pooled services behind interfaces.
  • Reuse objects efficiently and thread-safely with DefaultObjectPoolProvider.
With these principles, you can build highly efficient .NET applications that scale gracefully under load without sacrificing code clarity or maintainability. I have uploaded the code to my GitHub Repository. If you have found this article useful please click the like button.

HostForLIFE ASP.NET Core Hosting

European Best, cheap and reliable ASP.NET hosting with instant activation. HostForLIFE.eu is #1 Recommended Windows and ASP.NET hosting in European Continent. With 99.99% Uptime Guaranteed of Relibility, Stability and Performace. HostForLIFE.eu security team is constantly monitoring the entire network for unusual behaviour. We deliver hosting solution including Shared hosting, Cloud hosting, Reseller hosting, Dedicated Servers, and IT as Service for companies of all size.


European ASP.NET Core Hosting - HostForLIFE :: How to Fix v3 API Downtime Problems with NuGet Package Manager?

clock May 14, 2025 07:57 by author Peter

If you're working with NuGet in Visual Studio and encountering issues due to the NuGet v3 API being temporarily unavailable, you're not alone. Many developers have experienced downtime with the NuGet v3 API, leading to errors and hindering package management workflows. Fortunately, there is a quick workaround to resolve these issues.

Recognizing the Issue
Installing, updating, and managing third-party libraries and tools in projects is made simple for developers by NuGet, a well-liked package management for.NET. One of the main resources for managing and retrieving these packages is the NuGet v3 API. However, developers may encounter challenges when trying to restore or manage packages because of sporadic outages or connectivity problems with the NuGet v3 API.

A timeout or an inability to retrieve the required resources from the v3 API are common ways that the issue appears. When you're in the thick of development and require access to particular packages, this becomes really challenging.

Steps to Switch to NuGet v2 API

  • Open Visual Studio
    • Launch Visual Studio, the IDE you are using for your .NET projects.
  • Navigate to NuGet Package Manager Settings
    • Go to Tools in the top menu.
    • Select NuGet Package Manager.
    • Choose Package Manager Settings.
  • Change the Package Source URL
    • In the settings window, go to Package Sources.
    • You'll see the default NuGet source listed as https://api.nuget.org/v3/index.json.
    • Change this URL to https://www.nuget.org/api/v2/ to switch to the v2 API.
  • Save and Close
    • After updating the URL, click OK to save your settings.
  • Rebuild Your Project
    • Clean your project and rebuild it. This will allow NuGet to start using the v2 API to restore and manage packages.

Once these steps are completed, NuGet will automatically use the v2 API, bypassing the downtime issues caused by the v3 API.

Why Switch to NuGet v2 API?

The v2 API is older but still very reliable for managing packages. It allows for smoother transitions in cases of downtime, ensuring that your workflow remains uninterrupted. By using the v2 API, you can avoid the issues caused by API unavailability and continue your development efforts.

Additional Tips

  • Clear the NuGet Cache: If you face persistent issues even after switching the source, clearing the NuGet cache might help. This ensures that NuGet doesn’t use any outdated or corrupted cached data.
  • To clear the cache, go to:
    • Tools -> NuGet Package Manager -> Package Manager Settings -> Clear All NuGet Cache(s)
  • Check NuGet Status: Keep an eye on the official NuGet status page to see when the v3 API is back online. The NuGet team regularly updates the page with the status of their API services.
  • Revert Back to v3 Once Restored: Once the v3 API is back up and running, you can switch the URL back to the default v3 URL to take advantage of its enhanced features, such as better performance and newer functionalities.

Conclusion
Package management for your project may come to a complete stop if the NuGet v3 API goes down. However, you can carry on with your development without any disruptions if you swiftly transition to the v2 API as a temporary fix. This straightforward procedure guarantees that your workflow is unaffected while you wait for the v3 API to reactivate. To reduce interruptions to your development process, always maintain your NuGet settings current and monitor the state of the NuGet services.

HostForLIFE ASP.NET Core Hosting

European Best, cheap and reliable ASP.NET hosting with instant activation. HostForLIFE.eu is #1 Recommended Windows and ASP.NET hosting in European Continent. With 99.99% Uptime Guaranteed of Relibility, Stability and Performace. HostForLIFE.eu security team is constantly monitoring the entire network for unusual behaviour. We deliver hosting solution including Shared hosting, Cloud hosting, Reseller hosting, Dedicated Servers, and IT as Service for companies of all size.


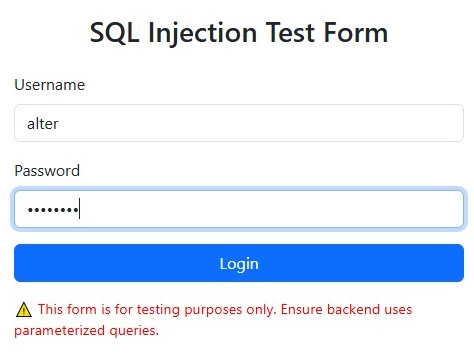
European ASP.NET Core Hosting - HostForLIFE :: Constructing a Secure SQL Injection Test Form with C# and ASP.NET

clock May 5, 2025 08:50 by author Peter

This blog post will discuss how to use C# and ASP.NET Web Forms to create a secure SQL injection testing website. This project is perfect for implementing input sanitization, error handling, and parameterized queries as well as learning about fundamental SQL injection protection measures.

Technologies Used

  • ASP.NET Web Forms (ASPX)
  • C# (Code-Behind)
  • SQL Server
  • ADO.NET with SqlHelper (Application Block)
  • Bootstrap 5 (Frontend UI)

Goal of This Application

  • Provide a login form that is intentionally structured to test SQL injection patterns.
  • Detect and block malicious inputs from both query string and form fields.
  • Log all suspicious activity.
  • Redirect users to a custom error page when SQL injection attempts are detected.

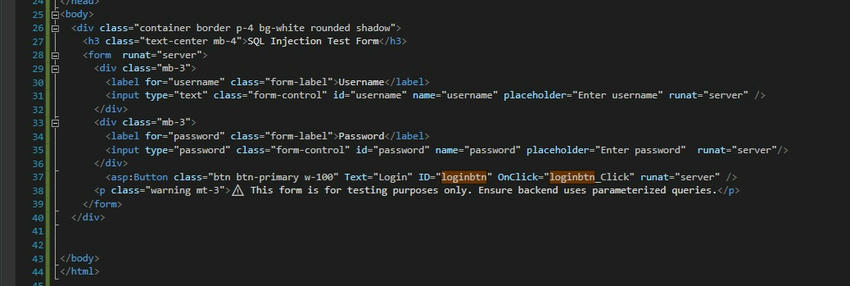
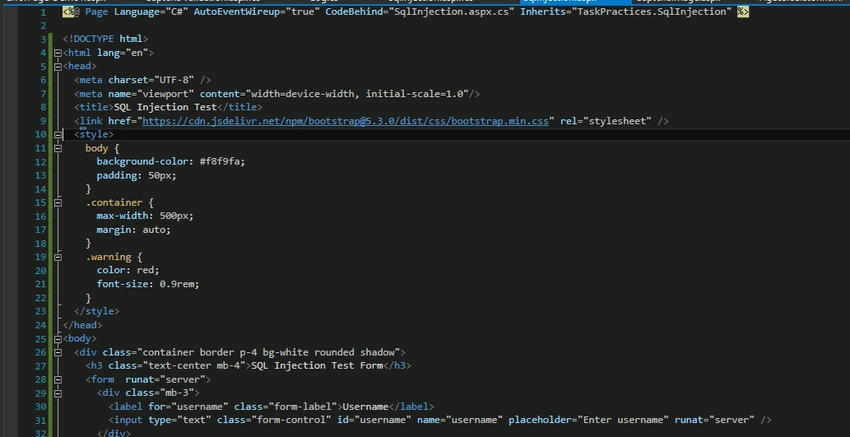
1. ASPX Page Code (Frontend Form)
<%@ Page Language="C#" AutoEventWireup="true" CodeBehind="SqlInjection.aspx.cs" Inherits="TaskPractices.SqlInjection" %>

<!DOCTYPE html>
<html lang="en">
<head>
    <meta charset="UTF-8" />
    <meta name="viewport" content="width=device-width, initial-scale=1.0" />
    <title>SQL Injection Test</title>
    <link href="https://cdn.jsdelivr.net/npm/[email protected]/dist/css/bootstrap.min.css" rel="stylesheet" />

    <style>
        body {
            background-color: #f8f9fa;
            padding: 50px;
        }

        .container {
            max-width: 500px;
            margin: auto;
        }

        .warning {
            color: red;
            font-size: 0.9rem;
        }
    </style>
</head>
<body>
    <div class="container border p-4 bg-white rounded shadow">
        <h3 class="text-center mb-4">SQL Injection Test Form</h3>
        <form runat="server">
            <div class="mb-3">
                <label for="username" class="form-label">Username</label>
                <input type="text" class="form-control" id="username" name="username" placeholder="Enter username" runat="server" />
            </div>

            <div class="mb-3">
                <label for="password" class="form-label">Password</label>
                <input type="password" class="form-control" id="password" name="password" placeholder="Enter password" runat="server" />
            </div>

            <asp:Button class="btn btn-primary w-100" Text="Login" ID="loginbtn" OnClick="loginbtn_Click" runat="server" />

            <p class="warning mt-3">
                ?? This form is for testing purposes only. Ensure backend uses parameterized queries.
            </p>
        </form>
    </div>
</body>
</html>
2. Code-Behind: SQL Injection Detection and Login Logic
using AppBlock;
using System;
using System.Collections.Generic;
using System.Configuration;
using System.Data;
using System.Data.SqlClient;
using System.Linq;
using System.Web;
using System.Web.UI;
using System.Web.UI.WebControls;
using TaskPractices.Allkindoflog;

namespace TaskPractices
{
    public partial class SqlInjection : System.Web.UI.Page
    {
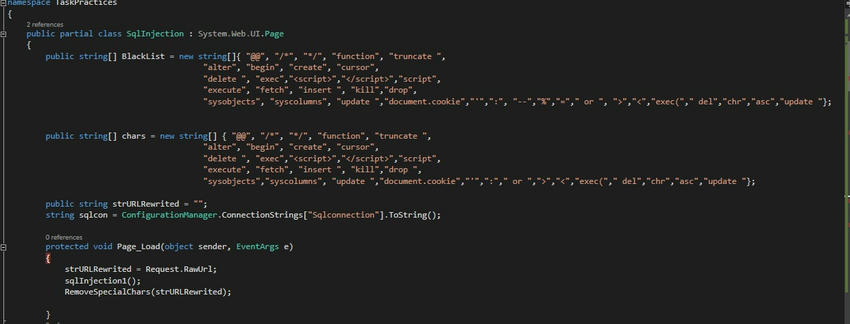
        public string[] BlackList = new string[]
        {
            "@@", "/*", "*/", "function", "truncate ", "alter", "begin", "create", "cursor",
            "delete ", "exec", "<script>", "</script>", "script", "execute", "fetch", "insert ",
            "kill", "drop", "sysobjects", "syscolumns", "update ", "document.cookie", "'", ":",
            "--", "%", "=", " or ", ">", "<", "exec(", " del", "chr", "asc", "update "
        };

        public string[] chars = new string[]
        {
            "@@", "/*", "*/", "function", "truncate ", "alter", "begin", "create", "cursor",
            "delete ", "exec", "<script>", "</script>", "script", "execute", "fetch", "insert ",
            "kill", "drop ", "sysobjects", "syscolumns", "update ", "document.cookie", "'", ":",
            " or ", ">", "<", "exec(", " del", "chr", "asc", "update "
        };

        public string strURLRewrited = "";
        string sqlcon = ConfigurationManager.ConnectionStrings["Sqlconnection"].ToString();

        protected void Page_Load(object sender, EventArgs e)
        {
            strURLRewrited = Request.RawUrl;
            sqlInjection1();
            RemoveSpecialChars(strURLRewrited);
        }

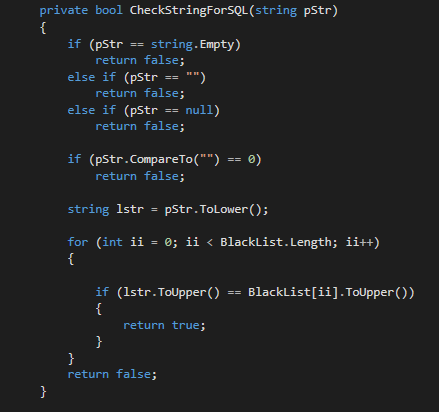
        private bool CheckStringForSQL(string pStr)
        {
            if (string.IsNullOrEmpty(pStr) || pStr.CompareTo("") == 0)
                return false;

            string lstr = pStr.ToLower();

            foreach (string item in BlackList)
            {
                if (lstr.ToUpper() == item.ToUpper())
                    return true;
            }

            return false;
        }

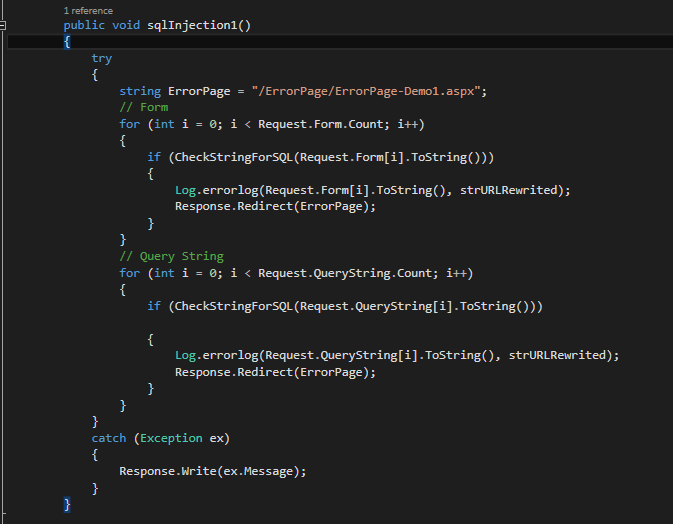
        public void sqlInjection1()
        {
            try
            {
                string ErrorPage = "/ErrorPage/ErrorPage-Demo1.aspx";

                // Form data check
                for (int i = 0; i < Request.Form.Count; i++)
                {
                    if (CheckStringForSQL(Request.Form[i]))
                    {
                        Log.errorlog(Request.Form[i], strURLRewrited);
                        Response.Redirect(ErrorPage);
                    }
                }

                // Query string check
                for (int i = 0; i < Request.QueryString.Count; i++)
                {
                    if (CheckStringForSQL(Request.QueryString[i]))
                    {
                        Log.errorlog(Request.QueryString[i], strURLRewrited);
                        Response.Redirect(ErrorPage);
                    }
                }
            }
            catch (Exception ex)
            {
                Response.Write(ex.Message);
            }
        }

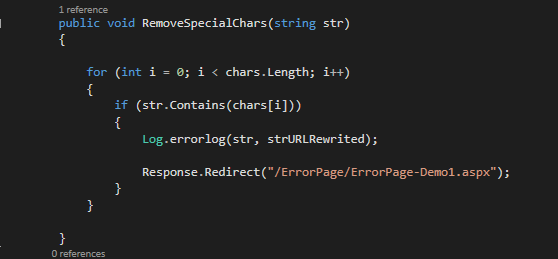
        public void RemoveSpecialChars(string str)
        {
            foreach (string c in chars)
            {
                if (str.Contains(c))
                {
                    Log.errorlog(str, strURLRewrited);
                    Response.Redirect("/ErrorPage/ErrorPage-Demo1.aspx");
                }
            }
        }

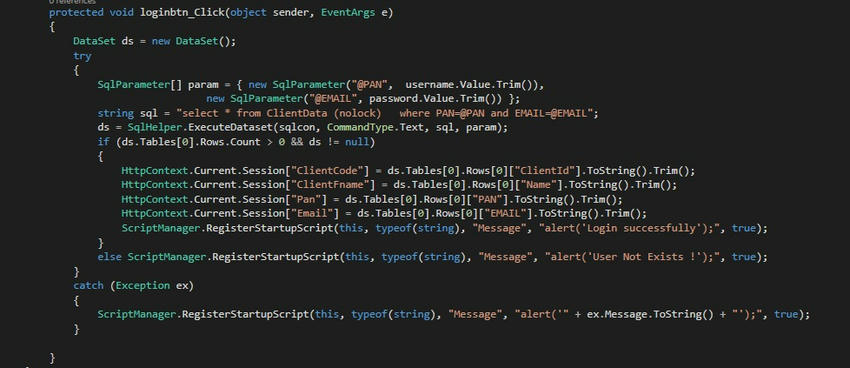
        protected void loginbtn_Click(object sender, EventArgs e)
        {
            DataSet ds = new DataSet();

            try
            {
                SqlParameter[] param = {
                    new SqlParameter("@PAN", username.Value.Trim()),
                    new SqlParameter("@EMAIL", password.Value.Trim())
                };

                string sql = "SELECT * FROM ClientData (NOLOCK) WHERE PAN=@PAN AND EMAIL=@EMAIL";
                ds = SqlHelper.ExecuteDataset(sqlcon, CommandType.Text, sql, param);

                if (ds != null && ds.Tables[0].Rows.Count > 0)
                {
                    HttpContext.Current.Session["ClientCode"] = ds.Tables[0].Rows[0]["ClientId"].ToString().Trim();
                    HttpContext.Current.Session["ClientFname"] = ds.Tables[0].Rows[0]["Name"].ToString().Trim();
                    HttpContext.Current.Session["Pan"] = ds.Tables[0].Rows[0]["PAN"].ToString().Trim();
                    HttpContext.Current.Session["Email"] = ds.Tables[0].Rows[0]["EMAIL"].ToString().Trim();

                    ScriptManager.RegisterStartupScript(this, typeof(string), "Message", "alert('Login successfully');", true);
                }
                else
                {
                    ScriptManager.RegisterStartupScript(this, typeof(string), "Message", "alert('User Not Exists !');", true);
                }
            }
            catch (Exception ex)
            {
                ScriptManager.RegisterStartupScript(this, typeof(string), "Message", $"alert('{ex.Message}');", true);
            }
        }
    }
}
Key Takeaways

  • Always use parameterized queries instead of string concatenation to prevent SQL injection.
  • Implement input sanitization and validation on both the server and client sides.
  • Maintain a blacklist of harmful SQL keywords to filter user input.
  • Redirect to custom error pages and log malicious attempts for analysis.

Improvements You Can Add

  • Use a whitelist approach for known safe characters.
  • Integrate logging with tools like ELMAH or Serilog.
  • Use Stored Procedures instead of inline queries for extra safety.
  • Replace hard-coded blacklists with centralized config-based filters.

Conclusion
This project helps demonstrate SQL injection defense in a hands-on way using ASP.NET. It’s a great way to test and validate your security practices while building safe and user-friendly forms. Would you like a downloadable PDF of this documentation?

HostForLIFE ASP.NET Core Hosting

European Best, cheap and reliable ASP.NET hosting with instant activation. HostForLIFE.eu is #1 Recommended Windows and ASP.NET hosting in European Continent. With 99.99% Uptime Guaranteed of Relibility, Stability and Performace. HostForLIFE.eu security team is constantly monitoring the entire network for unusual behaviour. We deliver hosting solution including Shared hosting, Cloud hosting, Reseller hosting, Dedicated Servers, and IT as Service for companies of all size.


About HostForLIFE

HostForLIFE is European Windows Hosting Provider which focuses on Windows Platform only. We deliver on-demand hosting solutions including Shared hosting, Reseller Hosting, Cloud Hosting, Dedicated Servers, and IT as a Service for companies of all sizes.

We have offered the latest Windows 2019 Hosting, ASP.NET 5 Hosting, ASP.NET MVC 6 Hosting and SQL 2019 Hosting.


Month List

Tag cloud

Sign in