Swagger (Open API) is a language-agnostic specification for describing and documenting the REST API. Swagger Allows both the Machine and Developer to understand the working and capabilities of the Machine without direct access to the source code of the project. The main objectives of swagger (Open API) are to:
Minimize the workload to connect with Microservice.
Reduce the Time Needed to accurately document the Microservice.
Default Addition of Swagger in .NET 5 & .NET 6
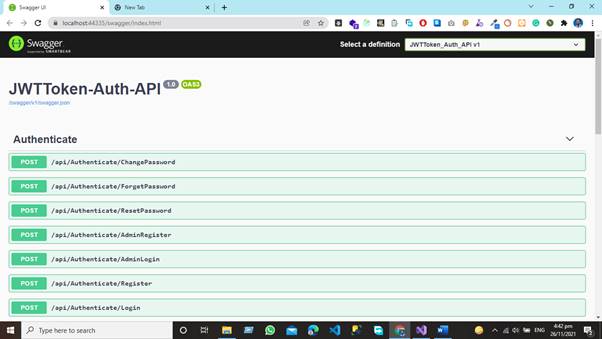
Swagger open API is used for developing APIs using ASP.Net Core versions .Net 5 and .Net 6. We can test our all-API Endpoints in a default functionality because it's directly integrated with our API for testing like.
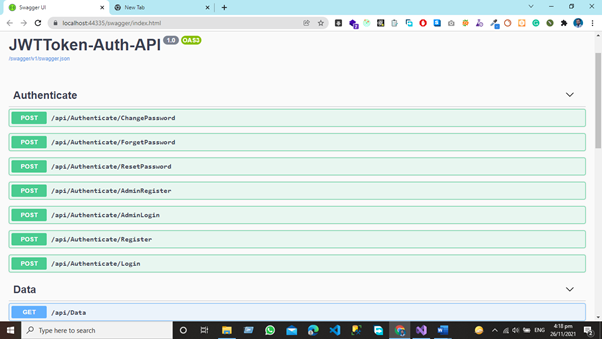
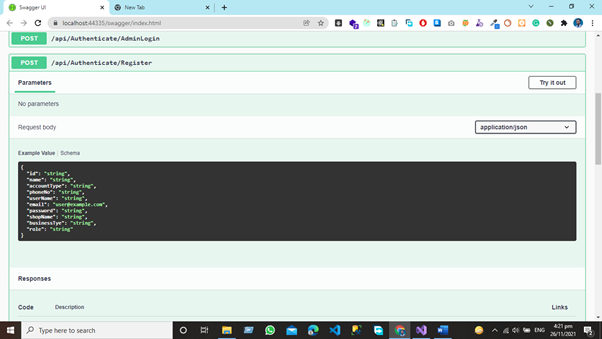
Swagger revealed all our endpoints in the Default view, and we can test them using JSON Schema. Like
However, we have a challenge in that we wish to retrieve data from a secured endpoint that requires a Token as well as a Role-based Token. After submitting a JWT Token and a Role, the endpoint shown below will return data.
[HttpGet]
[Authorize(Roles = "Admin")]
public IEnumerable < WeatherForecast > Get() {
var rng = new Random();
return Enumerable.Range(1, 5).Select(index => new WeatherForecast {
Date = DateTime.Now.AddDays(index),
TemperatureC = rng.Next(-20, 55),
Summary = Summaries[rng.Next(Summaries.Length)]
}).ToArray();
}
Demo
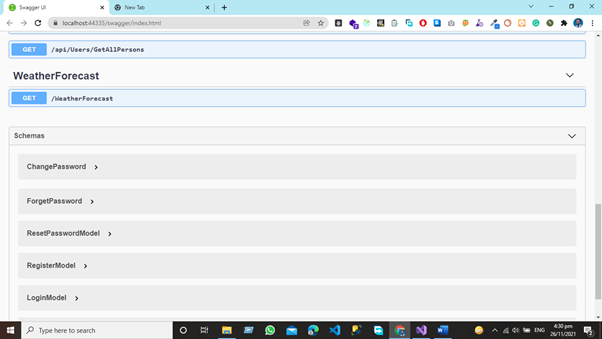
We'll test the endpoint listed below without a token or a role.
After hitting the endpoint, we have the output like
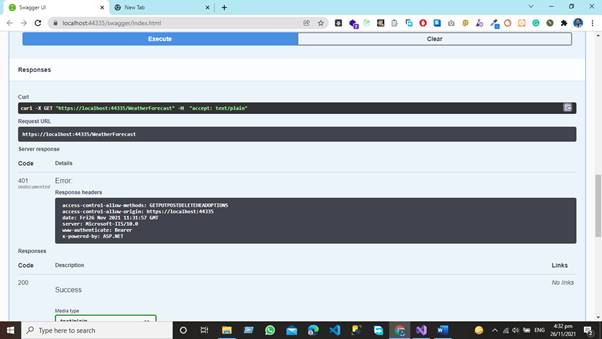
Unauthorized Access because the endpoint requires a JWT Token and a Role in order to access data from the database. By default, Swagger does not provide capability for token-based authorization of endpoints. We are currently adding JWT Token-based functionality to our API.
Default View
Adding JWT Token Functionality in Our API
First and foremost, you must change the default swagger functionality in our startup.cs class
public void ConfigureServices(IServiceCollection services) {
services.AddDbContext < ApplicationDbContext > (options => options.UseSqlServer(Configuration.GetConnectionString("ConnStr")));
services.AddControllers();
services.AddControllers();
//Default Functionality Added by Swagger
services.AddSwaggerGen();
// For Entity Framework
// For Identity
services.AddIdentity < ApplicationUser, IdentityRole > ().AddEntityFrameworkStores < ApplicationDbContext > ().AddDefaultTokenProviders();
// Adding Authentication
services.AddAuthentication(options => {
options.DefaultAuthenticateScheme = JwtBearerDefaults.AuthenticationScheme;
options.DefaultChallengeScheme = JwtBearerDefaults.AuthenticationScheme;
options.DefaultScheme = JwtBearerDefaults.AuthenticationScheme;
})
// Adding Jwt Bearer
.AddJwtBearer(options => {
options.SaveToken = true;
options.RequireHttpsMetadata = false;
options.TokenValidationParameters = new TokenValidationParameters() {
ValidateIssuer = false,
ValidateAudience = false,
ValidAudience = Configuration["JWT:ValidAudience"],
ValidIssuer = Configuration["JWT:ValidIssuer"],
IssuerSigningKey = new SymmetricSecurityKey(Encoding.UTF8.GetBytes(Configuration["JWT:Secret"]))
};
});
//services.AddTransient<PersonService, PersonService>();
}
Modifying the Functionality
Just add given below line and replace the,
services.AddSwaggerGen();
With given below lines,
services.AddSwaggerGen(c => {
c.SwaggerDoc("v1", new OpenApiInfo {
Title = "JWTToken_Auth_API", Version = "v1"
});
c.AddSecurityDefinition("Bearer", new OpenApiSecurityScheme() {
Name = "Authorization",
Type = SecuritySchemeType.ApiKey,
Scheme = "Bearer",
BearerFormat = "JWT",
In = ParameterLocation.Header,
Description = "JWT Authorization header using the Bearer scheme. \r\n\r\n Enter 'Bearer' [space] and then your token in the text input below.\r\n\r\nExample: \"Bearer 1safsfsdfdfd\"",
});
c.AddSecurityRequirement(new OpenApiSecurityRequirement {
{
new OpenApiSecurityScheme {
Reference = new OpenApiReference {
Type = ReferenceType.SecurityScheme,
Id = "Bearer"
}
},
new string[] {}
}
});
});
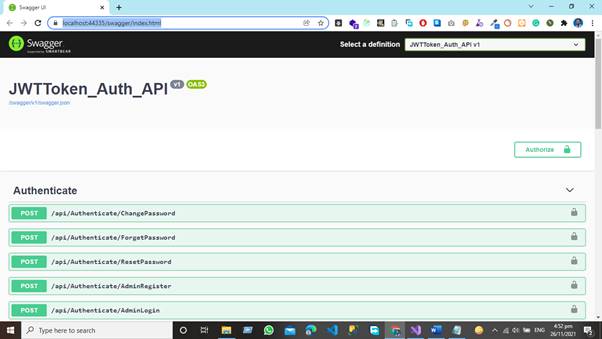
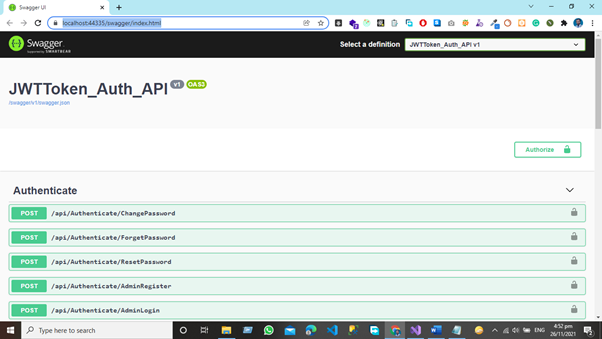
Now we can see the Authorize Option for JWT Token Authorization
Step 1
Get the JWT Token for the user by hitting the Login endpoints:
How To Add JWT Bearer Token Authorization Functionality in Swagger
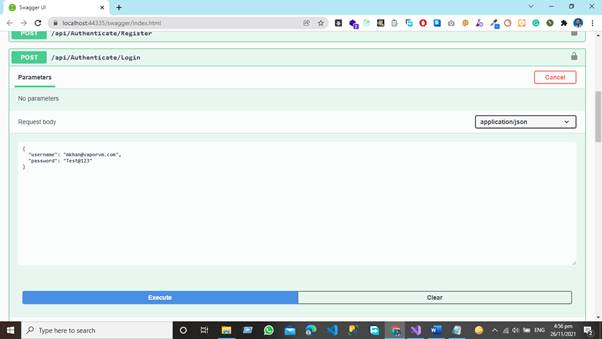
Step 2
Get the JWT Token using Login EndPoint:
How To Add JWT Bearer Token Authorization Functionality in Swagger
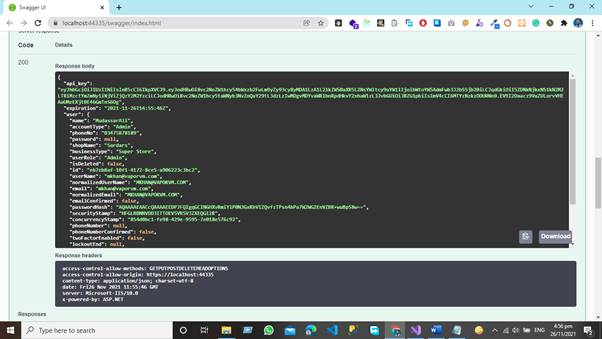
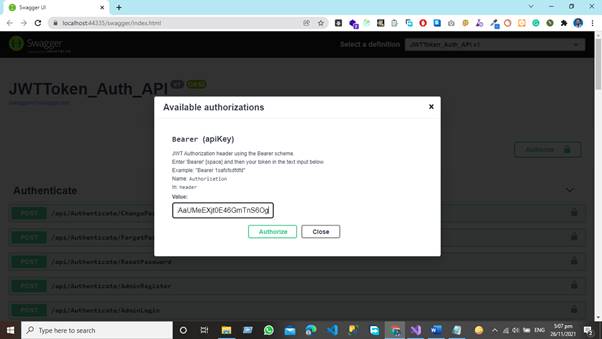
We now have the token, which we will add to our application using the Swagger JWT Token Authorization functionality.
Step 3
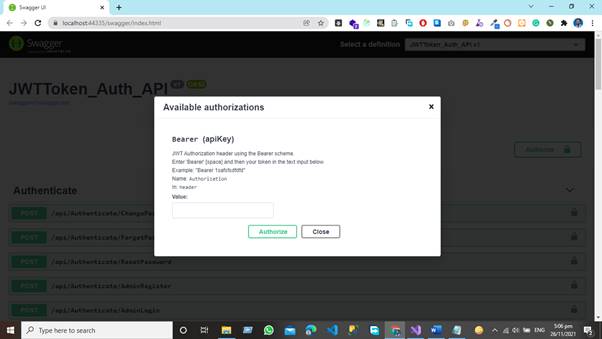
Hit the Authorize Button and add JWT Token in your application:
Now our all endpoints are authorized,
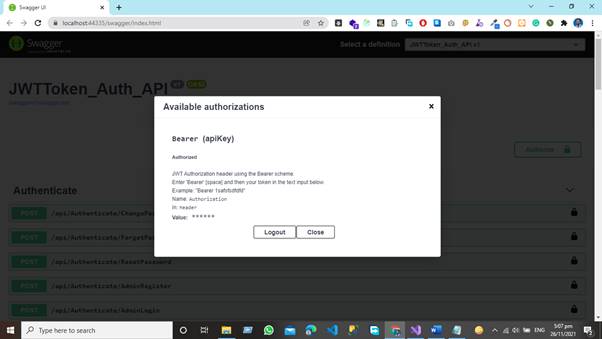
View after adding JWT Token Authentication in Application,

Now you see that we have the lock sign with all our endpoints so let’s try to access the same endpoint data now.
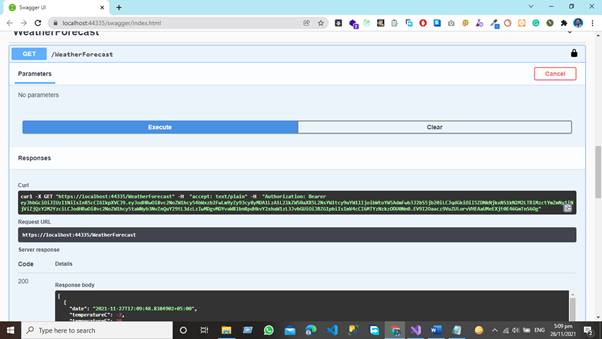
Now you can see that we have a JWT Token and that we have accessed data from a secured API using this token.
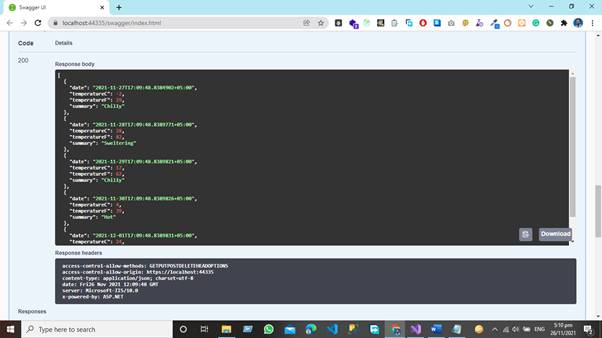
After adding the JWT Function in our Application now you can test all the secured endpoint using JWT Token Authentication
We covered how to enable JWT token capabilities in our application and then how to retrieve data from a secured endpoint in this article.
JWT Token Authentication in Asp.net Web API will be the subject of the next article.
“Happy Coding”
European best, cheap and reliable ASP.NET hosting with instant activation. HostForLIFE.eu is #1 Recommended Windows and ASP.NET hosting in European Continent. With 99.99% Uptime Guaranteed of Relibility, Stability and Performace. HostForLIFE.eu security team is constantly monitoring the entire network for unusual behaviour. We deliver hosting solution including Shared hosting, Cloud hosting, Reseller hosting, Dedicated Servers, and IT as Service for companies of all size.
