European ASP.NET 4.5 Hosting BLOG

BLOG about ASP.NET 4, ASP.NET 4.5 Hosting and Its Technology - Dedicated to European Windows Hosting Customer

European ASP.NET Core Hosting :: How to Use ASPX Files in .NET Core?

clock July 27, 2023 09:50 by author Peter

In .NET Core, there are problems such as the bad complexity of web programming and the vagueness of coding in the controller, and the destruction of the web programming structure on the server side. Also, one of the negative points of .NET Core is the lack of support for aspx files. An executable physical file (aspx) in the root makes your program more structured.

Introducing Code-Behind

This style is completely based on MVC, and in the near future, we will expand it in such a way that there is no need for coding the view part, such as for, foreach, and while loops.

Write code with Code-Behind
You can add aspx files in the wwwroot directory and its subdirectories.

An example of an aspx file based on Code-Behind.
<%@ Page Controller="YourProjectName.wwwroot.DefaultController" Model="YourProjectName.wwwroot.DefaultModel" %><!DOCTYPE html>
<html>
<head>
    <meta charset="utf-8" />
    <title><%=model.PageTitle%></title>
</head>
<body>
    <%=model.BodyValue%>
</body>
</html>


An example of a controller class that is based on Code-Behind.
using CodeBehind;

namespace YourProjectName.wwwroot
{
    public partial class DefaultController : CodeBehindController
    {
        public DefaultModel model = new DefaultModel();
        public void PageLoad(HttpContext context)
        {
            model.PageTitle = "My Title";
            model.BodyValue = "HTML Body";
            View(model);
        }
    }
}


An example of a model class that is based on Code-Behind.
using CodeBehind;

namespace YourProjectName.wwwroot
{
    public partial class DefaultModel : CodeBehindModel
    {
        public string PageTitle { get; set; }
        public string BodyValue { get; set; }
    }
}


Program file and additional Code-Behind items.
using CodeBehind;
using SetCodeBehind;

var builder = WebApplication.CreateBuilder(args);

var app = builder.Build();

// Configure the HTTP request pipeline.
if (!app.Environment.IsDevelopment())
{
    app.UseExceptionHandler("/Error");
    // The default HSTS value is 30 days. You may want to change this for production scenarios, see https://aka.ms/aspnetcore-hsts.
    app.UseHsts();
}

+ CodeBehindCompiler.Initialization();

app.Run(async context =>
{
+    CodeBehindExecute execute = new CodeBehindExecute();
+    await context.Response.WriteAsync(execute.Run(context));
});

app.UseHttpsRedirection();
app.UseStaticFiles();

app.UseRouting();

app.Run();


In the Program.cs class codes above, the three values marked with the + character must be added.

We show the codes separately for you.
CodeBehindCompiler.Initialization();

CodeBehindExecute execute = new CodeBehindExecute();
await context.Response.WriteAsync(execute.Run(context));


You can use the Write method in the model and controller classes; the Write method adds a string value to the ResponseText attribute; you can also change the values of the ResponseText attribute by accessing them directly.

In the controller class, there is an attribute named IgnoreViewAndModel attribute, and if you activate the IgnoreViewAndModel attribute, it will ignore the values of model and view, and you will only see a blank page; this feature allows you to display the values you need to the user and avoid multiple redirects and transfers.

To receive the information sent through the form, you can follow the instructions below.

public DefaultModel model = new DefaultModel();
public void PageLoad(HttpContext context)
{
    if (!string.IsNullOrEmpty(context.Request.Form["btn_Add"]))
        btn_Add_Click();

    View(model);
}

private void btn_Add_Click()
{
    model.PageTitle = "btn_Add Button Clicked";
}


Note. After running the program and compiling the aspx pages by Code-Behind, your program will no longer refer to any aspx files. If the scale of the program you are building is high or you need to act dynamically, using Code-Behind will definitely give you more freedom. If the scale of the program is low, using Code-Behind will simplify your program, and you will generate faster and more understandable code.

The following example shows the power of Code-Behind

aspx page
<%@ Page Controller="YourProjectName.wwwroot.DefaultController" Model="YourProjectName.wwwroot.DefaultModel" %><!DOCTYPE html>
<html>
<head>
    <meta charset="utf-8" />
    <title><%=model.PageTitle%></title>
</head>
<body>
    <%=model.LeftMenuValue%>
    <div class="main_content">
        <%=model.MainContentValue%>
    </div>
    <%=model.RightMenuValue%>
</body>
</html>


Controller class
using CodeBehind;

namespace YourProjectName.wwwroot
{
    public partial class DefaultController : CodeBehindController
    {
        public DefaultModel model = new DefaultModel();

        public void PageLoad(HttpContext context)
        {
            model.PageTitle = "My Title";
            CodeBehindExecute execute = new CodeBehindExecute();

            // Add Left Menu Page
            context.Request.Path = "/menu/left.aspx";
            model.LeftMenuValue = execute.Run(context);

            // Add Right Menu Page
            context.Request.Path = "/menu/right.aspx";
            model.RightMenuValue = execute.Run(context);

            // Add Main Content Page
            context.Request.Path = "/pages/main.aspx";
            model.MainContentValue = execute.Run(context);

            View(model);
        }
    }
}


Each of the pages is left.aspx, right.aspx, and main.aspx can also call several other aspx files; these calls can definitely be dynamic, and an add-on can be executed that the kernel programmers don't even know about.

Enjoy Code-Behind, but be careful not to loop the program! (Don't call pages that call the current page).
What power does Code-Behind give you while running the program?

Accessing hypertext contents of pages and replacing some values before calling in other pages.

Microsoft usually ties your hands, so you cannot create a dynamic system.

By using the default architecture of Microsoft's ASP.NET Core, you will face some very big challenges. Creating a system with the ability to support plugins that both provides security and does not loop, and can call other pages on your pages is very challenging.

Suppose you have created an application using the default ASP.NET Core cshtml that has a main page that includes a right menu and a left menu. As shown in the code above, can you change the values of these menus to Fill the dynamic form with cshtml pages and replace the values obtained from the pages? It is definitely possible, but it is difficult.

Code-Behind will not even refer to the physical aspx file to call the aspx pages and will only call a method.

How do you manage events in ASP.NET Core?

For example, a route from your program requires several methods to be executed, and these methods do not exist in the core of your program! This work can be blinded with the default cshtml of .NET, but it is difficult.

For example, we should have an event before the request to the search page and not allow the user to do more than 2 searches per minute. Using Code-Behind, we only need to check an aspx page, then reject or allow the search request.


European ASP.NET Core Hosting :: How to Download Files in Zip Format in .NET Core Web API?

clock July 25, 2023 07:06 by author Peter

In many web applications, there arises a need to download multiple files as a single zip archive. This scenario is common when dealing with document management systems, exporting data, or providing bulk downloads. In this article, we will explore how to enable users to download files in a zip format from a .NET Core Web API.


Step 1. Setting up the .NET Core Web API project
Open Visual Studio and create a new .NET Core Web API project.
Configure the project as per your requirements, including selecting a target framework and naming the project.

Step 2. Adding Required NuGet Packages

Right-click on the project in the Solution Explorer and select "Manage NuGet Packages."
Search for and install the "System.IO.Compression" and "System.IO.Compression.FileSystem" packages. These packages provide the necessary classes to work with ZIP files.

Step 3. Creating the File Download Endpoint
Create a new controller (or you can use an existing one also) that will handle the file download in zip format. In this example, we'll create a simple controller named FileController.

Add a new action method with an appropriate route to handle the file download.

Code Example
#nullable disable

using Microsoft.AspNetCore.Mvc;
using System.IO.Compression;

namespace ZipDownload.Controllers {
[ApiController]
[Route("api/files")]
public class FilesController: ControllerBase {
private readonly IWebHostEnvironment _hostEnvironment;

public FilesController(IWebHostEnvironment hostEnvironment) {
  _hostEnvironment = hostEnvironment;
}

[HttpGet]
[Route("download-zip")]
public IActionResult DownloadFiles() {
  try {
    var folderPath = Path.Combine(_hostEnvironment.ContentRootPath, "FilesToDownload");

    // Ensure the folder exists
    if (!Directory.Exists(folderPath))
      return NotFound("Folder not found.");

    // Get a list of files in the folder
    var files = Directory.GetFiles(folderPath);

    if (files.Length == 0)
      return NotFound("No files found to download.");

    // Create a temporary memory stream to hold the zip archive
    using(var memoryStream = new MemoryStream()) {
      // Create a new zip archive
      using(var zipArchive = new ZipArchive(memoryStream, ZipArchiveMode.Create, true)) {
        foreach(var file in files) {
          var fileInfo = new FileInfo(file);

          // Create a new entry in the zip archive for each file
          var entry = zipArchive.CreateEntry(fileInfo.Name);

          // Write the file contents into the entry
          using(var entryStream = entry.Open())
          using(var fileStream = new FileStream(file, FileMode.Open, FileAccess.Read)) {
            fileStream.CopyTo(entryStream);
          }
        }
      }

      memoryStream.Seek(0, SeekOrigin.Begin);

      // Return the zip file as a byte array
      return File(memoryStream.ToArray(), "application/zip", "files.zip");
    }
  } catch (Exception ex) {
    return StatusCode(500, $ "An error occurred: {ex.Message}");
  }
}
}
}

In the above code, the IWebHostEnvironment is injected into the constructor via dependency injection. It provides information about the web hosting environment, such as the content root path.

 Inside the DownloadFiles method, the first step is to construct the path to the folder containing the files to be downloaded. It combines the content root path obtained from _hostEnvironment.ContentRootPath with the folder name "FilesToDownload"

It then checks if the folder exists. If the folder does not exist, it returns a 404 Not Found response with a corresponding error message. Next, it retrieves a list of files present in the folder using Directory.GetFiles(folderPath). If there are no files in the folder, it returns a 404 Not Found response with an appropriate message.

A temporary MemoryStream is created to hold the zip archive that will be generated. Within the using statement, a new ZipArchive is created using the MemoryStream and the ZipArchiveMode.Create mode.

The code then iterates over each file in the folder and performs the following steps:

  • Retrieves file information using FileInfo.
  • Creates a new entry in the zip archive with the file name using the zip archive.CreateEntry(fileInfo.Name).
  • Opens the entry stream and the file stream and copies the file contents into the entry using fileStream.CopyTo(entryStream).
  • After all the files are added to the zip archive, the MemoryStream is rewound to the beginning using memoryStream.Seek(0, SeekOrigin.Begin).
  • Finally, the zip archive is returned as a downloadable response by using the File method of the base controller class. It takes the byte array representation of the zip archive (memoryStream.ToArray()), the MIME type of the zip file ("application/zip"), and the desired file name ("files.zip") as parameters.

In case any exception occurs during the process, it catches the exception, and a 500 Internal Server Error response is returned with the corresponding error message.

Step 4. Testing the File Download Endpoint

  • Run the Web API project and navigate to the download endpoint URL in a web browser or use a tool like Postman.
  • Upon accessing the endpoint, the browser or tool should prompt the user to save the ZIP file.
  • After downloading and extracting the ZIP file, the user will find all the requested files within the folder structure specified during creation.


In this article, we explored how to enable file downloads in ZIP format using a .NET Core Web API. By leveraging the System.IO.Compression namespace, we were able to compress multiple files into a single ZIP file and return it to the client. This approach offers a convenient way to bundle and deliver multiple files efficiently, improving the user experience when downloading content from a web application.


European ASP.NET Core Hosting :: What exactly is Entity Framework Core (EF)?

clock July 18, 2023 07:59 by author Peter

The Entity Framework (EF) Core is a lightweight, extendable, open-source, cross-platform version of the well-known Entity Framework data access technology. We'll look at the Code First technique in EF Core using a.NET 7 API in this article. This process begins with the definition of your model classes; EF Core then generates the database and its structure based on these models.

Why do we require EF Core?

Microsoft's EF Core is an open-source lightweight ORM that provides a mechanism to connect with relational databases using programming concepts. Here are some of the reasons why it is advantageous.

  • Object-Relational Mapping: EF Core connects relational databases to object-oriented programming. It lowers the amount of boilerplate code required to convert database tables and columns into object properties. This is handled automatically by EF Core.
  • Language Integrated Query (LINQ): LINQ is a strong querying language included with.NET. It enables developers to write database queries in C# syntax. LINQ converts our C# queries into efficient database queries.
  • Testability is promoted by the design of EF Core, which allows developers to fake or alter the database context during unit testing. This allows developers to build isolated tests that do not rely on a physical database, making testing more efficient and reliable.
Let's begin
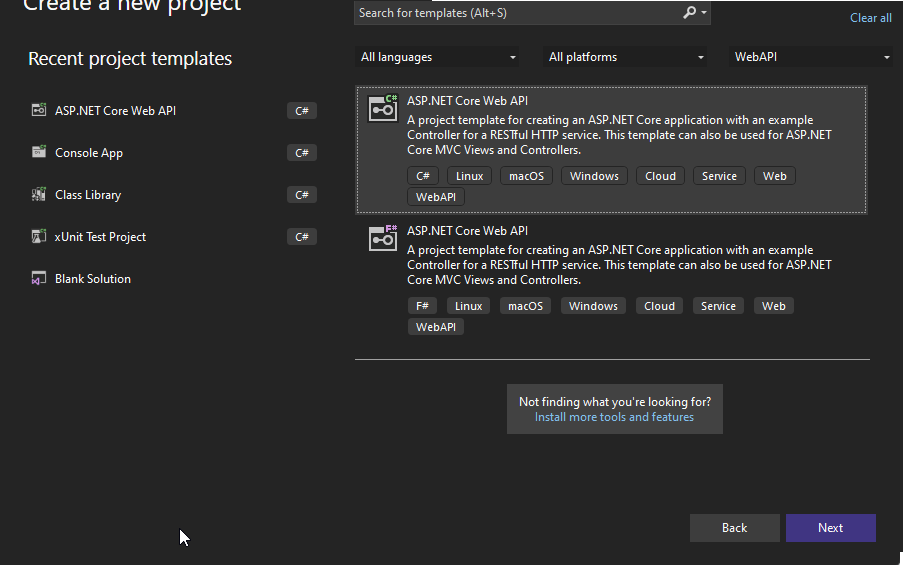
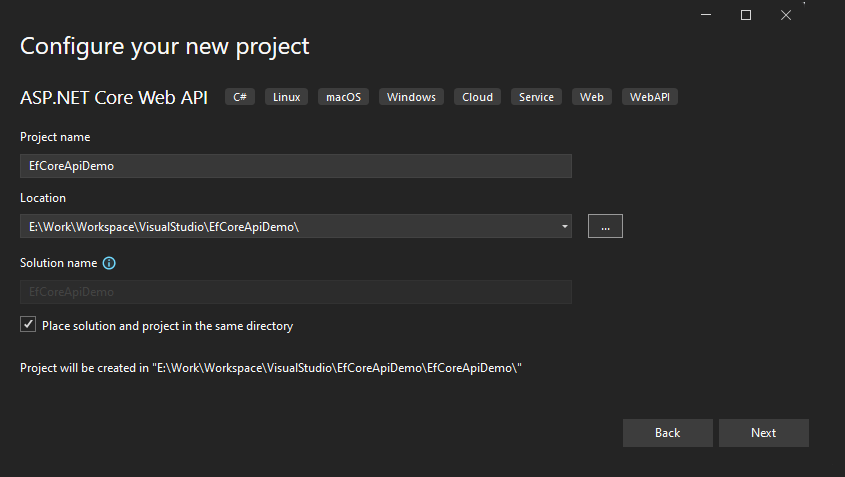
We will create a new project.

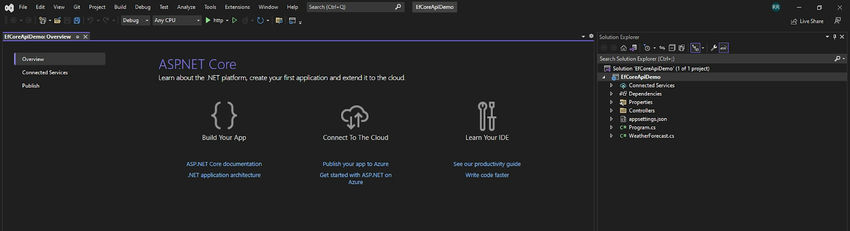
After project creation, we will have a structure like this.

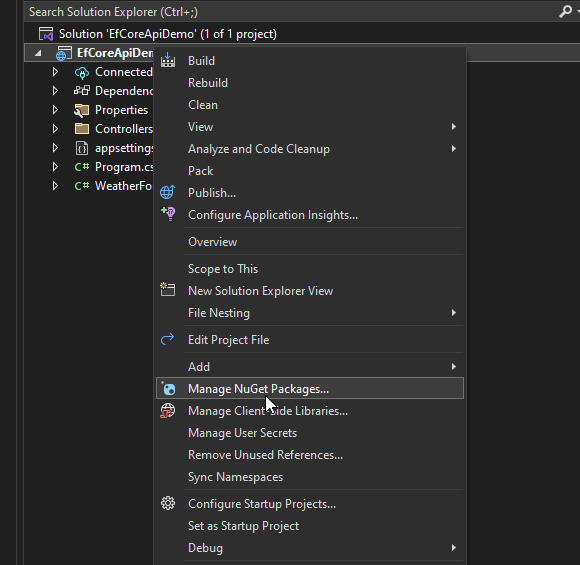
Next, we will install the required nuget packages.

Install the following packages,

    Microsoft.EntityFrameworkCore
    Microsoft.EntityFrameworkCore.Design
    Microsoft.EntityFrameworkCore.SqlServer

Now we will create a folder called 'Models' in the solution, and inside it, we will add another folder called Entities which will have entity classes from which our database will be created.

We will create a class "Department.cs" with the following properties.
public class Department
{
    public int Id { get; set; }
    public string Name { get; set; }
    public string Description { get; set; }
    public bool IsActive { get; set; }
    public DateTime CreatedDate { get; set; }
    public DateTime UpdatedDate { get; set; }
}


Now we will create a class called "Employee.cs".
public class Employee
{
    public int Id { get; set; }
    public string FirstName { get; set; }
    public string LastName { get; set; }
    public int DepartmentId { get; set; }

    public bool IsActive { get; set; }
    public DateTime CreatedDate { get; set; }
    public DateTime UpdatedDate { get; set; }
}

Now we will create an "EmployeeDbContext.cs".
public class EmployeeDbContext : DbContext
{
    public EmployeeDbContext(DbContextOptions<EmployeeDbContext> options) : base(options)
    {
    }

    public DbSet<Department> Departments { get; set; }
    public DbSet<Employee> Employees { get; set; }
}

As we can see, this EmployeeDbContext class extends from the DbContext class that comes in the "Microsoft.EntityFrameworkCore" framework, and then we have the DbSets for the Departments and Employees as per the entities we created.

Now we will configure the DB context in the "Program.cs".

We will add the following code.
builder.Services.AddDbContext<EmployeeDbContext>(options =>
{
    options.UseSqlServer("Server=RAVI;Database=EFCoreCodeFirstDB;Trusted_Connection=True;MultipleActiveResultSets=true;TrustServerCertificate=True;");
});


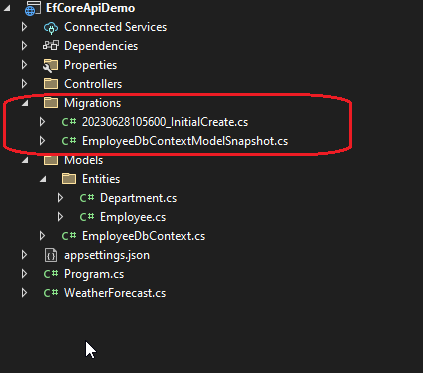
After that, we will run the migrations commands that will help us maintain the DB state.

Run the following command in the solution directory.

“dotnet ef migrations add InitialCreate”.

After running it, the output will look something like this.

In the solution explorer, you will see the following folder.

Note. If the above command throws the error, please run the following command first.
“dotnet tool install --global dotnet-ef”

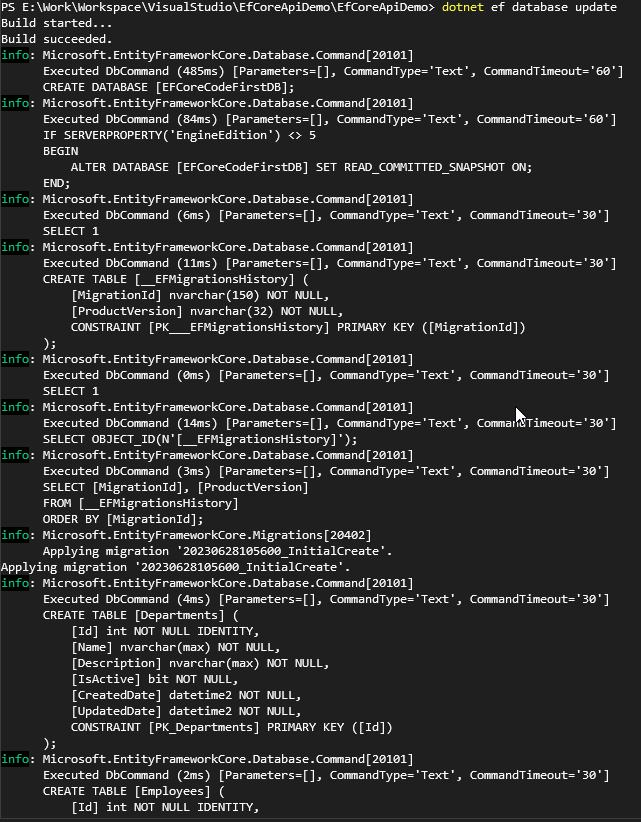
After this, we will run the following command.
“dotnet ef database update”

You should see the following output.

After this, you can see your SqlServer to see that your database has been created along with your tables.

Now we will add a controller called "DepartmentController.cs".
[Route("api/[controller]")]
[ApiController]
public class DepartmentController: ControllerBase {
  private readonly EmployeeDbContext _dbContext;
  public DepartmentController(EmployeeDbContext dbContext) {
    _dbContext = dbContext;
  }

  [HttpGet]
  public IActionResult Get() {
    var departments = _dbContext.Departments.ToList();
    return Ok(departments);
  }

  [HttpPost]
  public IActionResult Post([FromBody] Department department) {
    _dbContext.Departments.Add(department);
    _dbContext.SaveChanges();
    return Ok();
  }

  [HttpPut]
  public IActionResult Put([FromBody] Department department) {
    var dept = _dbContext.Departments.FirstOrDefault(d => d.Id == department.Id);
    if (dept == null)
      return NotFound();

    dept.Name = department.Name;
    dept.Description = department.Description;
    dept.UpdatedDate = DateTime.Now;
    _dbContext.SaveChanges();
    return Ok(dept);
  }
}


In our DepartmentController.cs, we have three REST endpoints; one is HttpGet which will get us the list of all departments. The second endpoint is HTTP POST which will save the departments in the DB, and the last one is HTTPPUT which will update the department in the DB.

Similarly, we will have an employee controller as well, which will save, update and get employees.
[Route("api/[controller]")]
[ApiController]
public class EmployeeController: ControllerBase {
  private readonly EmployeeDbContext _dbContext;
  public EmployeeController(EmployeeDbContext dbContext) {
    _dbContext = dbContext;
  }

  [HttpGet]
  public IActionResult Get() {
    var employees = _dbContext.Employees.ToList();
    return Ok(employees);
  }

  [HttpPost]
  public IActionResult Add([FromBody] Employee employee) {
    _dbContext.Employees.Add(employee);
    _dbContext.SaveChanges();
    return Ok();
  }

  [HttpPut]
  public IActionResult Update([FromBody] Employee employee) {
    var emp = _dbContext.Employees.FirstOrDefault(d => d.Id == employee.Id);
    if (emp == null)
      return NotFound();

    emp.FirstName = employee.FirstName;
    emp.LastName = employee.LastName;
    emp.DepartmentId = employee.DepartmentId;
    emp.UpdatedDate = DateTime.Now;
    _dbContext.SaveChanges();
    return Ok(emp);
  }
}

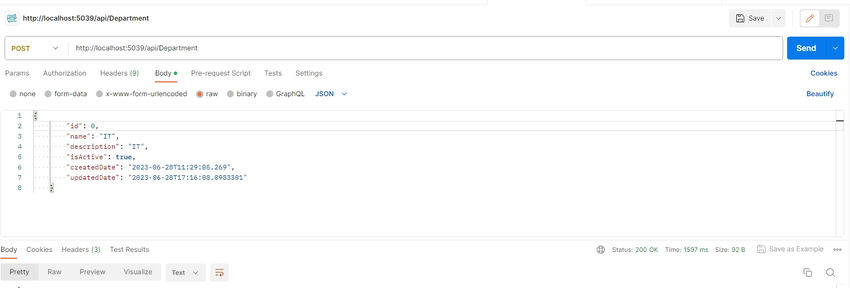
Now let's run our API, and then we will hit the POST endpoint of the department's controller.

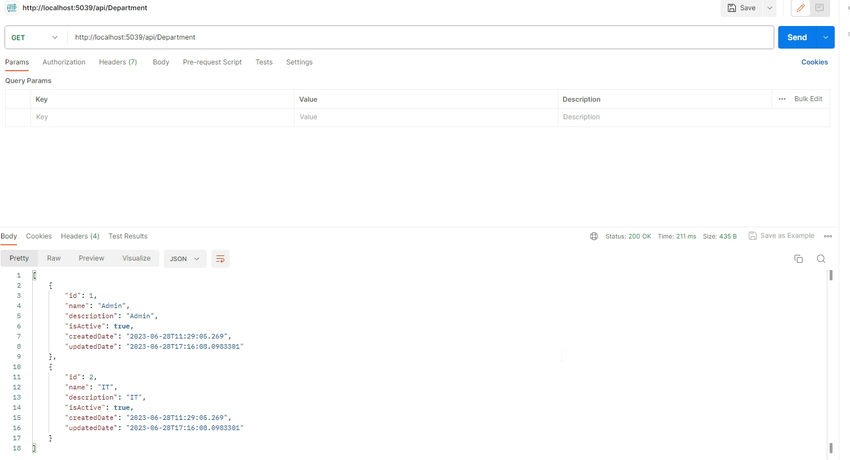
Now we will try to get all the departments by hitting the Get endpoint of departments.

Now we will create a new employee using the Post endpoint of the employee controller.


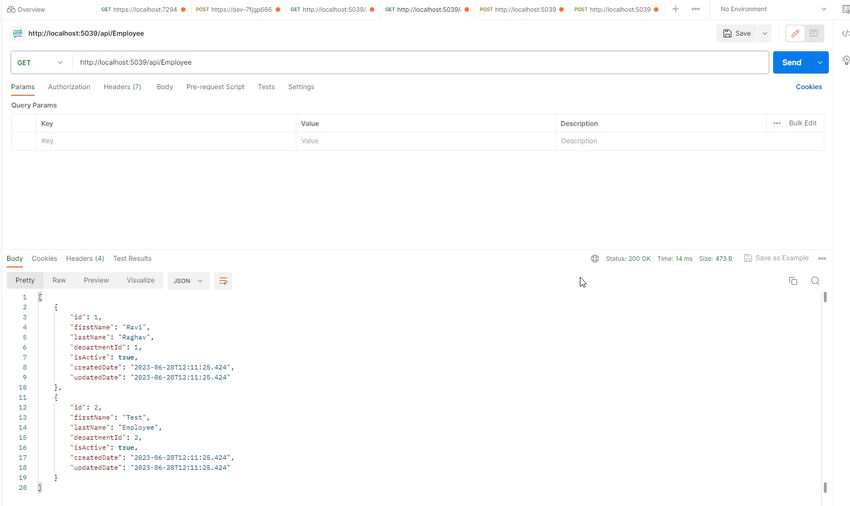
Now we will hit the Get endpoint of the employee controller.

Now we can verify the same values from the database as well.

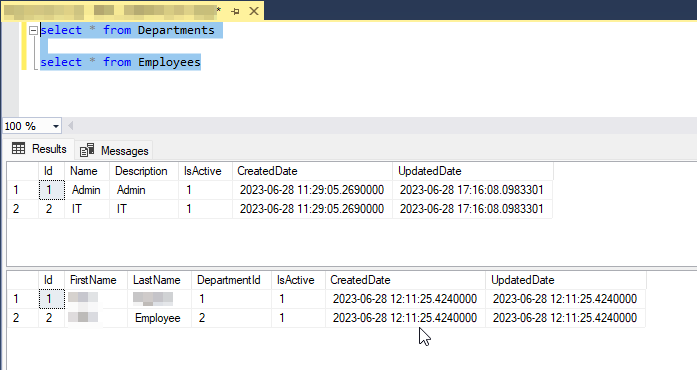
As we can verify, our values are stored in the database as well.
We have seen how to create a .NET 7 API and use EF Core to interact with the relational database to store and get the data.


European ASP.NET Core Hosting :: Push Notification From C#.Net Using FCM HTTP V1

clock July 4, 2023 09:19 by author Peter

In this article, we will be sending push notifications to Android devices via C# Dot Net/.Net. Using Firebase Cloud Messaging API HTTP V1.

This article will guide using of FCM HTTP V1 over Legacy FCM API.

Legacy FCM API :
https://fcm.googleapis.com/fcm/send

HTTP
Latest FCM Http V1:
https://fcm.googleapis.com/v1/projects/myproject-b5ae1/messages:send

HTTP
The latest FCM Http V1 provides better security, Support for the new Client Platform version.
Section 1. Create/ Login in Firebase Console Account.
URL: https://console.firebase.google.com/

After creating of account/Login, Click on Add Project.

Section 2. Add Firebase to your Android project
Section 3. Go to Project Settings

Section 4. Enable FCM HTTP V1

Section 5. Create a .Net Web API project; write this code to generate a Bearer token for calling FCM HTTP V1 API.

Code
using System.IO;
using Google.Apis.Auth.OAuth2;
using System.Net.Http.Headers;
using System.Text;
using System.Web;
using System.Web.Configuration;
using System.Net.Http;
using System.Web.Http;

//----------Generating Bearer token for FCM---------------

string fileName = System.Web.Hosting.HostingEnvironment.MapPath("~/***-approval-firebase-adminsdk-gui00-761039f087.json"); //Download from Firebase Console ServiceAccount

string scopes = "https://www.googleapis.com/auth/firebase.messaging";
var bearertoken = ""; // Bearer Token in this variable

using(var stream = new FileStream(fileName, FileMode.Open, FileAccess.Read)) {
  bearertoken = GoogleCredential
    .FromStream(stream) // Loads key file
    .CreateScoped(scopes) // Gathers scopes requested
    .UnderlyingCredential // Gets the credentials
    .GetAccessTokenForRequestAsync().Result; // Gets the Access Token
}


Section 6. Follow this Step to Download the Json file from the Firebase Console Account (Project Settings -> Service Account -> Generate New Private Key) & Place the Json File in your Project directory.

Section 7. Place the downloaded JSON File in your .net Project directory.

Section 8. Install Google.Api.Auth from Nuget Package Manager

Section 9. Use the Authorization token generated above via c# code to call FCM HTTP V1 API; get the FCM Token of Android from an Android device. Test using Postman; a push notification will be sent to the Android device.

Section 10. On successful completion of the above steps, Implement Further, Create this Model Classes for storing Request & Response data.

Section 11. Call the FCM HTTP V1 API using the Authorization token generated & get the FCM id / Token from the Android device.

Section 12. Entire Code
#region FCM Auth & Send Notification To Mobile //notify FCM Code
public class Data {

  public string body {
    get;
    set;
  }

  public string title {
    get;
    set;
  }

  public string key_1 {
    get;
    set;
  }

  public string key_2 {
    get;
    set;
  }

}

public class Message {

  public string token {
    get;
    set;
  }

  public Data data {
    get;
    set;
  }

  public Notification notification {
    get;
    set;
  }

}

public class Notification {

  public string title {
    get;
    set;
  }

  public string body {
    get;
    set;
  }

}

public class Root {

  public Message message {
    get;
    set;
  }

}

public void GenerateFCM_Auth_SendNotifcn()

{
  //----------Generating Bearer token for FCM---------------

  string fileName = System.Web.Hosting.HostingEnvironment.MapPath("~/***-approval-firebase-adminsdk-gui00-761039f087.json"); //Download from Firebase Console ServiceAccount

  string scopes = "https://www.googleapis.com/auth/firebase.messaging";
  var bearertoken = ""; // Bearer Token in this variable
  using(var stream = new FileStream(fileName, FileMode.Open, FileAccess.Read))

  {

    bearertoken = GoogleCredential
      .FromStream(stream) // Loads key file
      .CreateScoped(scopes) // Gathers scopes requested
      .UnderlyingCredential // Gets the credentials
      .GetAccessTokenForRequestAsync().Result; // Gets the Access Token

  }

  ///--------Calling FCM-----------------------------

  var clientHandler = new HttpClientHandler();
  var client = new HttpClient(clientHandler);

  client.BaseAddress = new Uri("https://fcm.googleapis.com/v1/projects/***-approval/messages:send"); // FCM HttpV1 API

  client.DefaultRequestHeaders.Accept.Clear();
  client.DefaultRequestHeaders.Accept.Add(new MediaTypeWithQualityHeaderValue("application/json"));

  //client.DefaultRequestHeaders.Accept.Add("Authorization", "Bearer " + bearertoken);
  client.DefaultRequestHeaders.Authorization = new AuthenticationHeaderValue("Bearer", bearertoken); // Authorization Token in this variable

  //---------------Assigning Of data To Model --------------

  Root rootObj = new Root();
  rootObj.message = new Message();

  rootObj.message.token = "cEM68BIdTomaE0R2dbaO:APA91bG8XfOjU_GSPNQYCrJ4wzE7VmMPEsyudwtE41VWKzJcoT2f3wbKsKCHwk5s078ZL31mM258-BzdZPRNXAlc_fyzCzj2txLQvQ3u7jggDPHjYIMlHRgspXT0CudfK"; //FCM Token id

  rootObj.message.data = new Data();
  rootObj.message.data.title = "Data Title";
  rootObj.message.data.body = "Data Body";
  rootObj.message.data.key_1 = "Sample Key";
  rootObj.message.data.key_2 = "Sample Key2";
  rootObj.message.notification = new Notification();
  rootObj.message.notification.title = "Notify Title";
  rootObj.message.notification.body = "Notify Body";

  //-------------Convert Model To JSON ----------------------

  var jsonObj = new JavaScriptSerializer().Serialize(rootObj);

  //------------------------Calling Of FCM Notify API-------------------

  var data = new StringContent(jsonObj, Encoding.UTF8, "application/json");
  data.Headers.ContentType = new MediaTypeHeaderValue("application/json");

  var response = client.PostAsync("https://fcm.googleapis.com/v1/projects/**-approval/messages:send", data).Result; // Calling The FCM httpv1 API

  //---------- Deserialize Json Response from API ----------------------------------

  var jsonResponse = response.Content.ReadAsStringAsync().Result;
  var responseObj = new JavaScriptSerializer().DeserializeObject(jsonResponse);

}

#endregion


About HostForLIFE

HostForLIFE is European Windows Hosting Provider which focuses on Windows Platform only. We deliver on-demand hosting solutions including Shared hosting, Reseller Hosting, Cloud Hosting, Dedicated Servers, and IT as a Service for companies of all sizes.

We have offered the latest Windows 2019 Hosting, ASP.NET 5 Hosting, ASP.NET MVC 6 Hosting and SQL 2019 Hosting.


Month List

Tag cloud

Sign in