European ASP.NET 4.5 Hosting BLOG

BLOG about ASP.NET 4, ASP.NET 4.5 Hosting and Its Technology - Dedicated to European Windows Hosting Customer

European ASP.NET Core Hosting - HostForLIFE :: Injecting Dependency In.NET Console Apps

clock October 30, 2023 07:51 by author Peter

Are you sick of hearing the term "Dependency Injection" and immediately visualizing complex web apps with flashy user interfaces? You're in for a treat, my fellow developers, because this post will show you how to use Dependency Injection in terminal apps!

"Console apps?" you might be wondering. Isn't that just for basic command-line utilities?" But wait a minute. Your basic console app can benefit from the same power and flexibility that ASP.NET Core developers have for their web applications thanks to Dependecy Injection. Doesn't it sound good? Let's get started and explore how we can make even the most basic console apps flexible and testable.

In this article, I'll walk you through the process of creating a basic console app with a ServiceCollection that any ASP.NET Core developer would recognize.

Adding NuGet packages

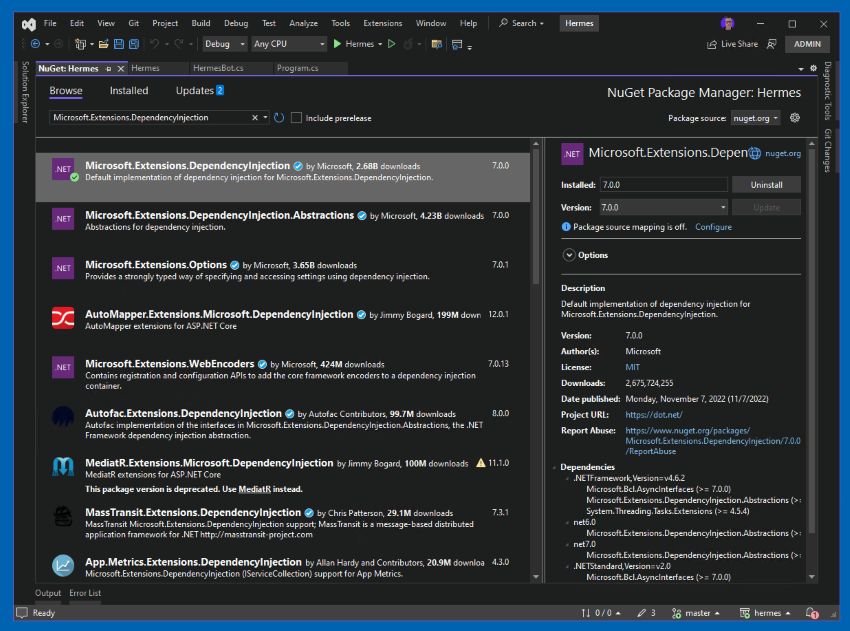
You must install the Microsoft.Extensions package.In your console program, include the DependencyInjection package.

Using the.NET CLI

dotnet package addition Microsoft.Extensions.Using Visual Studio to Implement Dependency Injection

Starting with Program.cs
When you first start a console app, the boilerplate code will include a Main method that prints "Hello, World!" to the console. Inside this method, we'll remove the Console.WriteLine() method and put up our own programs. My preference is to build a new class called "Application" in which my app's logic will reside. Then, Program.cs just bootstraps the Application class with dependency injection.

using Microsoft.Extensions.DependencyInjection
namespace MyApp
{
    internal class Program
    {
        private static void Main(string[] args)
        {
            var services = CreateServices();

            Application app = services.GetRequiredService<Application>();
            app.MyLogic();
        }

        private static ServiceProvider CreateServices()
        {
            var serviceProvider = new ServiceCollection()
                .AddSingleton<Application>(new Application())
                .BuildServiceProvider();

            return serviceProvider;
        }
    }

    public class Application
    {
        public void MyLogic()
        {
            // Do something epic
        }
    }
}

Let's take a look at what's going on. On line 9, we set a ServiceProvider variable, which is the output of the CreateServices() function. We register a single service in the collection using this way. Because we'll be passing application flow to the Application class, a singleton instance is the best choice.

Line 11 begins the application logic by using the dependency injection container to resolve our singleton. In the Application class, you might wish to have a method called "Start", "Initialize", or something similar.

Following steps
This structure provides us with a versatile basis on which to build. In the following sections, we'll look at how we can enhance this and add certain components that you'll most likely want in your advanced console app.

Making Use of EF Core

When we install EF Core, we usually have to retrieve the connection string from IConfiguration, add our database context to the DI container, and perhaps run EF migrations when the application starts. Let's see how we can do this.

Add NuGet packages
dotnet add package Microsoft.EntityFrameworkCore.Design
dotnet add package Microsoft.EntityFrameworkCore.Sqlite
dotnet add package Microsoft.Configuration.UserSecrets

Modifications to Program.cs
Don't forget about the new using statements that allow us to interact with EF Core and IConfiguration! There are two significant modifications to be aware of.

  • An IConfiguration is produced in CreateServices, and for demonstration purposes, I'm assuming my connection string is saved in my User Secrets file. The MyDbContext class is now registered to the ServiceCollection. Again, I'm using the Sqlite service for demonstration purposes.
  • Before beginning my Application class in the Main function, we request an instance of MyDbContext to perform database migrations. This ensures that when the logic of our app begins, the database is in the correct condition.

using System;
using Microsoft.EntityFrameworkCore;
using Microsoft.Extensions.Configuration;
using Microsoft.Extensions.DependencyInjection

namespace MyApp
{
    internal class Program
    {
        private static void Main(string[] args)
        {
            var services = CreateServices();

            MyDbContext context = services.GetRequiredService<MyDbContext>();
            context.Database.Migrate();

            Application app = services.GetRequiredService<Application>();
            app.MyLogic();
        }

        private static ServiceProvider CreateServices()
        {
            var configuration = new ConfigurationBuilder()
                .AddUserSecrets(Assembly.GetExecutingAssembly())
                .Build();

            string connectionString = configuration.GetConnectionString("MyApp");

            var serviceProvider = new ServiceCollection()
                .AddDbContext<MyDbContext>(options =>
                {
                    options.UseSqlite(connectionString);
                })
                .AddSingleton<Application>(new Application())
                .BuildServiceProvider();

            return serviceProvider;
        }
    }

    public class Application
    {
        public void MyLogic()
        {
            // Do something epic
        }
    }
}

ILogger is used for logging
Another popular component you may want to include in your console app is modern logging to replace all of those Console.WriteLine methods are used. We'll utilize the console logging provider as an example.

Add NuGet packages
dotnet add package Microsoft.Extensions.Logging.Console

Changes to Program.cs
On line 20, we're telling the dependency injection container that we're adding logging support. This comes from the using statement of Microsoft.Extensions.Logging. Then, I've modified the Application class so its constructor will receive an instance of ILogger which will come from our configured DI container. Take notice of how nothing needed to be changed on line 13 and 14. This is because our DI container will give us our configured singleton of Application, now with the ILogger<Application> included!

using System;
using Microsoft.Extensions.DependencyInjection
using Microsoft.Extensions.Logging;

namespace MyApp
{
    internal class Program
    {
        private static void Main(string[] args)
        {
            var services = CreateServices();

            Application app = services.GetRequiredService<Application>();
            app.MyLogic();
        }

        private static ServiceProvider CreateServices()
        {
            var serviceProvider = new ServiceCollection()
                .AddLogging(options =>
                {
                    options.ClearProviders();
                    options.AddConsole();
                })
                .AddSingleton<Application>(new Application())
                .BuildServiceProvider();

            return serviceProvider;
        }
    }

    public class Application
    {
        private readonly ILogger<Application> _logger;

        public Application(ILogger<Application> logger)
        {
            _logger = logger;
        }

        public void MyLogic()
        {
            _logger.LogInformation("Hello, World!");
        }
    }
}

HostForLIFE ASP.NET Core Hosting

European best, cheap and reliable ASP.NET hosting with instant activation. HostForLIFE.eu is #1 Recommended Windows and ASP.NET hosting in European Continent. With 99.99% Uptime Guaranteed of Relibility, Stability and Performace. HostForLIFE.eu security team is constantly monitoring the entire network for unusual behaviour. We deliver hosting solution including Shared hosting, Cloud hosting, Reseller hosting, Dedicated Servers, and IT as Service for companies of all size.


European ASP.NET Core Hosting - HostForLIFE :: SRP (Single Responsibility Principle) in.NET Core

clock October 26, 2023 10:09 by author Peter

As a one-year developer, you've probably heard of the SOLID principles, which are a collection of five principles that promote clean, maintainable, and scalable code. The Single Responsibility Principle (SRP) is the most important of these concepts to understand and master. In this post, we'll describe SRP in layman's terms and present a simple.NET Core example to demonstrate its importance.

What exactly is SRP?
The Single Responsibility Principle (SRP) is the first letter in SOLID, and it emphasizes the need of keeping your code simple and well-organized. In a nutshell, SRP asserts that a class should have only one reason to modify. In other words, a class should only have one task or goal.

Consider real-world examples to help you understand this subject. Consider a simple kitchen equipment such as a toaster. Its primary function is to toast bread; it does not brew coffee or conduct any other unrelated duties. Similarly, classes in software development should have a single purpose.

What is the significance of SRP?
Readability: Classes having a single purpose are simpler to grasp for you and other developers, boosting code readability and maintainability.
Reusability: When a class excels at one task, it is more likely to be reusable in other parts of your application without producing unexpected side effects.
Smaller, more concentrated classes are easier to test. Specific tests for a class's single task can be written, making it easier to find and fix errors.

A Simplified.NET Core Example
Let's look at a simple.NET Core example to explain SRP. User Class. In this example, a User class is in charge of managing user-specific data such as name, email address, and age. This class's sole responsibility is to handle user data.

public class User
{
    public string Name { get; set; }
    public string Email { get; set; }
    public int Age { get; set; }

    public User(string name, string email, int age)
    {
        Name = name;
        Email = email;
        Age = age;
    }
}

Classification of NotificationServices
Then we make a NotificationService class. This class is in charge of sending user notifications. It may send emails, SMS messages, or other types of communication. The key point is that it only has one responsibility: handling notifications.

public class NotificationService
{
    public void SendEmail(User user, string message)
    {
        // Code to send an email notification
        Console.WriteLine($"Email sent to {user.Name}: {message}");
    }

    public void SendSMS(User user, string message)
    {
        // Code to send an SMS notification
        Console.WriteLine($"SMS sent to {user.Name}: {message}");
    }
}

In this example, the User class deals with user data, while the NotificationService class manages sending notifications. This clear separation of responsibilities aligns with the Single Responsibility Principle.

Using the Classes

Here's how you can use these classes in your application.

public class Program
{
    public static void Main()
    {
        var user = new User("
Peter", "Peter@hfl.eu", 30);
        var notificationService = new NotificationService();

        // Sending a notification to the user
        notificationService.SendEmail(user, "Hello, Peter! Don't forget about our meeting.");
        notificationService.SendSMS(user, "Reminder: Meeting today at 3 PM.");
    }
}

This example shows how to use the SRP to keep your code orderly, maintainable, and extensible. These concepts will assist a novice developer (fresher) in building more robust and scalable programs. With SRP, you'll be well on your way to being a more capable and efficient developer. Remember that in your journey as a software developer, simplicity and adherence to core principles such as SRP are critical to generating high-quality software.

HostForLIFE ASP.NET Core Hosting

European best, cheap and reliable ASP.NET hosting with instant activation. HostForLIFE.eu is #1 Recommended Windows and ASP.NET hosting in European Continent. With 99.99% Uptime Guaranteed of Relibility, Stability and Performace. HostForLIFE.eu security team is constantly monitoring the entire network for unusual behaviour. We deliver hosting solution including Shared hosting, Cloud hosting, Reseller hosting, Dedicated Servers, and IT as Service for companies of all size.


European ASP.NET Core Hosting - HostForLIFE :: Using xUnit for unit testing

clock October 23, 2023 09:08 by author Peter

It is critical for a software developer to assure the quality and dependability of code, and unit testing is one of the finest strategies for doing so. Developers may quickly construct extensive unit tests that confirm that each unit of software code operates as intended using xUnit, a popular unit testing tool in the.NET ecosystem. Developers can save time and resources while greatly improving overall program quality by embracing the capabilities of xUnit and introducing unit testing into the development workflow. So, let's get started on creating effective unit tests for our.NET apps right away!

Unit Testing Fundamentals
element testing is a type of software testing in which individual components or functions of a software program are tested separately to ensure that each element of the software behaves as intended. The goal is to ensure that each unit of software code operates as planned. A unit is the smallest testable component of any piece of software. A unit in object-oriented programming could be a method or a class.

The primary objectives of unit testing are as follows:

  • Unit tests should be isolated, which means they should test a specific piece of functionality in the application without relying on other elements of the system.
  • Unit tests should be automated and repeatable so that developers can run them regularly to catch regressions as soon as they occur.
  • Unit tests should be executed quickly so that developers can receive immediate feedback on the correctness of the code.

An Overview of xUnit
xUnit is a free and open-source unit testing framework for.NET programming languages. It is a member of the xUnit testing family, which contains frameworks for other programming languages such as Java and PHP. xUnit adheres to the xUnit architecture, which is founded on four major principles:

  1. Setup: Create the prerequisites for the test
  2. Act: Run the unit of code that will be tested
  3. Verify that the unit of code behaves as intended
  4. Teardown: Remove any resources used during the test

xUnit is a simple and beautiful tool for writing unit tests for.NET applications.

Using xUnit to Implement Unit Tests in.NET
Step 1: In Visual Studio, create a new Console App.

Now create a Class name Calculator

public class Calculator
{
    public double Add(double number1, double number2)
    {
        return (number1 + number2);
    }

    public double Subtract(double number1, double number2)
    {
        return (number1 - number2);
    }
}

Now you can build this project.

Step 2. Create a new xUnit Project
We must add a reference to our original project after generating the new xUnit project. To do so, right-click on the References folder in the xUnit project and select "Add Reference." Then, choose the project you wish to refer to and press "OK." We will be able to use the classes and methods defined in our initial project in our xUnit tests as a result of this.

Now comes the drafting of the test.
Calculator cal = new Calculator();

[Fact]
public void Test_AddTwoNumber()
{
    // Arrange
    var num1 = 3.5;
    var num2 = 5.5;
    var expectedValue = 9;

    // Act
    var sum = cal.Add(num1, num2);

    //Assert
    Assert.Equal(expectedValue, sum, 1);
}

[Fact]
public void Test_SubtractTwoNumber()
{
    // Arrange
    var num1 = 6;
    var num2 = 2;
    var expectedValue = 4;

    // Act
    var sum = cal.Subtract(num1, num2);

    //Assert
    Assert.Equal(expectedValue, sum, 1);
}

Step 3: Carry out the test
To run the test, right-click on the xUnit Test project and choose "Run Test". This will run all of the unit tests in the project and display the results. Make sure to perform this after you've written the unit tests to ensure they're operating properly and catching any regressions as soon as they appear.

The results of the test are presented on the screen once you run it. This is an important phase in the unit testing process since it aids in the identification of any flaws or bugs in the code. Developers may discover any regressions as soon as they appear by running the test regularly, allowing them to fix the problems quickly and efficiently. Unit tests should also be automated and repeatable, which means they can be run fast and easily, providing developers with immediate feedback on the quality of the code. With xUnit, developers can simply create extensive unit tests for their.NET projects, assuring the codebase's reliability and maintainability.

HostForLIFE ASP.NET Core Hosting

European best, cheap and reliable ASP.NET hosting with instant activation. HostForLIFE.eu is #1 Recommended Windows and ASP.NET hosting in European Continent. With 99.99% Uptime Guaranteed of Relibility, Stability and Performace. HostForLIFE.eu security team is constantly monitoring the entire network for unusual behaviour. We deliver hosting solution including Shared hosting, Cloud hosting, Reseller hosting, Dedicated Servers, and IT as Service for companies of all size.


European ASP.NET Core Hosting - HostForLIFE :: FluentValidation for data validation in ASP.NET Core

clock October 20, 2023 07:19 by author Peter

Validation of data is an important part of web application development. It guarantees that the information submitted by users is correct, safe, and follows the anticipated format. FluentValidation in ASP.NET Core provides a powerful and easy way to handle validation logic, allowing developers to validate user input while maintaining clean, maintainable code.

What is ASP.NET Core FluentValidation?
FluentValidation is a well-known.NET library for creating strongly typed validation rules. FluentValidation, as opposed to traditional attribute-based validation, provides a more expressive syntax and allows developers to construct validation logic in a distinct, clean, and reusable manner. It integrates effortlessly into ASP.NET Core applications, providing a strong solution for validating user input.To begin using FluentValidation, create an ASP.NET Core Web API project.

After you've created the project, you'll need to add two NuGet packages to it.

NuGet\Install-Package FluentValidation -Version 11.7.1
NuGet\Install-Package FluentValidation.DependencyInjectionExtensions -Version 11.7.1

After the installation is complete, you will be able to define validation criteria for the models you generate.

Developing Validation Rules

Consider a straightforward registration form with fields such as username, email, and password. Create a validator class and an associated model to validate this form:

public class UserRegistrationModel
{
    public string Username { get; set; }
    public string Email { get; set; }
    public string Password { get; set; }
}

public class UserRegistrationValidator : AbstractValidator<UserRegistrationModel>
{
    public UserRegistrationValidator()
    {
        RuleFor(x => x.Username).NotEmpty().MinimumLength(3);
        RuleFor(x => x.Email).NotEmpty().EmailAddress();
        RuleFor(x => x.Password).NotEmpty().MinimumLength(6);
    }
}

After the installation is complete, you will be able to define validation criteria for the models you generate.
Developing Validation Rules

Consider a straightforward registration form with fields such as username, email, and password. Create a validator class and an associated model to validate this form:

builder.Services.AddScoped<IValidator<UserRegistrationModel>, UserRegistrationValidator>(); // register validators

Including Validation in Controllers
You can now utilize the validator in your controller to validate the model.

[HttpPost]
  public IActionResult Register(UserRegistrationModel model)
  {
      var validator = new UserRegistrationValidator();
      var validationResult = validator.Validate(model);

      if (!validationResult.IsValid)
      {
          return BadRequest(validationResult.Errors);
      }

      // Process registration logic if the model is valid

      return Ok("Registration successful!");
  }

In this case, the Register action method validated the receiving UserRegistrationModel with UserRegistrationValidator. If the model is invalid, a BadRequest response containing the validation errors is returned.

Please test it with Postman to check that it is working properly. Please let me know if you require any assistance in setting up the test.

The validation appears to be working well now.

FluentValidation streamlines the data validation process in ASP.NET Core apps. Developers can design complicated validation rules in a legible and maintainable manner by providing a fluent and expressive API. You can ensure that your apps process user input accurately and securely by introducing FluentValidation into your ASP.NET Core projects, resulting in a more robust and dependable user experience.


European ASP.NET Core Hosting - HostForLIFE :: How to Create an ASP.NET Core Web API Using a Simple Design Pattern?

clock October 11, 2023 09:16 by author Peter

Implementing a complete solution with all of the details you've asked requires a substantial amount of code, and providing an exhaustive example here may not be possible. I can, however, provide a general layout and code snippets for each layer of the Clean Architecture in an ASP.NET Core Web API application using the Facade Pattern for a CarCompany CRUD transaction.
Layers of Architecture that are Clean

Web API (Presentation Layer)
HTTP requests are handled by controllers.
DTOs (Data Transfer Objects) are used to communicate.

// CarCompanyController.cs
[ApiController]
[Route("api/[controller]")]
public class CarCompanyController : ControllerBase
{
    private readonly ICarCompanyFacade _carCompanyFacade;

    public CarCompanyController(ICarCompanyFacade carCompanyFacade)
    {
        _carCompanyFacade = carCompanyFacade;
    }

    [HttpGet]
    public IActionResult GetAll()
    {
        var carCompanies = _carCompanyFacade.GetAllCarCompanies();
        return Ok(carCompanies);
    }

    [HttpGet("{id}")]
    public IActionResult GetById(int id)
    {
        var carCompany = _carCompanyFacade.GetCarCompanyById(id);
        return Ok(carCompany);
    }

    [HttpPost]
    public IActionResult Create([FromBody] CarCompanyDto carCompanyDto)
    {
        var createdCompany = _carCompanyFacade.CreateCarCompany(carCompanyDto);
        return CreatedAtAction(nameof(GetById), new { id = createdCompany.Id }, createdCompany);
    }

    [HttpPut("{id}")]
    public IActionResult Update(int id, [FromBody] CarCompanyDto carCompanyDto)
    {
        _carCompanyFacade.UpdateCarCompany(id, carCompanyDto);
        return NoContent();
    }

    [HttpDelete("{id}")]
    public IActionResult Delete(int id)
    {
        _carCompanyFacade.DeleteCarCompany(id);
        return NoContent();
    }
}

Application Layer

  • Interfaces for the Facade.
  • Implementation of the Facade.

// ICarCompanyFacade.cs
public interface ICarCompanyFacade
{
    IEnumerable<CarCompanyDto> GetAllCarCompanies();
    CarCompanyDto GetCarCompanyById(int id);
    CarCompanyDto CreateCarCompany(CarCompanyDto carCompanyDto);
    void UpdateCarCompany(int id, CarCompanyDto carCompanyDto);
    void DeleteCarCompany(int id);
}

// CarCompanyFacade.cs
public class CarCompanyFacade: ICarCompanyFacade
{
    private readonly ICarCompanyService _carCompanyService;

    public CarCompanyFacade(ICarCompanyService carCompanyService)
    {
        _carCompanyService = carCompanyService;
    }

    public IEnumerable<CarCompanyDto> GetAllCarCompanies()
    {
        try
        {
            var carCompanies = _carCompanyService.GetAllCarCompanies();
            return carCompanies.Select(MapToDto);
        }
        catch (Exception ex)
        {
            throw new ApplicationException("Error occurred while fetching car companies.", ex);
        }
    }

    public CarCompanyDto GetCarCompanyById(int id)
    {
        try
        {
            var carCompany = _carCompanyService.GetCarCompanyById(id);
            return carCompany != null ? MapToDto(carCompany) : null;
        }
        catch (Exception ex)
        {
            throw new ApplicationException($"Error occurred while fetching car company with Id {id}.", ex);
        }
    }

    public CarCompanyDto CreateCarCompany(CarCompanyDto carCompanyDto)
    {
        try
        {
            var newCompany = new CarCompany
            {
                Name = carCompanyDto.Name,
            };

            _carCompanyService.CreateCarCompany(newCompany);
            return MapToDto(newCompany);
        }
        catch (Exception ex)
        {
            throw new ApplicationException("Error occurred while creating a new car company.", ex);
        }
    }

    public void UpdateCarCompany(int id, CarCompanyDto carCompanyDto)
    {
        try
        {
            var existingCompany = _carCompanyService.GetCarCompanyById(id);

            if (existingCompany != null)
            {
                existingCompany.Name = carCompanyDto.Name;
                // Update other properties...

                _carCompanyService.UpdateCarCompany(existingCompany);
            }
            else
            {
                throw new KeyNotFoundException($"Car company with Id {id} not found.");
            }
        }
        catch (Exception ex)
        {
            throw new ApplicationException($"Error occurred while updating car company with Id {id}.", ex);
        }
    }

    public void DeleteCarCompany(int id)
    {
        try
        {
            var existingCompany = _carCompanyService.GetCarCompanyById(id);

            if (existingCompany != null)
            {
                _carCompanyService.DeleteCarCompany(existingCompany);
            }
            else
            {
                throw new KeyNotFoundException($"Car company with Id {id} not found.");
            }
        }
        catch (Exception ex)
        {
            throw new ApplicationException($"Error occurred while deleting car company with Id {id}.", ex);
        }
    }

    private CarCompanyDto MapToDto(CarCompany carCompany)
    {
        return new CarCompanyDto
        {
            Id = carCompany.Id,
            Name = carCompany.Name,
        };
    }
}


Domain Layer
Define the CarCompany entity.
// CarCompany.cs
public class CarCompany
{
    public int Id { get; set; }
    public string Name { get; set; }
}

Infrastructure Layer
Implement the repository, database context, and any other infrastructure concerns.
// CarCompanyDbContext.cs
public class CarCompanyDbContext: DbContext
{
    public DbSet<CarCompany> CarCompanies { get; set; }

    public CarCompanyDbContext(DbContextOptions<CarCompanyDbContext> options) : base(options)
    {
    }

    protected override void OnModelCreating(ModelBuilder modelBuilder)
    {
        // Configure entity properties, relationships, etc.
        modelBuilder.Entity<CarCompany>().HasKey(c => c.Id);
        modelBuilder.Entity<CarCompany>().Property(c => c.Name).IsRequired();
        // Configure other properties...

        // Seed initial data if needed
        modelBuilder.Entity<CarCompany>().HasData(
            new CarCompany { Id = 1, Name = "Company A" },
            new CarCompany { Id = 2, Name = "Company B" }
            // Add other seed data...
        );

        base.OnModelCreating(modelBuilder);
    }
}

// CarCompanyRepository.cs
public class CarCompanyRepository: ICarCompanyRepository
{
    private readonly CarCompanyDbContext _dbContext;

    public CarCompanyRepository(CarCompanyDbContext dbContext)
    {
        _dbContext = dbContext;
    }

    public IEnumerable<CarCompany> GetAll()
    {
        return _dbContext.CarCompanies.ToList();
    }

    public CarCompany GetById(int id)
    {
        return _dbContext.CarCompanies.Find(id);
    }

    public void Add(CarCompany carCompany)
    {
        _dbContext.CarCompanies.Add(carCompany);
        _dbContext.SaveChanges();
    }

    public void Update(CarCompany carCompany)
    {
        _dbContext.CarCompanies.Update(carCompany);
        _dbContext.SaveChanges();
    }

    public void Delete(int id)
    {
        var carCompany = _dbContext.CarCompanies.Find(id);
        if (carCompany != null)
        {
            _dbContext.CarCompanies.Remove(carCompany);
            _dbContext.SaveChanges();
        }
    }
}

// ICarCompanyRepository.cs
public interface ICarCompanyRepository
{
    IEnumerable<CarCompany> GetAll();
    CarCompany GetById(int id);
    void Add(CarCompany carCompany);
    void Update(CarCompany carCompany);
    void Delete(int id);
}


Dependency Injection
Register dependencies in Startup.cs.

public void ConfigureServices(IServiceCollection services)
{
    services.AddScoped<ICarCompanyRepository, CarCompanyRepository>();
    services.AddScoped<ICarCompanyService, CarCompanyService>();
    services.AddScoped<ICarCompanyFacade, CarCompanyFacade>();
}

The implementation follows Clean Architecture principles in an ASP.NET Core Web API application, using the Facade Pattern to encapsulate the complexity of the CarCompany CRUD activities. The presentation layer, represented by the CarCompanyController, is in charge of handling HTTP requests, whilst the application layer introduces the ICarCompanyFacade interface and its implementation, CarCompanyFacade, which is in charge of orchestrating interactions with the underlying services. The CarCompany object is defined in the domain layer, containing the fundamental business logic, while the infrastructure layer handles data access via the CarCompanyRepository and database context. The Startup.cs file uses dependency injection to connect the various components. This structured method improves maintainability, scalability, and testability, allowing for simple system extension and modification in accordance with Clean Architecture principles. As a starting point, and further improvements can be developed based on unique project requirements.

HostForLIFE ASP.NET Core Hosting

European best, cheap and reliable ASP.NET hosting with instant activation. HostForLIFE.eu is #1 Recommended Windows and ASP.NET hosting in European Continent. With 99.99% Uptime Guaranteed of Relibility, Stability and Performace. HostForLIFE.eu security team is constantly monitoring the entire network for unusual behaviour. We deliver hosting solution including Shared hosting, Cloud hosting, Reseller hosting, Dedicated Servers, and IT as Service for companies of all size.


European ASP.NET Core Hosting - HostForLIFE :: In ASP.NET Core, use AddTransient and AddScoped for Repository Registration

clock October 5, 2023 07:57 by author Peter

Microsoft's open-source web framework, ASP.NET Core, provides developers with a versatile and modular platform for developing high-performance web applications. One of the most important components of ASP.NET Core application development is effectively managing dependencies. AddTransient and AddScoped are two often used techniques for registering services in the world of dependency injection, particularly when working with repositories. Choosing between these strategies can have a major impact on your application's behavior and performance. This detailed guide seeks to clarify the distinctions between AddTransient and AddScoped in order to assist developers in making educated decisions when registering repositories in ASP.NET Core apps.

Understanding ASP.NET Core Dependency Injection
DI is a design pattern that encourages loose coupling between components of an application by allowing one object to satisfy the dependencies of another. DI is a critical method in ASP.NET Core for controlling object instantiation and lifespan.

AddTransient: Short-lived Instances
AddTransient is used to register services that are created each time they are requested. In the context of repository registration, this means a new instance of the repository is created every time it is injected into a component such as a controller or a service. Transient services are suitable for lightweight, stateless services or repositories that don’t store any client-specific data.

services.AddTransient<IRepository, Repository>();

AddScoped: Scoped Instances

In contrast, AddScoped generates a single instance of the service for each scope. Each HTTP request generates a scope in the context of web applications. This means that all components sharing the same scoped instance of a service will use the same instance of that service within a single HTTP request. Scoped services are useful for stateful components such as database contexts or repositories that require state to be maintained across several areas of the application within a single request.

services.AddScoped<IRepository, Repository>();

Selecting AddTransient vs. AddScoped

The decision between AddTransient and AddScoped comes down to the desired behavior of your repositories:

When should you use AddTransient?

Statelessness is essential: Using AddTransient is useful if your repository is stateless and does not save any data between method calls. Each method call is assigned a repository instance.
Transient services are appropriate for lightweight operations when the expense of producing a new instance is small in comparison to the benefits of having a fresh instance each time.

Use AddScoped When:
Stateful Operations: If your repository or service maintains state throughout the duration of an HTTP request, using AddScoped ensures that all parts of your application that need the repository within the same request share the same instance.
Database Contexts: When dealing with Entity Framework Core’s DbContext, using AddScoped is crucial. DbContext instances should typically be scoped to the lifetime of a request to ensure data consistency and proper unit of work pattern.

Performance and Memory Usage Considerations
AddTransient is often faster in terms of performance because it does not use tracking scopes. However, in most situations, the difference may be minimal, and the ease and safety afforded by AddScoped frequently outweigh any minor performance improvements.

In terms of memory utilization, AddTransient can cause a greater number of instances to be created, thereby straining memory resources, particularly in high-traffic applications. AddScoped can improve memory usage by reusing instances inside the scope of a request.

The choice between AddTransient and AddScoped for repository registration in ASP.NET Core is determined by your application's individual requirements and characteristics. Understanding the fundamental distinctions and consequences of these technologies is critical for developing efficient, high-performance, and maintainable online applications. You can ensure that your services and repositories operate as intended by selecting the proper lifespan method, resulting in a seamless user experience and optimal resource use.

HostForLIFE ASP.NET Core Hosting

European best, cheap and reliable ASP.NET hosting with instant activation. HostForLIFE.eu is #1 Recommended Windows and ASP.NET hosting in European Continent. With 99.99% Uptime Guaranteed of Relibility, Stability and Performace. HostForLIFE.eu security team is constantly monitoring the entire network for unusual behaviour. We deliver hosting solution including Shared hosting, Cloud hosting, Reseller hosting, Dedicated Servers, and IT as Service for companies of all size.


About HostForLIFE

HostForLIFE is European Windows Hosting Provider which focuses on Windows Platform only. We deliver on-demand hosting solutions including Shared hosting, Reseller Hosting, Cloud Hosting, Dedicated Servers, and IT as a Service for companies of all sizes.

We have offered the latest Windows 2019 Hosting, ASP.NET 5 Hosting, ASP.NET MVC 6 Hosting and SQL 2019 Hosting.


Month List

Tag cloud

Sign in