Windows Identity Foundation 4.5 (WIF) is a framework for building identity-aware and more specifically claims-aware applications. It furthermore provides an abstraction to the underlying protocols (ex: WS-Trust, WS-Federation, etc …) and therefore encapsulates and standardizes application security.
Developers do not need to know how to exactly implement and use those protocols anymore. Instead they may use API calls to the WIF Toolkit for implementing secure applications, thus resulting in applications which are loosely coupled to their security implementations. Tokens issued from a large scale of different security providers (including ADFS 2.0, ACS and custom Security Token Services) can be handled.

The default configuration and behavior works great and with ease you will be able to implement it in no time. But the best of all : the WIF Toolkit is highly customizable. You may completely override and customize the default behavior on some or on all the step of the process (Protocol Module, Session Module, Claims Authorization Module, Token, STS, etc..).
WIF in its first version (1.0) is available as a runtime and as an external SDK for .NET 3.5 and .NET 4.0. You have to install it separately for being able to using it in your applications. The WIF Training Kit contains everything necessary to start with claims based security (explication, tutorials, examples, etc…).
WIF 4.5 and .NET 4.5
So what’s new in WIF 4.5 ? Well first of all WIF is now part of the .NET framework. You do not need to install it manually anymore. It is shipped and installed with .NET 4.5, which means that it is now an integral part of the framework ! Most of the classes and methods are now part of Mscorlib.dll !
Also it is now much easier and straightforward use WIF and to query for claims. Let me show this in the following example.
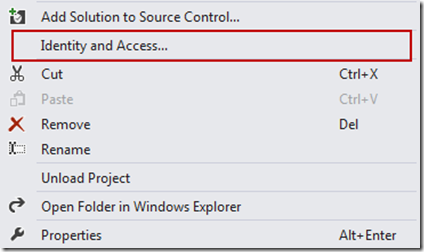
Create a new web application, right click on your project in the Solution Explorer and select "Identity and Access…” from the list.
You will see a new configuration wizard, which will guide you through the process of setting up a STS reference. You may either use a development STS, a business provider based on ADFS2 or Windows Azure Access Control Service (ACS).
For the example I use the development STS :

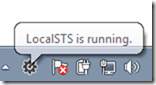
You may now run your web application and the development STS gets started automatically. When you see the little icon in the tray area you know that everything working correctly.
Now lets see how to query for a claim by using the ClaimsPrincipal in the System.Security.Claims namespace and calling its FindFirst(…) method.
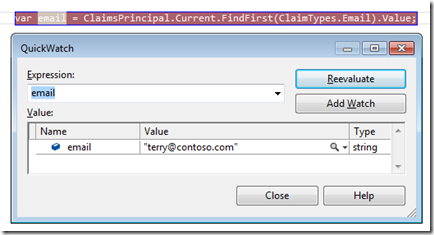
Where you had to write at least 3 lines of code and do casting operations in WIF 1.0, you now have everything in a single line ! Much easier to implement, to understand, to maintain and also to extend !
Note that there are a variety of other utility methods to aid you in working with claims (FindAll, FindFirst, HasClaim, etc…) and that you have access to almost everything just by using the ClaimsPrincipal.
Another improvement is the seamless integration of WCF 4.5 and WIF 4.5. You now can use both together much more easily. Custom service host factories or federation behaviors are not needed anymore. This can be achieved via the useIdentityConfiguration switch.
WIF 4.5 and WebFarms
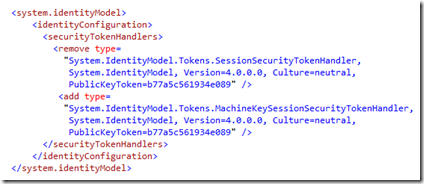
Great news for all developers using WIF in a WebFarms environment. With .NET 4.5 it is finally possible to use WIF without implementing complicated and time consuming workarounds to encrypt your WIF cookies with a single encryption key.
You just configure a new MachineSessionSecurityHandler by setting it in your Web.config file and it will work without any further changes ! This has even been added to the wizard as a checkbox! How easy is that compared to the old way of resolving this problem !
WIF 4.5 and Windows Server 2012
Windows Server 2012 Domain Controllers are going to support the claims based model and provide extra claims via Kerberos (User Claims and Device Claims), which you may then query for within your WIF 4.5 implementations. This is actually a quite interesting feature.
WIF 4.5 and Visual Studio 2012
The integration of WIF tools has been completely re-designed, as you saw in my quick example above. This has been done to simplify the whole process and to render it much more comprehensive. So it is now easier to understand with less steps and quicker configuration.
As you saw above the new tools contain a local development STS which simulates a real STS (comparable to the development fabric within the Windows Azure SDK). The development STS is by the way completely configurable (Token format, port, test claims, etc..).
Furthermore, the WIF 4.5 tools and all samples are now distributed as VSIX via the Visual Studio Extensions Gallery.
Conclusion
As you can see WIF 4.5 has been greatly enhanced and industrialized. It will become the the primary choice when working with application security. Come on and give it at try, test all these new features by downloading the Windows Identity Foundation Tools for Visual Studio 2012 RC.