European ASP.NET 4.5 Hosting BLOG

BLOG about ASP.NET 4, ASP.NET 4.5 Hosting and Its Technology - Dedicated to European Windows Hosting Customer

European ASP.NET Core Hosting :: ASP.NET Core - Middleware

clock July 8, 2022 07:39 by author Peter

Middleware is a newly introduced concept in asp.net core. I have split this topic into two parts. In the first part we will cover,

    HTTP Request Pipeline
    What is Middleware?
    How to configure Middleware
    Run() Method
    Use() Method
    Next() Method
    Map() Method

This article can be used by beginners, intermediates, and professionals.

Before we start with Middleware, we should have a good understanding of the HTTP Pipeline hence we will discuss the HTTP pipeline first and then move to Middleware.
HTTP Request Pipeline

Let’s say, we have an MVC application, and we got a request from the browser.

Please see the below diagram for the HTTP request pipeline of the above scenario.


As per the above diagram, the flow of the execution would be,

    The browser sent a request to the HTTP request pipeline.
    HTTP pipeline will execute.
    Once HTTP pipeline execution will be completed, the request goes to the MVC application.
    MVC Application executes the request and sends the response back to the HTTP Request pipeline -> Browser.

Now we will discuss Middleware.
What is Middleware?

Middleware is a core functionality of Asp.net Core. It is nothing but a class or component that will execute on each request.

If you worked on Asp.net before, you might be aware of HTTPhandler and HTTPModular which were part of the HTTP Request Pipeline. Middleware is like that only in the Asp.net Core HTTP request pipeline.

Let’s see the below image to get a better understanding of Middleware.

As we can see in the above diagram, There will be multiple middlewares in the asp.net core application and each middleware will be called one after the others in the pre-defined sequence. Please note that the order of the middleware matters a lot in the HTTP pipeline execution.

Each middleware will complete the task before and after the next middleware in the pipeline. It will also decide whether to pass the request to the next middleware or not.

We can have multiple middlewares in Asp.net Core Applications and it can be added through
    NuGet packages
    Custom Middleware – Project/Application specific.

How to configure Middleware
Middleware can be configured using Run(),Use() and Map() extension Methods.
Let's discuss the below code before we start a discussion on middleware,
public void Configure(IApplicationBuilder app, IWebHostEnvironment env) {
    if (env.IsDevelopment()) {
        app.UseDeveloperExceptionPage();
    } else {
        app.UseExceptionHandler("/Home/Error");
        // The default HSTS value is 30 days. You may want to change this for production scenarios, see https://aka.ms/aspnetcore-hsts.
        app.UseHsts();
    }
    app.UseHttpsRedirection();
    app.UseStaticFiles();
    app.UseRouting();
    app.UseAuthorization();
    app.UseEndpoints(endpoints => {
        endpoints.MapControllerRoute(name: "default", pattern: "{controller=Home}/{action=Index}/{id?}");
    });
}


We have created the Asp.net core MVC application. Open StartUp.cs file -> Configure method.
Now we will add new middleware in the above code,
In Asp.Net core 5.0, we can configure middleware in the configure method of the startup class using IApplicationBuilder and Run/Use/Map extension methods.
In Asp.Net core 6.0, We don’t have to configure the method hence we can add the same middleware code after the builder.build() method.

We have used Asp.net core 5.0 in the below example,
public void Configure(IApplicationBuilder app, IWebHostEnvironment env) {
    app.Run(async (context) => {
        await context.Response.WriteAsync("Hello world!");
    });
    if (env.IsDevelopment()) {
        app.UseDeveloperExceptionPage();
    } else {
        app.UseExceptionHandler("/Home/Error");
        // The default HSTS value is 30 days. You may want to change this for production scenarios, see https://aka.ms/aspnetcore-hsts.
        app.UseHsts();
    }
    app.UseHttpsRedirection();
    app.UseStaticFiles();
    app.UseRouting();
    app.UseAuthorization();
    app.UseEndpoints(endpoints => {
        endpoints.MapControllerRoute(name: "default", pattern: "{controller=Home}/{action=Index}/{id?}");
    });
}


In the above code, we have created simple Middleware using the Run() method. We will execute the code and see the output,

Output

You must notice that only the first middleware executes, and is then completed, other middlewares are not executed after the first middleware. This happened because we have used the Run () extension method to add middleware in the pipeline.

Let's discuss extension methods to configure middleware in the Request Pipelines.

Run() Method
Run() method is used to complete the middleware execution.

Syntax

using Microsoft.AspNetCore.Http;
namespace Microsoft.AspNetCore.Builder {
    //
    // Summary:
    //     Extension methods for adding terminal middleware.
    public static class RunExtensions {
        //
        // Summary:
        //     Adds a terminal middleware delegate to the application's request pipeline.
        //
        // Parameters:
        //   app:
        //     The Microsoft.AspNetCore.Builder.IApplicationBuilder instance.
        //
        //   handler:
        //     A delegate that handles the request.
        public static void Run(this IApplicationBuilder app, RequestDelegate handler);
    }
}

We have used the same method to create middleware in the last example.

Use() Method
Use() method is used to insert a new middleware in the pipeline.

Syntax
using Microsoft.AspNetCore.Http;
using System;
using System.Threading.Tasks;
namespace Microsoft.AspNetCore.Builder {
    //
    // Summary:
    //     Extension methods for adding middleware.
    public static class UseExtensions {
        //
        // Summary:
        //     Adds a middleware delegate defined in-line to the application's request pipeline.
        //
        // Parameters:
        //   app:
        //     The Microsoft.AspNetCore.Builder.IApplicationBuilder instance.
        //
        //   middleware:
        //     A function that handles the request or calls the given next function.
        //
        // Returns:
        //     The Microsoft.AspNetCore.Builder.IApplicationBuilder instance.
        public static IApplicationBuilder Use(this IApplicationBuilder app, Func < HttpContext, Func < Task > , Task > middleware);
    }
}


Let's see the below code to get a better understanding,
public void Configure(IApplicationBuilder app, IWebHostEnvironment env) {
    app.Use(async (context, next) => {
        await context.Response.WriteAsync("Hello World From 1st Middleware!");
    });
    if (env.IsDevelopment()) {
        app.UseDeveloperExceptionPage();
    } else {
        app.UseExceptionHandler("/Home/Error");
        // The default HSTS value is 30 days. You may want to change this for production scenarios, see https://aka.ms/aspnetcore-hsts.
        app.UseHsts();
    }
    app.UseHttpsRedirection();
    app.UseStaticFiles();
    app.UseRouting();
    app.UseAuthorization();
    app.UseEndpoints(endpoints => {
        endpoints.MapControllerRoute(name: "default", pattern: "{controller=Home}/{action=Index}/{id?}");
    });
}


Output

Next Method
The next () method is used to pass the execution to the next middleware.

We will use the next method to call the next middleware. We will add one more middleware in the previous example and call the next method.

Let’s see the below code of the same,
public void Configure(IApplicationBuilder app, IWebHostEnvironment env) {
    app.Use(async (context, next) => {
        await context.Response.WriteAsync("Hello World From 1st Middleware!");
        await next();
    });
    app.Run(async (context) => {
        await context.Response.WriteAsync("Hello World From 2st Middleware!");
    });
    if (env.IsDevelopment()) {
        app.UseDeveloperExceptionPage();
    } else {
        app.UseExceptionHandler("/Home/Error");
        // The default HSTS value is 30 days. You may want to change this for production scenarios, see https://aka.ms/aspnetcore-hsts.
        app.UseHsts();
    }
    app.UseHttpsRedirection();
    app.UseStaticFiles();
    app.UseRouting();
    app.UseAuthorization();
    app.UseEndpoints(endpoints => {
        endpoints.MapControllerRoute(name: "default", pattern: "{controller=Home}/{action=Index}/{id?}");
    });
}


You might notice the Next() method in the middleware. This method is responsible to invoke the next middleware component from the current Middleware.

public void Configure(IApplicationBuilder app, IWebHostEnvironment env) {
    app.Use(async (context, next) => {
        await context.Response.WriteAsync("Hello World From 1st Middleware!");
        await next();
    });
    app.Run(async (context) => {
        await context.Response.WriteAsync("Hello World From 2st Middleware!");
    });
    if (env.IsDevelopment()) {
        app.UseDeveloperExceptionPage();
    } else {
        app.UseExceptionHandler("/Home/Error");
        // The default HSTS value is 30 days. You may want to change this for production scenarios, see https://aka.ms/aspnetcore-hsts.
        app.UseHsts();
    }
    app.UseHttpsRedirection();
    app.UseStaticFiles();
    app.UseRouting();
    app.UseAuthorization();
    app.UseEndpoints(endpoints => {
        endpoints.MapControllerRoute(name: "default", pattern: "{controller=Home}/{action=Index}/{id?}");
    });
}


Output


As we have used the next method hence both middlewares is called.
Map()

Map() method is used to map the middleware to a specific URL

Syntex
using Microsoft.AspNetCore.Http;
using System;
namespace Microsoft.AspNetCore.Builder {
    //
    // Summary:
    //     Extension methods for the Microsoft.AspNetCore.Builder.Extensions.MapMiddleware.
    public static class MapExtensions {
        //
        // Summary:
        //     Branches the request pipeline based on matches of the given request path. If
        //     the request path starts with the given path, the branch is executed.
        //
        // Parameters:
        //   app:
        //     The Microsoft.AspNetCore.Builder.IApplicationBuilder instance.
        //
        //   pathMatch:
        //     The request path to match.
        //
        //   configuration:
        //     The branch to take for positive path matches.
        //
        // Returns:
        //     The Microsoft.AspNetCore.Builder.IApplicationBuilder instance.
        public static IApplicationBuilder Map(this IApplicationBuilder app, PathString pathMatch, Action < IApplicationBuilder > configuration);
        //
        // Summary:
        //     Branches the request pipeline based on matches of the given request path. If
        //     the request path starts with the given path, the branch is executed.
        //
        // Parameters:
        //   app:
        //     The Microsoft.AspNetCore.Builder.IApplicationBuilder instance.
        //
        //   pathMatch:
        //     The request path to match.
        //
        //   preserveMatchedPathSegment:
        //     if false, matched path would be removed from Request.Path and added to Request.PathBase.
        //
        //   configuration:
        //     The branch to take for positive path matches.
        //
        // Returns:
        //     The Microsoft.AspNetCore.Builder.IApplicationBuilder instance.
        public static IApplicationBuilder Map(this IApplicationBuilder app, PathString pathMatch, bool preserveMatchedPathSegment, Action < IApplicationBuilder > configuration);
    }
}

Let's discuss the below example for more understanding of the Map extension method.
public void Configure(IApplicationBuilder app, IWebHostEnvironment env) {
    app.Map("/testMap", testExample);
    if (env.IsDevelopment()) {
        app.UseDeveloperExceptionPage();
    } else {
        app.UseExceptionHandler("/Home/Error");
        // The default HSTS value is 30 days. You may want to change this for production scenarios, see https://aka.ms/aspnetcore-hsts.
        app.UseHsts();
    }
    app.UseHttpsRedirection();
    app.UseStaticFiles();
    app.UseRouting();
    app.UseAuthorization();
    app.UseEndpoints(endpoints => {
        endpoints.MapControllerRoute(name: "default", pattern: "{controller=Home}/{action=Index}/{id?}");
    });
}
private void testExample(IApplicationBuilder app) {
    app.Run(async (context) => {
        await context.Response.WriteAsync("\n" + "Hello World From TestExample!");
    });
}


In the above example,
    app.map method, “/testMap” is a path and the second parameter (“testExample”) is a function name.
    Once you will pass “testMap in the requested path, it will try to match and call the testExample function in case of matching.

Output

That’s all for this article. We will discuss this more in the next article.


European ASP.NET Core Hosting :: Working With ASP.NET 6 IDistributedCache Provider For NCache

clock July 7, 2022 09:52 by author Peter

Key Takeaways
    NCache is an open-source distributed in-memory cache developed natively in .NET and .NET Core that helps such applications to process fast and scale out with ease.
    Caching is a proven technique used to hold and readily use frequently accessed data.
    This article presents a discussion and implementation of how we can work with NCache IDistributedCache provider using .NET 6.

Introduction

In this post, we'll look at how to implement distributed caching in ASP.NET Core using NCache as the cache provider. A cache is a type of high-speed memory that applications use to store frequently accessed data. It reduces the unnecessary database hits since the data being requested is readily available in the cache. Caching is a well-known approach for boosting application performance.

What is distributed caching
A distributed cache is a cache that is shared by several app servers and is frequently managed as a separate service from the app servers that use it.

A distributed cache can go beyond the memory restrictions of a single computer by connecting multiple computers, which is known as a distributed architecture or a distributed cluster, for increased capacity and processing power.

An ASP.NET Core project's efficiency and scalability can be improved by using a distributed cache, especially if the application is hosted by a cloud service or a server farm. In high-data-volume and high-load applications, distributed caches are extremely useful. The distributed design allows for gradual expansion and scalability by adding more computers to the cluster, allowing the cache to expand in sync with the data growth.

The advantages of distributed cache are:
    Cached data is consistent across all web servers. The user gets the same results regardless of which web server serves their request.
    Web server restarts and deployments do not affect cached data. Individual web servers can be added or removed with no effect on the cache.
    Doesn't use local memory.

What is NCache?
NCache is a free, open-source distributed in-memory cache written in.NET and.NET Core. NCache is a distributed cache that saves application data while avoiding costly database trips. It's lightning-fast and linearly scalable. NCache can be utilized to reduce performance constraints caused by data storage and databases, as well as to enable your.NET Core applications to manage high-volume transaction processing (XTP). It can be used both locally and as a distributed cache cluster for ASP.NET Core apps hosted on Azure or other platforms.

Distributed Caching in ASP.NET Core
Using the IDistributedCache interface provided by dotnetcore, we can connect our ASP.NET Core apps to any distributed cache cluster and utilize it for caching as needed. Almost all major cache providers provide implementations for IDistributedCache, which we can register in the IoC container using IServiceCollection.

IDistributedCache Interface
This is the interface required to access the distributed cache objects, which includes synchronous and asynchronous methods. Items can be added, retrieved, and removed from the distributed cache implementation using this interface.

To perform actions on the actual cache, the IDistributedCache Interface provides the following methods.
    Get, GetAsync: Takes a string key and retrieves the cached item from the cache server if found.
    Set, SetAsync: Add items to the cache using a string key.
    Refresh, RefreshAsync: Resets the sliding expiry timeout of an item in the cache based on its key (if any).
    Remove, RemoveAsync: Deletes the cache data based on the key.

Connecting to an NCache cache
First, we need to install NCache on our machine. You can find a step-by-step tutorial on how to set up NCache on your windows machine here.

Once, the setup is complete, we are ready to use the NCache server in our .NET 6 app.  Let's create a .NET 6 project to learn the caching operations with NCache.

First, let's install the following NuGet package:

Install-Package NCache.Microsoft.Extensions.Caching.

This package uses NCache to implement the IDistributedCache interface.

We need to add the cache to the ASP.NET dependencies container in the Program.cs file after installing the NuGet package.
// Program.cs
using Alachisoft.NCache.Caching.Distributed;
var builder = WebApplication.CreateBuilder(args);
builder.Services.AddControllers();
// Add NCache implementation here...
builder.Services.AddNCacheDistributedCache(configuration => {
    configuration.CacheName = "myClusteredCache";
    configuration.EnableLogs = true;
    configuration.ExceptionsEnabled = true;
});
builder.Services.AddEndpointsApiExplorer();
builder.Services.AddSwaggerGen();
var app = builder.Build();
if (app.Environment.IsDevelopment()) {
    app.UseSwagger();
    app.UseSwaggerUI();
}
app.UseHttpsRedirection();
app.UseAuthorization();
app.MapControllers();
app.Run();


We can also configure the cache settings in the appsettings.json file. To achieve this, we can use another overload of the same method.
builder.Services.AddNCacheDistributedCache(Configuration.GetSection("NCacheSettings"));

// appsettings.josn
{
    "NCacheSettings": {
        "CacheName": "myClusteredCache",
        "EnableLogs": true,
        "EnableDetailLogs": false,
        "ExceptionsEnabled": true,
        "OperationRetry": 0,
        "operationRetryInterval": 0
    }
}

So far, we've finished the connectivity part. We have our NCache server running on our machine with a cluster cache named myClusterCache. A cluster cache with the name demoCache is created automatically when you install NCache on your machine. Learn about how to create a cluster cache manually here.

Let's create a new extension generic method that will make our life a bit easier to get or set records from the cache server. It contains two methods: SetRecordAsync, which stores the data in the cache, and GetRecordAsync, which retrieves the data. In the DistributedCacheEntryOptions, we can pass configuration values. This determines how long the items will be stored in the cache.

public static class DistributedCacheExtensions {
    public static async Task SetRecordAsync < T > (this IDistributedCache cache, string recordId, T data, TimeSpan ? absoluteExpireTime = null, TimeSpan ? unusedExpireTime = null) {
        var options = new DistributedCacheEntryOptions {
            AbsoluteExpirationRelativeToNow = absoluteExpireTime ?? TimeSpan.FromSeconds(60),
                SlidingExpiration = unusedExpireTime
        };
        var jsonData = JsonSerializer.Serialize(data);
        await cache.SetStringAsync(recordId, jsonData, options);
    }
    public static async Task < T > GetRecordAsync < T > (this IDistributedCache cache, string recordId) {
        var jsonData = await cache.GetStringAsync(recordId);
        if (jsonData is null) {
            return default (T);
        }
        return JsonSerializer.Deserialize < T > (jsonData);
    }
}


AbsoluteExpirationRelativeToNow
This method gets or sets an absolute expiry time relative to the current date and time.

SetSlidingExpiration

This works in the same way as Absolute Expiration. If it is not requested for a specified duration of time, the cache will expire. It is important to note that Sliding Expiration should always be set lower than absolute expiration.

Now, let's inject IDistributedCache into the StudentController to access the configured cache.
using DistributedCache_NCache.Extensions;
using DistributedCache_NCache.Models;
using DistributedCache_NCache.Services;
using Microsoft.AspNetCore.Mvc;
using Microsoft.Extensions.Caching.Distributed;
namespace DistributedCache_NCache.Controllers {
    [Route("api/[controller]")]
    [ApiController]
    public class StudentController: ControllerBase {
        private readonly IStudent < Student > _studentService;
        private readonly IDistributedCache _cache;
        public StudentController(IStudent < Student > studentService, IDistributedCache cache) {
                _studentService = studentService;
                _cache = cache;
            }
            [HttpGet]
        public async Task < IActionResult > Get() {
            string cacheKey = "StudentList_" + DateTime.Now.ToString("yyyyMMdd_hhmm");
            var student = await _cache.GetRecordAsync < List < Student >> (cacheKey);
            if (student is null) {
                student = (List < Student > ) await _studentService.ListAllAsync();
                await _cache.SetRecordAsync(cacheKey, student);
            }
            return Ok(student);
        }
    }
}

In the above snippet, we set the cache key first, so that when we call the method, it checks if the data is present with that cache key in the cache server. If the data is present, then it returns the data from the cache otherwise, it fetches the data from the database, set the data to the cache, and then returns the data.

The second time when we call this method again, the data will be returned from the cache without hitting the database and the response will be much faster.

Let's test our implementation via postman now. Run the application and hit the endpoint "/api/student".

The below screenshot shows that the request took 2.78 seconds for the response.

When I hit the endpoint for the second time, the data is returned from the cache, as it was added to the cache server on the first call. This is a cache hit and the response time is much faster compared to the first call.


The cache hit can also be seen on the NCache Web Manager portal, which allows us to keep track of the cache cluster's health and traffic in real-time.

Caching is a proven technique used to hold and readily use frequently accessed data. This has excellent benefits, as we can save the expensive database trips and increase the response time significantly and save a lot of resources and money.

While in-memory caching provides a decent start, distributed caching takes things a step further and is best suited to distributed systems and cloud-native solutions.

Along with Redis, Memcached, and other popular caching solutions, NCache is one of the most popular. It includes features like real-time cluster management, Pub/Sub design pattern, and a large library for ASP.NET Core integration.


European ASP.NET Core Hosting :: What Is .NET MAUI?

clock July 5, 2022 09:05 by author Peter

.NET MAUI is one of the latest additions to Microsoft's .NET ecosystem. If you are new to .NET MAUI, this artilce is for you. Here you will learn what .NET MAUI is and why Microsoft actually developed .NET MAUI. MAUI stands for Multi-platform App UI that is a UI framework to build UI applications using C#, .NET, and XAML. .NET MAUI can be used to build apps for Windows, MacOS, Web, and Mobile (iOS, Android). That means, you can develop one project and deploy that on multiple platfforms that will work on various devices including Desktops, Mac, laptops, tablets, and smartphones.

When I think of the .NET ecosystem, one phrase comes to mind: Code Re-use. It's amazing how much we can do within one .NET codebase, and this is especially true with the introduction of .NET Core, and technologies like Xamarin (and subsequently Xamarin.Forms).

These days, people switch between many devices throughout the day in order to stay maximally productive. It's becoming increasingly important that the applications we write are accessible, regardless of the devices our users are in front of. This point makes the web very powerful, and there are many pros to writing your application for the web browser. But, when we do this, we lose out on the native platform controls and performance offered to us by the OS vendors, making the application relatively unnatural to use, and to look at.

Xamarin.Forms to the rescue!
Xamarin Native (e.g. Xamarin.Android) abstracts away the underlying platform API, allowing us to use the fantastic .NET platform to write native applications on different devices. Xamarin.Forms takes this a step further, allowing us to write one UI for multiple platforms. We write the UI once, and this UI will then be translated to the appropriate native controls for each device.
.NET 5 and 6

Microsoft's goal with .NET 5 is to begin to unify all the various scattered technologies we know and love within .NET. The goal is to bring together technologies such as .NET Core, Mono, and Xamarin into one unified ecosystem. With .NET 6, this unifying will only continue further, with the introduction of .NET MAUI.

What is MAUI?

MAUI stands for Multi-platform App UI, which is a UI framework in .NET 6 for making Windows, iOS, Android, and macOS applications with one project, one codebase. It is an evolution over Xamarin.Forms and takes code reusability to the next level. Instead of having separate projects to target indiviual platforms, we will only need a single project, and we can just choose which platform we want to deploy on (whether it be emulators or physical devices.)

This is even more powerful than it might seem at first. Resources and assets such as fonts, images, etc will only need to be included once within the one project, and .NET MAUI will take care binding these assets to each platform.


Of course, just like in Xamarin, we will have access to the underlying native platform APIs if we need to open the hood and do some platform-specfic work. In fact, in .NET MAUI, this process will be even easier and more streamlined.

.NET 6 is all about developer productivity. Part of this productivity means not being locked-in to any individual architectural patterns you might not be comfortable with. Developers in .NET MAUI can choose to use the traditionally-accepted MVVM architectural pattern for writing multi-platform UIs, or the MVU (Model-View-Update) pattern which is a code-first UI experience.

The key benefits of .NET MAUI include:

  • C# and .NET developers can build all kinds of apps using a single programming language and framework. No need to learn different programming languages, frameworks, and libraries. Same code is compiled into libraries to target Windows, macOS, iOS, and Android. This is big for tech teams. They don't need to learn different programming languages and frameworks.
  • Businesses don’t need to hire multiple teams for different platforms. Also, no need to maintain multiple technologies and teams. The cost of hiring and maintain different tech stack teams are often costly. Imagine a startup launching a website and mobile apps for iOS and Android. The startup needs to maintain three different teams with different tech stacks.

What about my Xamarin projects?
In .NET MAUI, we will be using the same XAML controls we know and love from Xamarin.Forms, and Microsoft intends to make the migration process from Xamarin.Forms to MAUI as easy as possible. They will provide migration guides as well as tooling to convert your existing projects.
Sounds great, but what will happen to Xamarin?

Xamarin Native technologies (Xamarin.iOS, Xamarin.Android) are bindings to the native platform technologies offered by the OS vendors. This concept is fundamental to Xamarin.Forms, and .NET MAUI. These technologies will continue to exist, but will be merged into .NET 6 as first-class citizens. (".NET for Android" and ".NET for iOS")

After the release of .NET 6, the Xamarin team will release final versions of the Xamarin SDKs as they exist today, and continue servicing these SDKs and Xamarin.Forms for a year. After that, support will be shifted entirely to .NET MAUI, .NET for Android, and .NET for iOS.
Conclusion

I am very excited about .NET MAUI and all the productivity it will bring. The Idea of integrating Xamarin.Forms as a first-class technology in .NET makes sense, and I look forward to watching this technology come to life.

Thanks for reading! Feedback is always welcome.

HostForLIFE.eu ASP.NET Core Hosting

European best, cheap and reliable ASP.NET hosting with instant activation. HostForLIFE.eu is #1 Recommended Windows and ASP.NET hosting in European Continent. With 99.99% Uptime Guaranteed of Relibility, Stability and Performace. HostForLIFE.eu security team is constantly monitoring the entire network for unusual behaviour. We deliver hosting solution including Shared hosting, Cloud hosting, Reseller hosting, Dedicated Servers, and IT as Service for companies of all size.


European ASP.NET Core Hosting :: Getting Started With Unit Testing With NUnit In .Net Core

clock July 4, 2022 08:24 by author Peter

What is Unit Testing?
Unit testing is a type of Software Testing in which the smallest isolated individual piece of code is tested. This testing aims to validate each unit so that the software works as expected. Unit testing is done during the development phase of the software by the software developers. Tests that rely on external systems are not unit tests. Unit tests help to identify and fix the bugs in the development phase.

There are several Unit Testing frameworks available that can be used for Unit testing like MSTest, NUnit, xUnit, etc. A test suite is the collection of tests and a unit test runner is a program that verifies tests and reports the test results.

What is Test-Driven Development (TDD)?

Test-Driven Development is a development methodology in which a Test case is written before writing the actual piece of code. This methodology is also known as the “Red-Green-Refactor” approach. In this approach, First, the test case fails (red), then get the test case to Pass (Green) and then optimize the code (Refactor).
How to set up a unit test project with NUnit?

For demonstration, I am using Visual Studio 2019 and already have a class library project using .Net Core. Below is the structure of the Project.
And the code which is written in Calculate.cs is shown in the below image.

And the code which is written in Calculate.cs is shown in the below image.


In the above code, we have a method named as addTwoNumber which will add and return the result as the response. Now let’s add a Class Library project for writing the NUnit Test cases.


Install NUnit, NUnit3TestAdapter, and Microsoft.NET.Test.Sdk in Calculator.Test project from the Nuget Package Manager.


Now add the Calculator Class Library’s project reference in the Unit Test Project.

In the Unit Test project, add a class CalculateTest. Use the [TestFixture] attribute on CalculateTest class which denotes that the class contains the unit tests. [Test] attribute indicates that method is a test method. In the checkAddTwoNumber() method, I created an object of Calculate class and Assert the expected and actual value using the AreEqual() method.


Open Test Explorer through the Test menu as shown in the below image.


In case the expected and actual values matched then the test case is passed and shown with a green tick symbol.

In case the test case is failed then the message and the stack trace details will help to find the issue.


HostForLIFE.eu ASP.NET Core Hosting

European best, cheap and reliable ASP.NET hosting with instant activation. HostForLIFE.eu is #1 Recommended Windows and ASP.NET hosting in European Continent. With 99.99% Uptime Guaranteed of Relibility, Stability and Performace. HostForLIFE.eu security team is constantly monitoring the entire network for unusual behaviour. We deliver hosting solution including Shared hosting, Cloud hosting, Reseller hosting, Dedicated Servers, and IT as Service for companies of all size.


European ASP.NET SignalR Hosting - HostForLIFE :: SignalR Error: Failed To Complete Negotiation With The Server

clock June 30, 2022 09:13 by author Peter

I was working on ASP.NET Core SignalR client application to receive the message from the SignalR hub. This is the scenario where my SignalR server and client were two separate .NET Core applications. In the client application, I got the below error message while trying to receive the message from SignalR Hub(server). This error may arise and the solution is almost similar for both cases using SignalR Javascript client and .NET Client.

Exact Error Message: “Error: Failed to complete negotiation with the server: Error: Not Found: Status code ‘404’ Either this is not a SignalR endpoint or there is a proxy blocking the connection.”

Below is my earlier code:
var connection = new signalR.HubConnectionBuilder().withUrl("http://localhost:39823/event-hub)

Then to resolve the above error I found that we need to add the below code in HubConnectionBuilder.

skipNegotiation: true,
transport: signalR.HttpTransportType.WebSockets

Note that: The negotiation should be skipped only when the transport property is set to ‘signalR.HttpTransportType.WebSockets‘.

Solution
Below is the previous code with which I got an error.
var connection = new signalR.HubConnectionBuilder().withUrl("http://localhost:4023/yourevent)

Complete code to resolve the issue.

var connection = new signalR.HubConnectionBuilder().withUrl("http://localhost:4023/yourevent", {
    skipNegotiation: true,
    transport: signalR.HttpTransportType.WebSockets
})

Note: This solution is applicable for both cases either using the SignalR .NET client or SignalR JavaScript client.

I hope you have got an idea of how to resolve this error.


European ASP.NET Core Hosting :: Calling a Power Automate flow from .NET

clock June 28, 2022 07:49 by author Peter

In this tutorial, we will learn how to call a Power Automate flow from .NET, using an HTTP post. For this purpose, we will use an example to send an email.

This is the flow created in Power Automate:

Power Automate Flow

1. .NET Development
In the first instance, we must refer to the endpoint of our Power Automate flow:

private string uri = "HTTP POST URL";

Then we can define a method in a service for example to be able to call it from somewhere in our application, and this will receive as parameters the username, toAddress, and the emailSubject. The idea with this method is to be able to prepare the request for the HTTP post, and that the Power Automate flow can be triggered:

public async Task SendEmailAsync(string username, string toAddress, string emailSubject)
{
    try
    {
        HttpClient client = new HttpClient();
        client.BaseAddress = new Uri(uri);
        client.DefaultRequestHeaders.Accept.Clear();
        client.DefaultRequestHeaders.Accept.Add(new MediaTypeWithQualityHeaderValue("application/json"));

        HttpRequestMessage request = new HttpRequestMessage(HttpMethod.Post, client.BaseAddress);
        var body = $"{{\"emailAddress\": \"{toAddress}\",\"emailSubject\":\"{emailSubject}\",\"userName\":\"{username}\"}}";
        var content = new StringContent(body, Encoding.UTF8, "application/json");
        request.Content = content;
        var response = await MakeRequestAsync(request, client);
        Console.WriteLine(response);

    }
    catch (Exception e)
    {
        Console.WriteLine(e.Message);
        throw new Exception();
    }
}

Finally, we can count on an additional method to be able to perform the HTTP post request, according to the previously established request:

public async Task<string> MakeRequestAsync(HttpRequestMessage getRequest, HttpClient client)
{
    var response = await client.SendAsync(getRequest).ConfigureAwait(false);
    var responseString = string.Empty;
    try
    {
        response.EnsureSuccessStatusCode();
        responseString = await response.Content.ReadAsStringAsync().ConfigureAwait(false);
    }
    catch (HttpRequestException)
    {
        // empty responseString
    }

    return responseString;
}

2. Test the code in a web app with ASP.NET
To perform the tests, let's see an example in a web application from ASP.NET that calls this deployed Power Automate service, when a user is added from a form, and notified by email with this flow:

await new PowerAutomateService().SendEmailAsync(student.FirstName, student.Email, "Greetings from ASP.NET / DotVVM web application.");


Thanks for reading.
I hope you liked the article. If you have any questions or ideas in mind, it'll be a pleasure to be able to communicate with you and together exchange knowledge with each other.


HostForLIFE.eu ASP.NET Core Hosting

European best, cheap and reliable ASP.NET hosting with instant activation. HostForLIFE.eu is #1 Recommended Windows and ASP.NET hosting in European Continent. With 99.99% Uptime Guaranteed of Relibility, Stability and Performace. HostForLIFE.eu security team is constantly monitoring the entire network for unusual behaviour. We deliver hosting solution including Shared hosting, Cloud hosting, Reseller hosting, Dedicated Servers, and IT as Service for companies of all size.


European ASP.NET Core Hosting :: Blazor Server vs. Blazor Web Assembly

clock June 27, 2022 09:04 by author Peter

What is Blazor?
Blazor is a UI framework, it allows developers to design and develop interactive rich UI components with C#, HTML, CSS, plus it is open sourced and free. So technically now you can create web pages directly in C# instead of JavaScript.

Blazor web application is nothing but a collection of web pages or to be precise razor pages, then each razor page will host bunch of blazor components and get this, this blazor web application could run on both server or on client. Isn't that cool?

In traditional architecture, server is designed with high level languages such as Java, C# and client is dominated by dynamic programming language such as javascript, now with blazor you can design both your server and client application in C#.
What is Blazor Server?

Have a look at the image below, you'd notice there is a server present somewhere on cloud or in office premises and it is communicating with a browser with something called SignalR. You can learn more about signalR here, but let me explain with a simple example.

    You might have played online games, those games run on a client machine or on a client browser but the data is coming from the server. So if you kill 3 enemies the counter is stored on the server, the moment you kill the 4th enemy counter increases to 4, that communication between server and client is so fast the user can hardly notice any lag. And this is enabled by SignalR in the blazor server app. So for every user interaction on browser signalR sends UI components and data from server to browser and then browser simply renders those changes.

In Blazor server app, UI components (razor components) are stored on the server. Every UI updates, event calls are handled by SignalR which sends the updated data/component to the browser on demand. In order to run app smoothly browser need to have consistent connection with server. The browser has script, blazor.server.js which establishes the SignalR connection with the server.

Perks of using Blazor server app:

    Size: Application that runs on the browser is smaller in size as it is requested from the server and since the browser doesn't have to deal with the entire application at once it is faster.
    loosely coupled architecture: With the support of server, you can now create a thin client app. Here the server communicates with the browser for all of the client's needs. This loosely coupled architecture is easy to scale the application. But it has its disadvantages as well.

Disadvantages:

    Latency: Every time a user interacts with the browser, the browser sends a request to the server and the UI component reacts based on the server's response. Human eye wouldn't catch the latency as SignalR performs high-frequency updates at a faster pace but you'll observe the delay when you'd have to bind 1 million rows fetched from the server to bind to the data grid.
    Active connection to server: If connection is lost then the communication to the server is lost. now you're no longer able to run the application.

What is Blazor Assembly A.K.A. Blazor WASM?

WebAssembly is nothing but compact bytecode feeded to the browser.

Blazor webAssembly executes UI components directly from the client side with the help of .Net runtime. Blazor-WASM works same way as any other UI frameworks Angular or React but instead of JavaScript it uses C#. Blazor-WASM allows browsers to download the application so you run it directly from the browser. Meaning DLLs are loaded into the browser.

In 3 simple steps let's understand what is happening in the image below.
    You can develop code in C#, HTML, CSS which is encapsulated in razor files which get compiled by .NET assemblies.
     When you run the Blazor-WASM, .NET runtime and these compiled assemblies are downloaded into the browser.
    Now .NET runtime uses JavaScript interop to handle DOM manipulation to render the logical structure of razor components.
     

Advantages

  • Can work offline: As there is no server dependency, the client can work without being dependent on the server. so it doesn't matter if you lose the connection with the server.

Disadvantages

  • Size of app: The more complex your application gets, the bigger the size of application will be, it's gonna take a toll on performance of the app. However there is a solution to this disadvantage. You don't need to load entire app's dll's to the browser at once you can load as they requested. This is where component based architecture helps.

I hope this clears the confusion once and for all.


European ASP.NET Core Hosting :: Why We Need To Move From .NET 5.0 To .NET 6.0 ?

clock June 20, 2022 08:52 by author Peter

Before starting the article, I would like to share with you all that after a small break I have come back to write articles and I hope all my upcoming articles will be interesting and useful for all my readers. After this .NET 6.0 intro article, I plan to publish a series of .NET 6.0 and Angular articles.

 In this article, we will see why we need to move our existing projects from .NET 5.0 to .NET 6.0 also for all our new projects why we need to start with .NET 6.0 instead of .NET 5.0.

In March 2022 Microsoft announced as from May 10 2022 Microsoft will stop all the support which also includes security support and technical support. Check this article for more details from the official Microsoft announcement https://devblogs.microsoft.com/dotnet/dotnet-5-end-of-support-update/.

Microsoft also stated in the above blog that the existing users can still run the .NET 5.0 for their current project but at the same time if the users need any security support or technical support then it's not possible after May 10, 2022.

Do we need to move or start with .NET 6.0?

Yes, we need to migrate from .NET 5.0 to .NET 6.0.

The main reason why I recommend this is that, more than technical support, Microsoft is also stopping the security support of .NET 5.0. Security support is more important than technical support as in the future if we found any vulnerability in .NET 5.0 then Microsoft can not support on any security issues. Considering the security and technical support it is good and advisable to migrate or create all our future projects from .NET 5.0 projects to .NET 6.0

In this article, we will see in detail about getting start with .NET 6.0 by installing the Visual Studio 2022.

Visual Studio 2022
If you have not yet installed Visual Studio 2022 then you can download the Visual studio 2022 from this link  and install it on your computer.

Download and install the Visual Studio 2022.

Note: The Community version is free for all and you can download the community version if you don’t have the Installation Key. If you have the Installation key or have the MSDN subscription then you can download the Professional or Enterprise version. As a Microsoft MVP, I have the MSDN subscription and I have installed the Professional version.

Getting started with .NET 6.0
.NET 6.0 has more advantages than working with the .NET 5.0 as .NET 6.0 has more improvement on the performance which also includes some major advantage as it has intelligent code editing and also it is called the fastest full-stack web framework. The .NET 6.0 also provides better performance in the File Stream.

We will see a demo on creating console application in .NET 6.0 and also, we will see what advantage the Console application has in .NET 6.0 with an example of intelligent code editing.

Create .NET 6.0 Console Application
After installing all the prerequisites listed above and clicking Start >> Programs >> Visual Studio 2022 >> Visual Studio 2022 on your desktop. Click New >> Project.


Click on Console App and Click Next

Enter your project name and click Next.


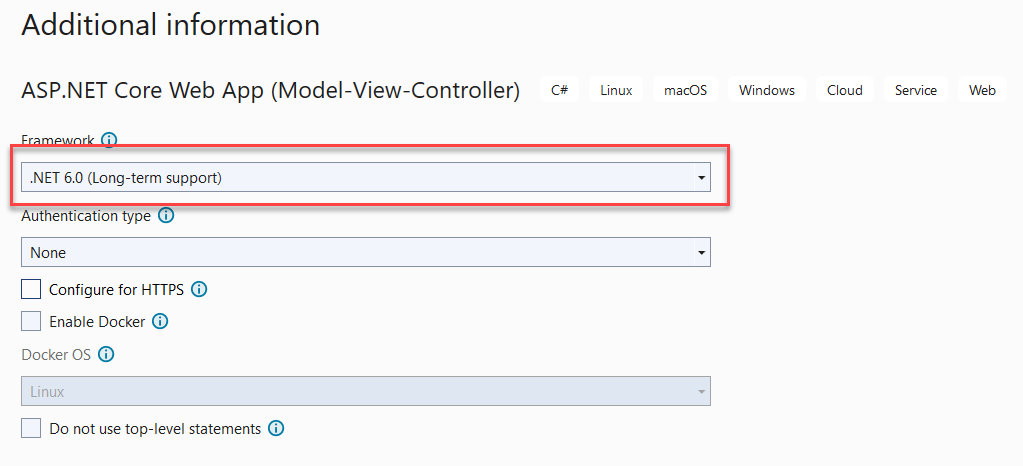
Now we can see the Framework is .NET 6.0(Long term support). Click on the Create button to create our first .NET 6.0 Console application.


When we create the new console application, we can see very simple code in our program.cs file.

.NET 5.0 and previous versions of .NET
In the .NET 5.0 and previous versions for any console application, we can see the main method, class, namespace, and the using header files. Without any of the below code the program cannot be executed.

.NET 6.0 Console Application
We can see that there is no main method, class, and using headers in the program.cs file. But don’t panic, yes now in the .NET 6.0 the codes are made simpler and the intelligent code supports seem to be more advanced and now it’s easier and reduces the time on working our codes and projects.
Top-Level statements

This is called the Top-Level statements as the main method is not needed from the C# 9. The main aim of the Top-Level statement is to reduce the code and improve the performance. The main method and the class will be created by the compiler as we don't need to write separate code for it.

After the Top-Level statements introduced from C# 9.0 now, it seems easier for programming and easy to learn C#. Yes, now it seems like Small Basic programming and it makes it easier for the programmers to get started and work on codes.

When we run the program or press the F5 button from the application, we can see the .NET 6.0 can run without any errors even though the main method is missing

.NET 6.0 Intelligent Code Editing
In the same application, I will add the code to get the name and display the name in command prompt. For this, I have declared the string as myname and using the Console.ReadLine() method the input from the user and display the results.

You can see when I enter the Console and press the Tab the code is automatically generated and also the intelligent code has automatically added the string as myname to be displayed. This reduces the coders workload 😊, also I'm happy to work with Intelligent Code editing as it's also fun to work with the codes.


When we run the program and enter the name in command prompt and press enter.

Working with Simple Methods in .NET 6.0
Here we will see two ways of creating the functions in .NET 6.0 as in the first method for all the single like statements its more easy to follow the method format with the  => codes and for all the multiple statements we can use the {} brackets as we do earlier.

I hope this article helps you to understand why we need to migrate or started working with .NET 6.0. Also explained a few basic advantages of .NET 6.0. As I mentioned in this article mainly for the security updates and concerns we need to move from .NET 5.0 to .NET 6.0.

HostForLIFE.eu ASP.NET Core Hosting

European best, cheap and reliable ASP.NET hosting with instant activation. HostForLIFE.eu is #1 Recommended Windows and ASP.NET hosting in European Continent. With 99.99% Uptime Guaranteed of Relibility, Stability and Performace. HostForLIFE.eu security team is constantly monitoring the entire network for unusual behaviour. We deliver hosting solution including Shared hosting, Cloud hosting, Reseller hosting, Dedicated Servers, and IT as Service for companies of all size.


European ASP.NET Core Hosting :: Restful API In .NET Core Using EF Core And Postgres

clock June 14, 2022 09:05 by author Peter

REST API is an application programming interface which can be used by multiple clients(or APPS) to communicate with a server. Rest API is a kind of web-service which stores and retrieves necessary data for your application in a convenient format (e.g. JSON or XML). It provides great flexibility to developers since it does not need any dependent code libraries to access the web-services as it is stateless.Amongst the many protocols supported by REST, the most common one is HTTP.

When a request is sent from the client using a HTTPRequest, a corresponding response is sent from the server using HTTPResponse. The most widely used machine readable format supported for requests and responses are JSON (Javascript Object Notification) and XML (Extensible Markup Language).

REST was created by computer scientist ROY FIELDING.
REST APIs can be used to perform different actions. Based on the actions, the relevant method should be used. The following are the 5 methods supported by REST.

  1. GET - This method is used to retrieve a data from database / server.
  2. POST - This method is used to create a new record.
  3. PUT - This method is used to modify / replace the record. It replaces the entire record.
  4. PATCH - This method is used to modify / update the record. It replaces parts of the record.
  5. DELETE - This method is used to delete the record.
Let us see this with an example. We know that mothers never get enough rest. But lets take these rest-less mommies as an example and see how they use Rest API. :)
Amongst the excessive demands by a newborn baby, diapering takes the first place on the leader board.

A mother wants everything best for the baby. So, it's obvious that the mother would want to choose the best diaper for her baby. So, she goes to a shopping website(assume: flipkart) and searches for diapers. This will send a HTTP Request to flipkart’s server to GET the list of all diapers. Flipkart’s server responds with a HTTP Response which will be a JSON object(assume) containing a list of diapers with some basic details. Flipkart’s website reads this Response and converts to human readable format and displays it on the webpage for the mother to see it.

After she chooses a particular diaper for her newborn baby and adds it to her list. This creates a POST request where a new record is created in flipkart’s database containing the diaper brand, size, quantity, price etc.

Her baby keeps growing and soon outgrows the newborn size. Suppose, the mother still likes the diaper brand and just wants to size up, all she has to do is just choose the new diaper size. When she updates the diaper size from size newborn to size 1, this triggers a PATCH method where everything else remains the same and only the size of the diaper is changed.

It is very common for the mother to change the current brand and decide to switch to an alternate the brand. Here, the mother will initiate a PUT request where the entire data containing previously chosen brand is modified and replaced with data corresponding to the newly chosen brand.

Finally, after a series of experiments involving several GETs, POSTs, PUTs and PATCHs, it's time for the mother to potty train the child. If she succeeds in training the child, then the diapers will no longer be required. This triggers a DELETE request.

PREREQUISITES
    Visual studio 2022
    .Net Core 6 : ASP.NET Core is a new version of ASP.NET, developed by Microsoft. It is an open-source framework for developing web applications and API's and it can be run on Windows, Mac, or Linux. Asp.Net Core is a cross platform, high-performance, open-source framework for building modern, cloud-based, internet-connected applications.
    Entity Framework core: Entity Framework (EF) Core is a lightweight, extensible, open source and cross-platform version of the popular Entity Framework data access technology.
    Postgres Database : PostgreSQL is a powerful, open source object-relational database system with over 30 years of active development that has earned it a strong reputation for reliability, feature robustness, and performance.

API CREATIONS STEPS
Step 1
Open Visual studio 2022 and create asp.net core webapi project.

Step 2
Install Npgsql.EntityFrameworkCore.PostgreSQL & Microsoft.EntityFrameworkCore.Tools from Nuget

Step 3
Create Product.cs and Order.cs
using System.ComponentModel.DataAnnotations;
using System.ComponentModel.DataAnnotations.Schema;
[Table("product")]
public class Product {
    [Key, Required]
    public int id {
        get;
        set;
    }
    [Required]
    public string ? name {
        get;
        set;
    }
    public string ? brand {
        get;
        set;
    }
    public string ? size {
        get;
        set;
    }
    public decimal price {
        get;
        set;
    }
    public virtual ICollection < Order > orders {
        get;
        set;
    }
}

using System.ComponentModel.DataAnnotations;
using System.ComponentModel.DataAnnotations.Schema;
[Table("order")]
public class Order {
    [Key, Required]
    public int id {
        get;
        set;
    }
    public int product_id {
        get;
        set;
    }
    [Required]
    public string ? name {
        get;
        set;
    }
    public string ? address {
        get;
        set;
    }
    public string ? phone {
        get;
        set;
    }
    public DateTime createdon {
        get;
        set;
    }
    public virtual Product product {
        get;
        set;
    }
}

Step 4
Create EF_DataContext inherited from DbContext class
using Microsoft.EntityFrameworkCore;
public class EF_DataContext: DbContext {
    public EF_DataContext(DbContextOptions < EF_DataContext > options): base(options) {}
    protected override void OnModelCreating(ModelBuilder modelBuilder) {
        modelBuilder.UseSerialColumns();
    }
    public DbSet <Product> Products {
        get;
        set;
    }
    public DbSet <Order> Orders {
        get;
        set;
    }
}


Step 5
Open appsetting.json
"ConnectionStrings": {
    "Ef_Postgres_Db": "Server=localhost;Database=shopingpostgres;Port=5432;User Id=postgres;Password=qwerty1234;"
}

Step 6
Open Program.cs

builder.Services.AddDbContext < EF_DataContext > (o => o.UseNpgsql(builder.Configuration.GetConnectionString("Ef_Postgres_Db")));

Step 7
Run the 2 commands
Add-Migration InitialDatabase
Update-Database

Step 8
Create the API Product and Order Models that will be used for API communication
public class Product {
    public int id {
        get;
        set;
    }
    public string ? name {
        get;
        set;
    }
    public string ? brand {
        get;
        set;
    }
    public string ? size {
        get;
        set;
    }
    public decimal price {
        get;
        set;
    }
}

public class Order {
    public int id {
        get;
        set;
    }
    public int product_id {
        get;
        set;
    }
    public string ? name {
        get;
        set;
    }
    public string ? address {
        get;
        set;
    }
    public string ? phone {
        get;
        set;
    }
    public DateTime createdon {
        get;
        set;
    }
    public virtual Product product {
        get;
        set;
    }
}


Step 9
Add the DBhelper class that will talk to your database
using ShoppingWebApi.EfCore;
namespace ShoppingWebApi.Model {
    public class DbHelper {
        private EF_DataContext _context;
        public DbHelper(EF_DataContext context) {
            _context = context;
        }
        /// <summary>
        /// GET
        /// </summary>
        /// <returns></returns>
        public List < ProductModel > GetProducts() {
            List < ProductModel > response = new List < ProductModel > ();
            var dataList = _context.Products.ToList();
            dataList.ForEach(row => response.Add(new ProductModel() {
                brand = row.brand,
                    id = row.id,
                    name = row.name,
                    price = row.price,
                    size = row.size
            }));
            return response;
        }
        public ProductModel GetProductById(int id) {
            ProductModel response = new ProductModel();
            var row = _context.Products.Where(d => d.id.Equals(id)).FirstOrDefault();
            return new ProductModel() {
                brand = row.brand,
                    id = row.id,
                    name = row.name,
                    price = row.price,
                    size = row.size
            };
        }
        /// <summary>
        /// It serves the POST/PUT/PATCH
        /// </summary>
        public void SaveOrder(OrderModel orderModel) {
            Order dbTable = new Order();
            if (orderModel.id > 0) {
                //PUT
                dbTable = _context.Orders.Where(d => d.id.Equals(orderModel.id)).FirstOrDefault();
                if (dbTable != null) {
                    dbTable.phone = orderModel.phone;
                    dbTable.address = orderModel.address;
                }
            } else {
                //POST
                dbTable.phone = orderModel.phone;
                dbTable.address = orderModel.address;
                dbTable.name = orderModel.name;
                dbTable.Product = _context.Products.Where(f => f.id.Equals(orderModel.product_id)).FirstOrDefault();
                _context.Orders.Add(dbTable);
            }
            _context.SaveChanges();
        }
        /// <summary>
        /// DELETE
        /// </summary>
        /// <param name="id"></param>
        public void DeleteOrder(int id) {
            var order = _context.Orders.Where(d => d.id.Equals(id)).FirstOrDefault();
            if (order != null) {
                _context.Orders.Remove(order);
                _context.SaveChanges();
            }
        }
    }
}


Step 10
Create your Api Controller name it as ShoppingRestApi
using Microsoft.AspNetCore.Mvc;
using ShoppingWebApi.EfCore;
using ShoppingWebApi.Model;
// For more information on enabling Web API for empty projects, visit https://go.microsoft.com/fwlink/?LinkID=397860
namespace ShoppingWebApi.Controllers {
    [ApiController]
    public class ShoppingApiController: ControllerBase {
        private readonly DbHelper _db;
        public ShoppingApiController(EF_DataContext eF_DataContext) {
            _db = new DbHelper(eF_DataContext);
        }
        // GET: api/<ShoppingApiController>
        [HttpGet]
        [Route("api/[controller]/GetProducts")]
        public IActionResult Get() {
            ResponseType type = ResponseType.Success;
            try {
                IEnumerable < ProductModel > data = _db.GetProducts();
                if (!data.Any()) {
                    type = ResponseType.NotFound;
                }
                return Ok(ResponseHandler.GetAppResponse(type, data));
            } catch (Exception ex) {
                return BadRequest(ResponseHandler.GetExceptionResponse(ex));
            }
        }
        // GET api/<ShoppingApiController>/5
        [HttpGet]
        [Route("api/[controller]/GetProductById/{id}")]
        public IActionResult Get(int id) {
            ResponseType type = ResponseType.Success;
            try {
                ProductModel data = _db.GetProductById(id);
                if (data == null) {
                    type = ResponseType.NotFound;
                }
                return Ok(ResponseHandler.GetAppResponse(type, data));
            } catch (Exception ex) {
                return BadRequest(ResponseHandler.GetExceptionResponse(ex));
            }
        }
        // POST api/<ShoppingApiController>
        [HttpPost]
        [Route("api/[controller]/SaveOrder")]
        public IActionResult Post([FromBody] OrderModel model) {
            try {
                ResponseType type = ResponseType.Success;
                _db.SaveOrder(model);
                return Ok(ResponseHandler.GetAppResponse(type, model));
            } catch (Exception ex) {
                return BadRequest(ResponseHandler.GetExceptionResponse(ex));
            }
        }
        // PUT api/<ShoppingApiController>/5
        [HttpPut]
        [Route("api/[controller]/UpdateOrder")]
        public IActionResult Put([FromBody] OrderModel model) {
            try {
                ResponseType type = ResponseType.Success;
                _db.SaveOrder(model);
                return Ok(ResponseHandler.GetAppResponse(type, model));
            } catch (Exception ex) {
                return BadRequest(ResponseHandler.GetExceptionResponse(ex));
            }
        }
        // DELETE api/<ShoppingApiController>/5
        [HttpDelete]
        [Route("api/[controller]/DeleteOrder/{id}")]
        public IActionResult Delete(int id) {
            try {
                ResponseType type = ResponseType.Success;
                _db.DeleteOrder(id);
                return Ok(ResponseHandler.GetAppResponse(type, "Delete Successfully"));
            } catch (Exception ex) {
                return BadRequest(ResponseHandler.GetExceptionResponse(ex));
            }
        }
    }
}


Step 11
Add the response model and response handler that will handle your API responses
namespace ShoppingWebApi.Model {
    public class ApiResponse {
        public string Code {
            get;
            set;
        }
        public string Message {
            get;
            set;
        }
        public object ? ResponseData {
            get;
            set;
        }
    }
    public enum ResponseType {
        Success,
        NotFound,
        Failure
    }
}


Now test the API's using POSTMAN as shown is video.

HostForLIFE.eu ASP.NET Core Hosting

European best, cheap and reliable ASP.NET hosting with instant activation. HostForLIFE.eu is #1 Recommended Windows and ASP.NET hosting in European Continent. With 99.99% Uptime Guaranteed of Relibility, Stability and Performace. HostForLIFE.eu security team is constantly monitoring the entire network for unusual behaviour. We deliver hosting solution including Shared hosting, Cloud hosting, Reseller hosting, Dedicated Servers, and IT as Service for companies of all size.


European ASP.NET Core Hosting :: Caching In Entity Framework Core Using NCache

clock June 13, 2022 08:33 by author Peter

It will be explained in this article how to integrate Entity Framework Core with a caching engine using NCache. The article will give a practical example of how we could set up our Entity Framework Core in a Console application and how to make use of NCache to make faster requests to the database with its native in-memory distributed cache.

What is Entity Framework Core?

Entity Framework Core is Microsoft's most recent ORM - Object Relational Mapper, that helps software applications map, connect, and manage entities to a wide range of databases. Entity Framework Core is open source and cross-platform, being the top 1 ORM used by software using Microsoft technologies.

At the moment of writing this article, Entity Framework Core offers two ways to connect your entities to the database:

Code First, writing your project's entities first and then reflecting those objects in the database;
Database First, have your database created first and then generate your project's entities.

What is NCache?
NCache is also open-source and cross-platform software. Its cache server offers a scalable in-memory distributed cache for .NET, Java, Scala, Python, and Node.js. As this article will be focusing on .NET technologies, we can use NCache to take advantage of the following usages:

  • ASP.NET session state storage;
  • ASP.NET view state caching;
  • ASP.NET output cache;
  • Entity Framework cache;
  • NHibernate second-level cache.

NCache with Entity Framework Core
We can add a layer of cache between the Entity Framework Core and our application with NCache, this would improve our queries response time and reduce the necessity of round trips to the database as far as we would get data from NCache cached entities.

Caching Options

NCache gives the possibility to have a different set of options to be sent from each request, meaning that we can use the cache differently based on the result set that we are working with in order to be more efficient.

As we are going to see in the practical samples, we must provide the cache options on each request to NCache and those options are the following:
AbsoluteExpirationTime, sets the absolute time when the cached item will expire;
    Data type: Datetime
CreateDbDependency, creates or not a database dependency from the result set;
    Data type: boolean
ExpirationType, sets the expiration type:
    Absolute,
    Sliding,
    None.
IsSyncEnabled, sets if the expired items must be re-synced with the database.
    Data type: boolean
Priority, sets the relative priority of items stored in the cache.
    Normal,
    Low,
    BelowNormal,
    AboveNormal,
    High,
    NotRemovable,
    Default
QueryIdentifier, result set identifier.
    Data type: string.
ReadThruProvider, sets the read thru provider for cache sync
    Data type: string
SlidingExpirationTime, sets the sliding expiration time
    Data type: TimeSpan
StoreAs, sets how the items are to be stored.
    Collection
    SeperateEntities

Deferred Calls
NCache has its own extension methods for us to work with Entity Framework Core deferred calls and they are in 3 different groups:

Aggregate Operators, making operations against collections. Can be used with both FromCache and FromCacheOnly methods.
    DeferredAverage.
        Products.Select(o => o.UnitPrice).DeferredAverage()
    DeferredCount
        Customers.Select(c => c.Country).GroupBy(c => c).DeferredCount()
    DeferredMin
        Orders.Where(o => o.CustomerId == "VINET").Select(o => o.RequiredDate).DeferredMin()
    DeferredMax
        Orders.Select(o => o.RequiredDate).DeferredMax()
    DeferredSum
        OrderDetails.Select(o => o.UnitPrice).DeferredSum()
Element Operators, making operations for single elements. Can be used only with the FromCache method.
    DeferredElementAtOrDefault
        Customers.DeferredElementAtOrDefault(c => c.City == "London")
    DeferredFirst
        Customers.DeferredFirst(c => c.ContactTitle == "Sales Representative")
    DeferredFirstOrDefault
        Customers.DeferredFirstOrDefault(c => c.ContactTitle == "Sales Representative")
    DeferredLast
        Customers.DeferredLast(c => c.City == "London")
    DeferredLastOrDefault
        Customers.DeferredLastOrDefault(c => c.City == "London")
    DeferredSingle
        Customers.DeferredSingle(c => c.CustomerId == "ALFKI")
    DeferredSingleOrDefault
        Customers.DeferredSingleOrDefault(c => c.CustomerId == "ANATR")
Others. Can be used only with the FromCache method.
    DeferredAll
        Products.DeferredAll(expression)
    DeferredLongCount
        Products.DeferredLongCount()
    DeferredContains
        Products.DeferredContains(new Products { ProductId = 1 })

Caching Methods

NCache's methods to manipulate cached objects:

Insert
Insert a single object in the cache with its own options. Returns the cache key
var customerEntity = new Customers
{
   CustomerId = "HANIH",
   ContactName = "Hanih Moos",
   ContactTitle = "Sales Representative ",
   CompanyName = "Blauer See Delikatessen"
};

//Add customer entity to database
database.Customers.Add(customerEntity);
database.SaveChanges();

//Caching options for cache
var options = new CachingOptions
{
   QueryIdentifier = "CustomerEntity",
   Priority = Runtime.CacheItemPriority.Default,
};

//Add customer entity to cache
Cache cache = database.GetCache();

cache.Insert(customerEntity, out string cacheKey, options);


Remove (object Entity)
Remove a single object from the cache.
var cust = new Customers
{
  CustomerId = "PETER",
  ContactName = "Peter Scott",
  ContactTitle = "Sales Representative",
  CompanyName = "Hostforlife"
};

cache.Remove(cust);


Remove (string cacheKey)
Remove an object by passing its cache key
cache.Remove("cacheKey");

RemoveByQueryIdentifier
Remove all entities from the cache which match the query identifier
Tag tag = new Tag(queryIdentifier);
cache.RemoveByQueryIdentifier(tag);


Caching using NCache extension methods
NCache's Extension methods for Entity Framework Core

Gets the cache instance.
using (var context = new NorthwindContext())
{
Cache cache = context.GetCache();
}


FromCache
If there is cached data, then it will be returned without going through the data source. If there is no data cached, then data will be returned from the data source and cached.
var options = new CachingOptions
{
StoreAs = StoreAs.SeperateEntities
};

var resultSet = (from cust in context.Customers
             where cust.CustomerId == 10
             select cust).FromCache(options);


Returning the cacheKey from the result set
var options = new CachingOptions
{
StoreAs = StoreAs.Collection
};

var resultSet = (from cust in context.Customers
            where cust.CustomerId == 10
            select cust).FromCache(out string cacheKey, options);


LoadIntoCache
Every request goes first to the data source, caches its result set, and returns it.
var options = new CachingOptions
{
    StoreAs = StoreAs.SeperateEntities
};

var resultSet = (from custOrder in context.Orders
                 where custOrder.Customer.CustomerId == 10
                 select custOrder)).LoadIntoCache(options);

Returning the cache key from the result set
var options = new CachingOptions
{
StoreAs = StoreAs.Collection
};

var resultSet = (from custOrder in context.Orders
             where custOrder.Customer.CustomerId == 10
             select custOrder)).LoadIntoCache(out string cacheKey, options);


FromCacheOnly
Never goes to the data source. The request is only going to the cache, if no matching result is cached, then it will be returned as an empty result set.
Includes and joins are not supported by FromCacheOnly().
var resultSet = (from cust in context.Customers
             where cust.CustomerId == someCustomerId
             select cust).FromCacheOnly();


NCache Implementation Step by Step
0. Pre-Requisites

Have NCache running on your machine. Access your NCache through http://localhost:8251/

1. The application
Create a C# console application targeting .NET 6.0 and install the following nugets packages:
    EntityFrameworkCore.NCache
    Microsoft.EntityFrameworkCore.SqlServer
    Microsoft.EntityFrameworkCore.SqlServer.Design
    Microsoft.EntityFrameworkCore.Tools
    System.Data.SqlClient
    System.Collections
The following NCache files will be inserted into your project after installing the Nuget Packages.
    client.ncconf
    config.ncconf
    tls.ncconf


2. Models
For this sample, it was created a very simple model relationship, as follows:
Product
[Serializable]
public class Product
{
public int Id { get; set; }
public string Name { get; set; }
public double Price { get; set; }
public List<Transaction> Transactions { get; set; }
public Store Store { get; set; }
public int? StoreId { get; set; }
}


Store
[Serializable]
public class Store
{
public int Id { get; set; }
public string Name { get; set; }
public string Location { get; set; }
public ICollection<Product> AvailableProducts { get; set; }
public ICollection<Consumer> RegularConsumers { get; set; }
}


Consumer
[Serializable]
public class Consumer
{
public int Id { get; set; }
public string Name { get; set; }
public Store FavouriteStore { get; set; }
public int? FavouriteStoreId { get; set; }
public List<Transaction> Transactions { get; set; }
}

Transaction
[Serializable]
public class Transaction
{
 public int Id { get; set; }

 public Consumer Consumer { get; set; }
 public int ConsumerId { get; set; }

 public Product Product { get; set; }
 public int ProductId { get; set; }
}

DBContext
The DBContext class has NCache initialization settings and the model's relationship.

public class SampleDbContext : DbContext
{
protected override void OnConfiguring(DbContextOptionsBuilder optionsBuilder)
{
    // configure cache with SQLServer DependencyType and CacheInitParams
    CacheConnectionOptions initParams = new CacheConnectionOptions();
    initParams.RetryInterval = new TimeSpan(0, 0, 5);
    initParams.ConnectionRetries = 2;
    initParams.ConnectionTimeout = new TimeSpan(0, 0, 5);
    initParams.AppName = "appName";
    initParams.CommandRetries = 2;
    initParams.CommandRetryInterval = new TimeSpan(0, 0, 5);
    initParams.Mode = IsolationLevel.Default;

    NCacheConfiguration.Configure("democache", DependencyType.SqlServer, initParams);

    optionsBuilder.UseSqlServer(@"Data Source=DESKTOP-AT3H2E;Initial Catalog=sampleDatabase;Integrated Security=True");
}

protected override void OnModelCreating(ModelBuilder modelBuilder)
{
    modelBuilder.Entity<Store>()
        .HasMany(x => x.AvailableProducts)
        .WithOne(x => x.Store)
        .HasForeignKey(x => x.StoreId)
        .IsRequired(false)
        .OnDelete(DeleteBehavior.NoAction);

    modelBuilder.Entity<Store>()
        .HasMany(x => x.RegularConsumers)
        .WithOne(x => x.FavouriteStore)
        .HasForeignKey(x => x.FavouriteStoreId)
        .IsRequired(false)
        .OnDelete(DeleteBehavior.NoAction);

    modelBuilder.Entity<Transaction>()
        .HasOne(x => x.Consumer)
        .WithMany(x => x.Transactions)
        .HasForeignKey(x => x.ConsumerId)
        .IsRequired(false);

    modelBuilder.Entity<Transaction>()
        .HasOne(x => x.Product)
        .WithMany(x => x.Transactions)
        .HasForeignKey(x => x.ProductId)
        .IsRequired(false);
}

public DbSet<Store> Stores { get; set; }
public DbSet<Consumer> Consumers { get; set; }
public DbSet<Product> Products { get; set; }
public DbSet<Transaction> Transactions { get; set; }
}


3. NCache Methods
Here is the class with NCache methods needed to manipulate objects from and to the cache.
public class NCacheExtensions
{
private SampleDbContext Database { get; set; }
private CachingOptions CachingOptions { get; set; }
private Cache Cache { get; set; }

public NCacheExtensions(SampleDbContext database)
{
    this.Database = database;
    this.CachingOptions = new CachingOptions
    {
        QueryIdentifier = "Sample QueryIdentifier",
        Priority = Alachisoft.NCache.Runtime.CacheItemPriority.Default,
        CreateDbDependency = false,
        StoreAs = StoreAs.Collection
    };

    Cache = database.GetCache();
}


public string AddSingleEntity<T>(T entity)
{
    Cache.Insert(entity, out string cacheKey, this.CachingOptions);
    return cacheKey;
}
public void RemoveSingleEntity<T>(T entity)
{
    Cache.Remove(entity);
}
public void RemoveSingleEntity(string cacheKey)
{
    Cache.Remove(cacheKey);
}
public void RemoveByQueryIdentifier(string queryIdentifier)
{
    var tag = new Tag(queryIdentifier);
    Cache.RemoveByQueryIdentifier(tag);
}

public IEnumerable<Consumer> GetAllConsumersFromCache(CachingOptions cachingOptions)
{
    return Database.Consumers.Include(x => x.Transactions).ThenInclude(x => x.Product).FromCache(cachingOptions);
}
public async Task<IEnumerable<Consumer>> GetAllConsumersFromCacheAsync(CachingOptions cachingOptions)
{
    return await Database.Consumers.Include(x => x.Transactions).ThenInclude(x => x.Product).FromCacheAsync(cachingOptions);
}
public IEnumerable<Consumer> LoadAllConsumersIntoCache(CachingOptions cachingOptions)
{
    return Database.Consumers.Include(x => x.Transactions).ThenInclude(x => x.Product).LoadIntoCache(cachingOptions);
}
public async Task<IEnumerable<Consumer>> LoadAllConsumersIntoCacheAsync(CachingOptions cachingOptions)
{
    return await Database.Consumers.Include(x => x.Transactions).ThenInclude(x => x.Product).LoadIntoCacheAsync(cachingOptions);
}
public IEnumerable<Consumer> GetAllConsumersFromCacheOnly(CachingOptions cachingOptions)
{
    return Database.Consumers.FromCacheOnly();
}
}

4.The program.cs class
Here we have the start point of our console application. With an example on how to connect to NCache and use its extension methods that were provided above.
class Program
{
static void Main(string[] args)
{
    Console.WriteLine("Hello World!");

    using (var context = new SampleDbContext())
    {
        var cachedContext = new NCacheExtensions(context);

        Console.WriteLine("start LoadAllConsumersIntoCache " + DateTime.Now.ToString("HH:mm:ss.f"));
        var loadInCache = cachedContext.LoadAllConsumersIntoCache(new CachingOptions { StoreAs = StoreAs.Collection, QueryIdentifier = "Sample QueryIdentifier" });
        Console.WriteLine("finish LoadAllConsumersIntoCache" + DateTime.Now.ToString("HH:mm:ss.f"));

        Console.WriteLine("start GetAllConsumersFromCache " + DateTime.Now.ToString("HH:mm:ss.f"));
        var getFromCache = cachedContext.GetAllConsumersFromCache(new CachingOptions { Priority = Alachisoft.NCache.Runtime.CacheItemPriority.Default });
        Console.WriteLine("finish GetAllConsumersFromCache " + DateTime.Now.ToString("HH:mm:ss.f"));

        Console.WriteLine("start load from DBContext " + DateTime.Now.ToString("HH:mm:ss.f"));
        var getFromDb = context.Consumers.Include(x => x.Transactions).ThenInclude(x => x.Product);
        Console.WriteLine("finishg load from DBContext " + DateTime.Now.ToString("HH:mm:ss.f"));

        var cachedEntity = cachedContext.AddSingleEntity<Consumer>(getFromDb.FirstOrDefault());
        Console.WriteLine("cache key: " + cachedEntity);

        cachedContext.RemoveSingleEntity(cachedEntity);
        cachedContext.RemoveByQueryIdentifier("Sample QueryIdentifier");

    }
}
}


Application working:


About HostForLIFE

HostForLIFE is European Windows Hosting Provider which focuses on Windows Platform only. We deliver on-demand hosting solutions including Shared hosting, Reseller Hosting, Cloud Hosting, Dedicated Servers, and IT as a Service for companies of all sizes.

We have offered the latest Windows 2019 Hosting, ASP.NET 5 Hosting, ASP.NET MVC 6 Hosting and SQL 2019 Hosting.


Month List

Tag cloud

Sign in