European ASP.NET 4.5 Hosting BLOG

BLOG about ASP.NET 4, ASP.NET 4.5 Hosting and Its Technology - Dedicated to European Windows Hosting Customer

European ASP.NET Core Hosting - HostForLIFE :: Step-by-Step Guide To Develop Tic-Tac-Toe AI With Blazor

clock March 9, 2023 09:30 by author Peter

Step-by-Step Guide To Develop Tic-Tac-Toe AI With Blazor

Tic Tac Toe is a popular game that has been enjoyed for generations, on the other hand, our generation enjoys AI. It's about time we clash them together. In this article, we will be designing Tic Tac Toe in Blazor and developing AI-driven game logic with the Min Max algorithm, an artificial intelligence algorithm used for game decision-making.

What is the Min Max Algorithm?
The Min Max algorithm is used to design digital board games like chess and checkers to help determine the best possible move for a player. The algorithm works by evaluating all possible moves a player can make and predicting the best outcome of each move.

To begin with, let me lay down the steps:

    Create a new Blazor application.
    Create a new component called "TicTacToe".
    Iterate div tags under 2 for loops to create a 3x3 matrix
    Create a char array of 3x3 to support matrix data, and create a list of winning combinations
    Add a method that will be called when the user clicks on a cell in the grid
    Design a MinMax algorithm to suggest the next possible best move
    Use the MinMax algorithm with the Blazor app to predict the next best move for AI
        Check if the cell is already occupied. If it is, return
        Call the MinMax algorithm to get the next best move
        Update the cell with the current player's mark (X or O).
        Check if the game has been won or if it is a tie.
        If the game is finished, show animation with JavaScript and reset the grid.
        Repeat the above steps until the game is won or a tie is reached.

Let's take a closer look at each of these steps.

Step 1. Create a new Blazor application
To create a new Blazor application, open Visual Studio and select "Create a new project". In the "Create a new project" dialog, select "Blazor WebAssembly App" or "Blazor Server App" and click "Next".

Give your project a name and click "Create".


Step 2. Add a new razor component called "TicTacToe"
To add a new component, right-click on the project, select "Add" then select "New item", which will bring the dialog below, then select "Razor component", give it a name, and click on the "Add" button.


Step 3. Iterate div tags under 2 for loops to create a 3x3 matrix
In the "TicTacToe" component, add the following HTML to create a 3x3 grid:

@page "/"
@inject IJSRuntime JS

<div>
    <div class="board">
        @for(int i=0; i < 3; i++)
        {
            int row = i;
            for (int j = 0; j < 3; j++)
            {
                int col = j;
                <div class="square" @onclick="()=> SquareCliked(row, col)">
                    <h5 class="char">@Board[row, col]</h5>
                </div>
            }
        }
    </div>
</div>


Listing 1: TicTacToe.razor (HTML)
Step 4. Create a char array of 3x3 to support matrix data and create a list of winning combinations
Create an empty char array, "Board", and create a char to represent a "Player", There are 8 possible winning combos, create a list of "WinningCombos"
@code {

    char[,] Board = { { ' ', ' ', ' ' }, { ' ', ' ', ' ' }, { ' ', ' ', ' ' } };
    char Player = 'o';
    List<List<int[]>> WinningCombos = new()
    {
        //First row
        new List<int[]>() {new int[] { 0,0 }, new int[] { 0, 1 }, new int[] { 0, 2} },
        //Second row
        new List<int[]>() {new int[] { 1,0 }, new int[] { 1, 1 }, new int[] { 1, 2} },
        //Third row
        new List<int[]>() {new int[] { 2,0 }, new int[] { 2, 1 }, new int[] { 2, 2} },

        //First column
        new List<int[]>() {new int[] { 0,0 }, new int[] { 1, 0 }, new int[] { 2, 0} },
        //Second column
        new List<int[]>() {new int[] { 0,1 }, new int[] { 1, 1 }, new int[] { 2, 1} },
        //Third column
        new List<int[]>() {new int[] { 0,2 }, new int[] { 1, 2 }, new int[] { 2, 2} },

        //Backward diagonal
        new List<int[]>() {new int[] { 0,0 }, new int[] { 1, 1 }, new int[] { 2, 2} },
        //Forward diagonal
        new List<int[]>() {new int[] { 0,2 }, new int[] { 1, 1 }, new int[] { 2, 0} },
    };
}


Listing 2: TicTacToe.razor (C#)
Step 5. Add a method that will be called when the user clicks on a cell in the grid
private async Task SquareCliked(int row, int col)
{

}

Listing 3: TicTacToe.razor (C#)
Step 6. Design a MinMax algorithm to suggest the next possible best move
Let's write the algorithm in a separate file. Right-click on project > add a folder, name "AI," then add a C# file inside the folder, name it "MinMaxAlgorithm.cs"
namespace BlazingTicTacToe.AI
{
    public class MinMaxAlgorithm
    {
        public class Turn
        {
            public int row, col;
        };

        private static readonly char Player = 'x';
        private static readonly char Opponent = 'o';
        private static readonly char EmptyCell = ' ';

        //Returns true if there are moves left
        static bool AreMoveLeft(char[,] board)
        {
            for (int i = 0; i < 3; i++)
            {
                for (int j = 0; j < 3; j++)
                {
                    if (board[i, j] == EmptyCell)
                    {
                        return true;
                    }
                }
            }
            return false;
        }

        static int GetCurrentScore(char[,] board)
        {
            // Validate for Rows.
            for (int i = 0; i < 3; i++)
            {
                if (board[i, 0] == board[i, 1] && board[i, 1] == board[i, 2])
                {
                    if (board[i, 0] == Player)
                    {
                        return +10;
                    }
                    else if (board[i, 0] == Opponent)
                    {
                        return -10;
                    }
                }
            }

            // Validate for Columns.
            for (int j = 0; j < 3; j++)
            {
                if (board[0, j] == board[1, j] && board[1, j] == board[2, j])
                {
                    if (board[0, j] == Player)
                    {
                        return +10;
                    }

                    else if (board[0, j] == Opponent)
                    {
                        return -10;
                    }
                }
            }

            // Validate for Backward diagonal.
            if (board[0, 0] == board[1, 1] && board[1, 1] == board[2, 2])
            {
                if (board[0, 0] == Player)
                {
                    return +10;
                }
                else if (board[0, 0] == Opponent)
                {
                    return -10;
                }
            }
            // Validate for Forward diagonal.
            if (board[0, 2] == board[1, 1] && board[1, 1] == board[2, 0])
            {
                if (board[0, 2] == Player)
                {
                    return +10;
                }
                else if (board[0, 2] == Opponent)
                {
                    return -10;
                }
            }

            return 0;
        }


        static int ComputeMinMax(char[,] board, int depth, bool isMax)
        {
            int score = GetCurrentScore(board);

            // If Max has won the game
            if (score == 10) return score;

            // If Mini has won the game
            if (score == -10) return score;

            // If it is a tie
            if (AreMoveLeft(board) == false) return 0;

            // Max move
            if (isMax)
            {
                int bestValue = -1000;

                for (int i = 0; i < 3; i++)
                {
                    for (int j = 0; j < 3; j++)
                    {
                        if (board[i, j] == EmptyCell)
                        {
                            // Make the move
                            board[i, j] = Player;

                            // Call ComputeMinMax recursively to get max
                            bestValue = Math.Max(bestValue, ComputeMinMax(board, depth + 1, !isMax));

                            // Undo the move
                            board[i, j] = EmptyCell;
                        }
                    }
                }
                return best;
            }
            else
            {
                int bestValue = 1000;

                for (int i = 0; i < 3; i++)
                {
                    for (int j = 0; j < 3; j++)
                    {
                        if (board[i, j] == EmptyCell)
                        {
                            // Make the move
                            board[i, j] = Opponent;

                            // Call ComputeMinMax recursively to get min
                            bestValue = Math.Min(bestValue, ComputeMinMax(board, depth + 1, !isMax));

                            // Undo the move
                            board[i, j] = EmptyCell;
                        }
                    }
                }
                return bestValue ;
            }
        }

        // AI will select best possible move
        public static Turn GetNextBestMove(char[,] board)
        {
            int bestValue = -1000;
            Turn bestTurn = new()
            {
                row = -1,
                col = -1
            };

            // GetCurrentScore ComputeMinMax function And return the cell with best value.
            for (int i = 0; i < 3; i++)
            {
                for (int j = 0; j < 3; j++)
                {
                    if (board[i, j] == EmptyCell)
                    {
                        board[i, j] = Player;
                        int currentTurnValue = ComputeMinMax(board, 0, false);

                        // Undo the move
                        board[i, j] = EmptyCell;

                        if (currentTurnValue > bestValue)
                        {
                            bestTurn.row = i;
                            bestTurn.col = j;
                            bestValue = currentTurnValue;
                        }
                    }
                }
            }
            return bestTurn;
        }
    }
}


Listing 4: MinMaxAlgorithm.cs
Step 7. Use the MinMax algorithm to predict the next best move for AI and Update the cell with the current player's mark (X or O)
private async Task SquareCliked(int row, int col)
{
    if (Board[row, col] != ' ') return;
    Board[row, col] = Player;

    Turn currentTurn = MinMaxAlgorithm.GetNextBestMove(Board);
    if(!(currentTurn.row == -1 && currentTurn.col == -1))
    Board[currentTurn.row, currentTurn.col] = 'x';

    foreach (var combo in WinningCombos)
    {
       int[] first = combo[0];
       int[] second = combo[1];
       int[] third = combo[2];
       if (Board[first[0], first[1]] == ' ' || Board[second[0], second[1]] == ' ' || Board[third[0], third[1]] == ' ') continue;
       if (Board[first[0], first[1]] == Board[second[0], second[1]] && Board[second[0], second[1]] == Board[third[0], third[1]] && Board[first[0], first[1]] == Board[third[0], third[1]])
        {
               string winner = Player == 'o' ? "AI" : "Player ONE";
               await JS.InvokeVoidAsync("ShowSwal", winner);
               await Task.Delay(1000);
               ResetGame();
         }
      }

      if (IsGameReset())
      {
          await JS.InvokeVoidAsync("ShowTie");
          ResetGame();
      }
}


Listing 5: TicTacToe.razor, SquareClick method (C#)

Add a few helper methods to reset the game.
private bool IsGameReset()
{
    bool isReset = true;
    for (int i = 0; i < 3; i++)
    {
       for (int j = 0; j < 3; j++)
       {
           if(Board[i, j] == ' ')
           {
              isReset = false;
           }
       }
    }
    return isReset;
}

private void ResetGame()
{
   for (int i = 0; i < 3; i++)
   {
      for (int j = 0; j < 3; j++)
      {
          Board[i, j] = ' ';
      }
    }
}


Listing 5: TicTacToe.razor, helper methods (C#)
You must wonder what those statements are in listing 5 > line numbers 19 and 27. Well, that's how we call javascript methods using JSRuntime.

There are 2 scenarios when we are calling JS,

    When either Player 1 or 2 wins.
    If the game is tied.

First and foremost, go to wwwroot, and create a new folder named "js" inside the folder, add a new javascript file, name it common.js

There are 2 methods,
ShowSwal means to show a sweet alert. In code snippet 2 at line 34, we mention this method name as a parameter, so JsRuntime looks for the same method we specify as a parameter.
ShowTie, representing the tie, in code snippet 2 at line number 41, we are specifying this method name as a parameter.
window.ShowSwal = (player) => {
    Swal.fire({
        title: player + ' won!!',
        width: 350,
        padding: '3em',
        color: '#716add',
        backdrop: `
                        rgba(0,0,123,0.4)
                        url("/images/nyan-cat-nyan.gif")
                        left top
                        no-repeat
                      `
    })
}
window.ShowTie = () => {
    Swal.fire({
        title: 'Go home, nobody won!',
        width: 350,
        padding: '3em',
        color: '#716add',
        backdrop: `
                        rgba(0,0,123,0.4)
                        url("/images/crying-tear.gif")
                        left top
                        no-repeat
                      `
    })
}


Listing 6: Common.js
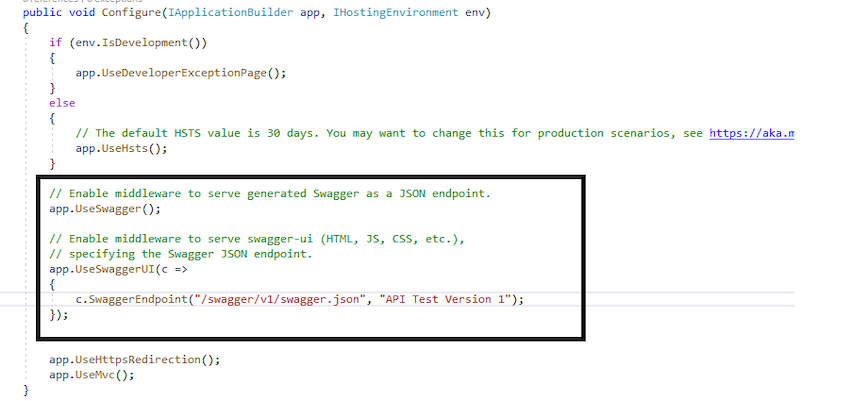
Now let's integrate JavaScript with blazor app.
Open Index.html under wwwroot folder. And inside a head tag, add these 3 script tags.

<script src="js/common.js"></script>
<script src="https://cdn.jsdelivr.net/npm/sweetalert2@11"></script>
<script src="sweetalert2.min.js"></script>

Listing 7: Index.html
The CSS
we are almost done, but it's not done unless we have some CSS, right? If you remember, for code snippet 1, we have added a bunch of classes to our divs. Let's code those classes in a separate CSS file.

Here is the trick to create a razor specific CSS file. Click on the folder named "pages" and say "Add new item" then select Style Sheet. Here you have to give the same name as your razor file. For our example, we will name TicTacToe.razor.css, refer image below.


Now you will see how newly added CSS is automatically assigned below the razor component.

Here is the CSS with basic properties with flex and hover.
* {
    padding: 0;
    margin: 0;
}

h1 {
    text-align: center;
    margin-bottom: 10px;
}

p {
    margin-top: 10px;
    text-align: center;
    font-family: cursive;
}

.board {
    width: 22rem;
    height: 22rem;
    margin: auto;
    border: 1px solid white;
    display: flex;
    flex-wrap: wrap;
}

.square {
    width: 7rem;
    height: 7rem;
    border: 1px solid white;
    margin-right: 4px;
    border-radius: 30px;
    background: #78bec5;
    opacity: 80;
}

    .square:hover {
        background: #ecaf4f;
        cursor: pointer;
    }

.char {
    font-size: 3.5rem;
    text-align: center;
    font-weight: 800;
    margin-top: 15%;
    color: #dc685a;
    font-family: cursive;
}


Listing 8: TicTacToe.razor.css
Conclusion
I believe, Implementing the Tic Tac Toe game using the Min Max algorithm in Blazor was a great learning experience. This algorithm is widely used in game development and can help you create more intelligent and challenging games.

Blazor provides an excellent platform to implement this game as it uses C# language to write the code, making it easier for most developers. It also allows you to create interactive UI and responsive web applications using HTML, CSS, and JavaScript.

HostForLIFE.eu ASP.NET Core Hosting

European best, cheap and reliable ASP.NET hosting with instant activation. HostForLIFE.eu is #1 Recommended Windows and ASP.NET hosting in European Continent. With 99.99% Uptime Guaranteed of Relibility, Stability and Performace. HostForLIFE.eu security team is constantly monitoring the entire network for unusual behaviour. We deliver hosting solution including Shared hosting, Cloud hosting, Reseller hosting, Dedicated Servers, and IT as Service for companies of all size.


European ASP.NET Core Hosting - HostForLIFE :: Structured Logging Using Serilog In ASP.NET Core 7.0

clock March 7, 2023 08:02 by author Peter

In this article, we will learn how to do structured logging using Serilog in asp.net core 7.0.

Logging is an essential part of an application. It helps us to track the application and even helps us to find the root cause of an error after the deployment of an application into production.

When we work with the asp.net core application, then we have an ILogger interface that helps us to do logging. But what if we want to have more control of the application? What if we want to have logging in a more structured way and with more detail? Then the Logging Frameworks or the Libraries come into the picture.

 There are many ways through which we can do the logging, and every tool has cons and pros. Here we will discuss in detail Serilog, which helps us to log in a structured way. Serilog libraries are among the most popular for .NET Core Applications.

What is Serilog?
Serilog is the third-party logging library that overrides the default ILogger library and implements its own methods and logic in a structured way. It helps developers log events or messages into various applications like consoles, web, databases, etc.

Serilog supports structured logging, which enables more logging details and information about the event logged in the application. This logging helps us to find the root cause while debugging the code, or if we get the error in production, a fast fix to the end user.

To implement Serilog, we first need to create an asp.net core API application. So for that, let's open visual studio 2022 and click on create a new project and select an Asp.net core web application template.

Now give the project name 'SerilogApp' and click Next.


Now select the framework and click next

Once you click on next, it will create an application.
Now right-click on the application and go to the NuGet package manager.

In the NuGet package manager window, select the "Serilog.AspNetCore" and install it like below

If you don't want to install "Serilog.AspNetCore" from the NuGet package manager, then you can run the below command as well in the console package manager,
Install-Package Serilog.AspNetCore

Once the package is installed successfully, we must configure it in the program.cs class

we can call the UseSerilog function in the HostBuilder instance to configure Serilog using a lambda expression.

The simplest way to configure Serilog in the application is by calling ReadFrom.Configuration().

We can also use the UseSerilogRequestLogging() method to introduce the automatic HTTP request logging in the asp.net core API application.
using Serilog;
var builder = WebApplication.CreateBuilder(args);
builder.Host.UseSerilog((context, configuration) => configuration.ReadFrom.Configuration(context.Configuration));
// Add services to the container.
builder.Services.AddControllers();
// Learn more about configuring Swagger/OpenAPI at https://aka.ms/aspnetcore/swashbuckle
builder.Services.AddEndpointsApiExplorer();
builder.Services.AddSwaggerGen();
var app = builder.Build();
// Configure the HTTP request pipeline.
if (app.Environment.IsDevelopment()) {
    app.UseSwagger();
    app.UseSwaggerUI();
}
app.UseSerilogRequestLogging();
app.UseHttpsRedirection();
app.UseAuthorization();
app.MapControllers();
app.Run();


Structured Logging using Serilog in ASP.NET Core 7.0

Configuring Serilog With the appsettings.json
We need to add a new Serilog section block in the appsettings.json file.

Here we can configure below things:
    Logging sinks to use with the Serilog
    Override the default and the minimum log levels
    Configure the file-logging arguments

Here we will add the Console and the File sinks to Serilog. And apart from it, we will also add some other configurations for the File sink in the Serilog.WriteTo configuration section. We can even configure the output path for all log files with the naming format.
{
    "Logging": {
        "LogLevel": {
            "Default": "Information",
            "Microsoft.AspNetCore": "Warning"
        }
    },
    "AllowedHosts": "*",
    "Serilog": {
        "Using": ["Serilog.Sinks.File", "Serilog.Sinks.Console"],
        "MinimumLevel": {
            "Default": "Information",
            "Override": {
                "Microsoft": "Warning",
                "System": "Warning"
            }
        },
        "WriteTo": [{
            "Name": "Console"
        }, {
            "Name": "File",
            "Args": {
                "path": "/logs/log-.txt",
                "rollOnFileSizeLimit": true,
                "formatter": "Serilog.Formatting.Compact.CompactJsonFormatter,Serilog.Formatting.Compact",
                "rollingInterval": "Day"
            }
        }],
        "Enrich": ["FromLogContext", "WithThreadId", "WithMachineName"]
    }
}

Now go to Controller class and put any log you want to track. In my case, I kept below log information,

public WeatherForecastController(ILogger < WeatherForecastController > logger) {
        _logger = logger;
        _logger.LogInformation("WeatherForecast controller called ");
    }
    [HttpGet(Name = "GetWeatherForecast")]
public IEnumerable < WeatherForecast > Get() {
    _logger.LogInformation("WeatherForecast get method Starting.");
    return Enumerable.Range(1, 5).Select(index => new WeatherForecast {
        Date = DateOnly.FromDateTime(DateTime.Now.AddDays(index)),
            TemperatureC = Random.Shared.Next(-20, 55),
            Summary = Summaries[Random.Shared.Next(Summaries.Length)]
    }).ToArray();
}

Now run your application and call the weatherForecast controller to get the method in swagger.
Once you hit the get method in swagger, you go to the file path ( this path we define in the appsettings.json -> write to -> file Path section), where we log it. In my case, it is in C: directory -> log folder -> log.txt

Now open this file you will see your log information is logged successfully in the file and console.

Since we have given in the appsettings.json file where we want to log the information, it is logging in 2 places.

Output is below


Serilog Structured Logging in JSON Format
Previously we added logs into a text file. Now if you want to log the information in JSON format, then we need to change the file format, and other things will automatically take care like below:

Now run your application again and call the weather forecast controller to get the method. Then go to the same directory path, a new JSON file you will see and you can find your logging information there as well.

In this article, we've seen the structured logging setup with the help of Serilog in ASP.NET Core 7.0. Logging into an application help developer while debugging an application, and Serilog helps us more with it.

HostForLIFE.eu ASP.NET Core Hosting

European best, cheap and reliable ASP.NET hosting with instant activation. HostForLIFE.eu is #1 Recommended Windows and ASP.NET hosting in European Continent. With 99.99% Uptime Guaranteed of Relibility, Stability and Performace. HostForLIFE.eu security team is constantly monitoring the entire network for unusual behaviour. We deliver hosting solution including Shared hosting, Cloud hosting, Reseller hosting, Dedicated Servers, and IT as Service for companies of all size.


European ASP.NET Core Hosting - HostForLIFE :: How To Implement Serilog In ASP.NET Core Web API?

clock March 6, 2023 07:20 by author Peter

SeriLog is one of developers' most popular and widely used logging libraries for .NET applications. It offers several benefits compared to other logging libraries available on the market.

What is Logging?
Logging is an essential part of any application. It helps developers understand what's happening in the application, diagnose, and troubleshoot problems.
Why do you need to consider Serilog instead of other logging libraries?

Scalability and Performance

Serilog is designed to handle large volumes of log data efficiently. Serilog is well optimized for performance. It was also designed with minimal impact on the application's performance while logging through features such as asynchronous logging, lazy message generation, and support for log message batching.

Extensibility
Serilog is highly extensible, and it has more than 90+ provided sinks, including popular logging services such as
    Amazon DynamoDB
    Azure Blob Storage
    Azure CosmosDB
    ElasticSearch
    Google Cloud StackDriver
    MariaDB
    MongoDB
    PostgreSQL
    SQLite
    SQL Server and so on

Serilog provides an advanced plug-in architecture that allows developers to extend the library with custom sinks and enrichers. It includes general-purpose sinks such as file and console sinks. In the following example, you will learn how to log messages in a file and on the console.

You can see more details about provided sinks in Serilog here.

Flexible and structured logging
Serilog provides a simple and flexible logging API that allows us to capture structured logs in various formats, including JSON, plain text, and XML.

It helps you and your team analyze the application, and you can use that data to make a more optimized version of your application.

Integration with popular .NET frameworks:
Serilog is most popularly used within the .NET community, and it has built-in integration with popular .NET frameworks, such as ASP.NET Core, Entity Framework, and Microsoft.Extensions.Logging.

Community Support:
Serilog is backed by a large community of active developers who contribute to the development of the framework. They are always ready to share knowledge and provide support. You can see more about it in Github repos here.

How to Configure the Serilog
In this article, I'm giving two examples. The First example shows how to log the information to a text file using File Sink, and the second example shows how to log the information to Console and a Text file using a separate configuration JSON file for Serilog with the help of Console and File Sinks.

You can clone My Github Repository to try this example here

Open Visual Studio Application → create a new project → select ASP.NET Core Web API Template → Give a name for your Project → Also make sure .NET 6.0 is selected in Framework dropdown additional information page → Click Create

After the project is created, try to run the project → Debug or Press F5. It will open a Swagger API Web Page in the New Browser window, and you will see the console like in the image below.

How to install Serilog dependencies?
You need to install dependencies before implementing the code. You can do this in two ways one is through GUI, and another one is through Package Manager Console.

In Solution Explorer Window → your project name → Dependencies → right-click Packages → Manage NuGet Packages.
It opens the NuGet package manager in that browse tab → search for Serilog.AspNet.Core → install that package as shown in the image below.

Package Manager Console
You can also install dependencies through Package Manager Console. To do this, click Tools → NuGet Package Manager → Package Manager Console. It brings the console and executes the following commands to install Serilog dependencies.
Install-Package Serilog
Install-Package Serilog.Sinks.Console
Install-Package Serilog.Sinks.File

Log the information to a text file using the serilog file sink

I will log the information to a text file using the serilog file sink in this first example.

Open program.cs file. Change the code in that file, which is given below.
using Serilog;

var builder = WebApplication.CreateBuilder(args);


// Add services to the container.

var logger = new LoggerConfiguration()
    .ReadFrom.Configuration(builder.Configuration)
    .Enrich.FromLogContext()
    .CreateLogger();
builder.Logging.ClearProviders();
builder.Logging.AddSerilog(logger);
builder.Services.AddControllers();
// Learn more about configuring Swagger/OpenAPI at https://aka.ms/aspnetcore/swashbuckle
builder.Services.AddEndpointsApiExplorer();
builder.Services.AddSwaggerGen();

var app = builder.Build();

// Configure the HTTP request pipeline.
if (app.Environment.IsDevelopment())
{
    app.UseSwagger();
    app.UseSwaggerUI();
}

app.UseHttpsRedirection();

app.UseAuthorization();

app.MapControllers();

app.Run();


Open appsettings.json, and Change the code in that file, which is given below.
{
  "Logging": {
    "LogLevel": {
      "Default": "Information",
      "Microsoft.AspNetCore": "Warning"
    }
  },
  "Serilog": {
    "Using": [ "Serilog.Sinks.File" ],
    "MinimumLevel": {
      "Default": "Information"
    },
    "WriteTo": [
      {
        "Name": "File",
        "Args": {
          "path": "../logs/webapi-.log",
          "rollingInterval": "Day",
          "outputTemplate": "{Timestamp:yyyy-MM-dd HH:mm:ss.fff zzz} {CorrelationId} {Level:u3} {Username} {Message:lj}{Exception}{NewLine}"
        }
      }
    ]
  }
}


In the Solution Explorer window → Controllers → WeatherForecastController.cs. Replace the following code.
using Microsoft.AspNetCore.Mvc;

namespace SerilogTutorial.Controllers
{
    [ApiController]
    [Route("[controller]")]
    public class WeatherForecastController : ControllerBase
    {
        private static readonly string[] Summaries = new[]
        {
        "Freezing", "Bracing", "Chilly", "Cool", "Mild", "Warm", "Balmy", "Hot", "Sweltering", "Scorching"
    };

        private readonly ILogger<WeatherForecastController> _logger;

        public WeatherForecastController(ILogger<WeatherForecastController> logger)
        {
            _logger = logger;
        }

        [HttpGet(Name = "GetWeatherForecast")]
        public IEnumerable<WeatherForecast> Get()
        {

            _logger.LogInformation("Seri Log is Working");

            return Enumerable.Range(1, 5).Select(index => new WeatherForecast
            {
                Date = DateTime.Now.AddDays(index),
                TemperatureC = Random.Shared.Next(-20, 55),
                Summary = Summaries[Random.Shared.Next(Summaries.Length)]
            })
            .ToArray();
        }
    }
}


Debug the project Press F5.

It opens a SwaggerAPI Page in the browser, try to hit the GetWeatherForecast Endpoint.

It creates a logs folder in your Project folder and a webapi txt file inside it. If you open that webapi txt file, it contains the project log.


How to configure Serilog Properties in a separate JSON file instead of an appsettings.json file?
In this example, It will log information in the file and console using a separate configuration file for Serilog properties. If you want to try the second example, please follow the steps of the first example. It contains the basic configuration of the Serilog, or you can clone my Github repo using the link given above.

You need to add one JSON file for this scenario. In the Solution explorer window → right-click the project name → add → New Item → select JSON file. I added a JSON file name as seri-log.config.json.

I added the code in the given code snippet. Paste this code into that file
{
  "Serilog": {
    "Using": [ "Serilog.Sinks.File", "Serilog.Sinks.Console" ],
    "MinimumLevel": {
      "Default": "Information"
    },
    "WriteTo": [
      {
        "Name": "File",
        "Args": {
          "path": "../logs/webapi-.log",
          "rollingInterval": "Day",
          "outputTemplate": "{Timestamp:yyyy-MM-dd HH:mm:ss.fff zzz} {CorrelationId} {Level:u3} {Username} {Message:lj}{Exception}{NewLine}"
        }
      },
      {
        "Name": "Console",
        "Args": {
          "outputTemplate": "{Timestamp:yyyy-MM-dd HH:mm:ss} [{Level:u3}] {Message}{NewLine}{Exception}"
        }
      }
    ]
  }
}


It has two sinks one is a file that will log the information in a text file, and another is a console that will log the information in the console.

Also, you need to change the program.cs file code that will read the configuration from the newly created json file. That code is also given in the code snippet.
using Serilog;

var builder = WebApplication.CreateBuilder(args);

// Add services to the container.

//logger

var logger = new LoggerConfiguration()
    .ReadFrom.Configuration(new ConfigurationBuilder()
    .AddJsonFile("seri-log.config.json")
    .Build())
    .Enrich.FromLogContext()
    .CreateLogger();
builder.Logging.ClearProviders();
builder.Logging.AddSerilog(logger);

builder.Services.AddControllers();
// Learn more about configuring Swagger/OpenAPI at https://aka.ms/aspnetcore/swashbuckle
builder.Services.AddEndpointsApiExplorer();
builder.Services.AddSwaggerGen();

var app = builder.Build();

// Configure the HTTP request pipeline.
if (app.Environment.IsDevelopment())
{
    app.UseSwagger();
    app.UseSwaggerUI();
}

app.UseHttpsRedirection();

app.UseAuthorization();

app.MapControllers();

app.Run();

After following the steps, press F5

Now the log information shows in the console, too.


Methods and Serilog Properties Explanations
new LoggerConfiguration() - This method creates a new LoggerConfiguration object that will be used to configure the Serilog logger.

ReadFrom.Configuration(builder.Configuration) - This method configures the logger based on the application's configuration. This method uses the builder.Configuration object to read the configuration settings and apply them to the logger.

Enrich.FromLogContext() - This method adds contextual information to log events. This will allow log events to be enriched with additional information, such as the name of the current method or the user that initiated the event.

CreateLogger() - This method is used to create the Serilog logger.
builder.Logging.ClearProviders() - It can be called on an instance of ILoggerFactory in a .NET application to remove all the logging providers from the logging pipeline.

builder.Logging.AddSerilog(logger) - This method is used to add a Serilog logger to the logging pipeline of a .NET application.

AddJsonFile("seri-log.config.json") - Configuration object that reads from a JSON file named "seri-log.config.json" (using the AddJsonFile() method) and then passes that configuration object to the ReadFrom.Configuration() method.

Build() - After loading the configuration file, it can be built into a Configuration object by calling the Build().

Using: This property is an array of strings specifying the Serilog packages the logger will use.

MinimumLevel: This is an important property you must remember while configuring the Serilog. This property specifies the minimum logging level for the logger. Serilog has 6 level minimum levels.
    Verbose: It is used to track the low level of severity. It is the noisiest level. It is rarely enabled for a production app.
    Debug: Debug is mostly used by the developer team to know about your application's internal events that are not necessarily observable from the outside.
    Information: Information is used for logging the general information on how the flow happens in your application.
    Warning: Warning is used for logging the information not needed to take immediate action now, but those may need attention future.
    Error: Error is used for logging functionality not working or broken. These types need immediate attention.
    Fatal: Fatal logs critical level that will cause an application crash. This types also need immediate attention.

Example: If you choose a higher level, it will log the lower level by default. If you choose minimum level as Warning, it logs warning, information, Debug, and Verbose level Details.

WriteTo: This property is an array of objects that specifies the log sinks to which the log events will be written.

Name: This property specifies the name of the sink.

Path: the property is used to specify the path to the log file that the File sink will write.

RollingInterval - property is used to specify how often to create a new log file. The log file name will include the date in the format specified by the rollingInterval property, with the specified file path and extension.

OutputTemplate - property accepts a string value that can include placeholders for various information associated with each log event. It contains the following placeholders in this example,

{Timestamp:yyyy-MM-dd HH:mm:ss.fff zzz}: The date and time of the log event, in the format yyyy-MM-dd HH:mm:ss.fff zzz.

{CorrelationId}: A unique identifier for the request or operation associated with the log event, if one is available.

{Level:u3}: The log level of the event, abbreviated to three characters.

{Username}: The username associated with the request or operation, if one is available.

{Message:lj}: The log message associated with the event is left-justified and trimmed to fit within the maximum message length.

{Exception}: Any exception that is associated with the log event.

{NewLine}: A new line character.

Serilog is easy to use and configure and implement the structured logging in your .net application. It provides a wide variety of sinks that allow us to log your application information based on your needs easily. You will understand your application's events, errors, and performance metrics based on that information. In hard times it helps to troubleshoot application issues. If you are looking for a good logging framework, it's worth giving it a try to Serilog.


European ASP.NET Core Hosting - HostForLIFE :: Convert File to Byte Array In C#

clock February 28, 2023 07:45 by author Peter

Here are the steps to create a .NET Core API with Swagger documentation,
1. Create a new .NET Core project in Visual Studio or using the .NET Core CLI.
2. Install the Swashbuckle.AspNetCore NuGet package by running the following command in the Package Manager Console,

Install-Package Swashbuckle.AspNetCore

3. Open the Startup.cs file and add the following code to the ConfigureServices method,
services.AddSwaggerGen(c =>
{
    c.SwaggerDoc("v1", new OpenApiInfo { Title = "My API", Version = "v1" });
});

This code registers the Swagger generator and configures a Swagger document titled "My API" and version "v1".

4. In the Configure method of the Startup.cs file, add the following code,
app.UseSwagger();
app.UseSwaggerUI(c =>
{
    c.SwaggerEndpoint("/swagger/v1/swagger.json", "My API V1");
});


This code adds the Swagger middleware to generate the Swagger JSON endpoint and the Swagger UI.

5. Add XML comments to your API controllers and models to provide more detailed descriptions of your API. To enable XML documentation, add the following code to the .csproj file,
<PropertyGroup>
    <GenerateDocumentationFile>true</GenerateDocumentationFile>
    <NoWarn>$(NoWarn);1591</NoWarn>
</PropertyGroup>


This code generates an XML documentation file for your project and suppresses the warning for missing XML comments.

6. Run your API project and navigate to the Swagger UI page at https://localhost:{port}/swagger/index.html, where {port} is the port number of your API project. You should see the API documentation generated by Swagger.

That's it! You have now created a .NET Core API with Swagger documentation. You can customize the Swagger document by adding additional options to the AddSwaggerGen method, such as security definitions and operation filters.

HostForLIFE.eu ASP.NET Core Hosting

European best, cheap and reliable ASP.NET hosting with instant activation. HostForLIFE.eu is #1 Recommended Windows and ASP.NET hosting in European Continent. With 99.99% Uptime Guaranteed of Relibility, Stability and Performace. HostForLIFE.eu security team is constantly monitoring the entire network for unusual behaviour. We deliver hosting solution including Shared hosting, Cloud hosting, Reseller hosting, Dedicated Servers, and IT as Service for companies of all size.


European ASP.NET Core Hosting - HostForLIFE :: Getting Started with Dependency Injection in ASP.NET Core using C#

clock February 20, 2023 07:29 by author Peter

Dependency Injection (DI) is a design pattern that allows for loose coupling between components of an application. In an ASP.NET Core application, DI is a key feature that makes it easier to manage dependencies between classes and promotes code reusability. In this article, we'll cover the basics of DI and its benefits and show how to use the built-in DI container in ASP.NET Core to register and inject dependencies.

What is Dependency Injection?

In a typical application, many classes depend on other classes to perform their tasks. For example, a 'ProductService' class may need a 'ProductRepository' class to retrieve data from a database. The traditional approach to handling dependencies like this is to create the dependent object inside the class that needs it. This creates a tight coupling between the two classes, making it difficult to change the implementation of the dependent class without modifying the class that uses it.

DI is an alternative approach to handling dependencies that promotes loose coupling between classes. With DI, the dependent object is provided to the class that needs it rather than being created inside the class. This is typically done using a constructor or a property. The benefit of this approach is that it makes the code more modular and easier to maintain. It also makes it possible to easily switch out implementations of the dependent object without modifying the class that uses it.

Configuring the Built-in DI Container in ASP.NET Core

ASP.NET Core includes a built-in DI container that makes registering and injecting dependencies easy. To use the DI container, you must first configure it in your application's Startup class. Here is an example of how to do that:
public class Startup
{
    public void ConfigureServices(IServiceCollection services)
    {
        // Register services for DI here
    }

    public void Configure(IApplicationBuilder app, IWebHostEnvironment env)
    {
        // Configure middleware here
    }
}


The 'ConfigureServices' method allows you to register your services for DI. The 'IServiceCollection' parameter is a collection of service descriptors that define the services available for injection.

Registering Services for Injection

To register a service for injection, you must create a service descriptor and add it to the 'IServiceCollection'. A service descriptor consists of three parts:
    The service type, which is the interface or base class that the service implements
    The implementation type, which is the concrete class that provides the implementation for the service
    The lifetime, which determines how long the service should be kept in memory

Here's an example of how to register a service for injection:
services.AddScoped<IProductRepository, SqlProductRepository>();

This code registers a service that implements the 'IProductRepository' interface and provides the implementation in the 'SqlProductRepository' class. The AddScoped method specifies that the service should have a scoped lifetime, which means that a new instance of the service will be created for each HTTP request.

Injecting Dependencies

Once you have registered your services for injection, you can inject them into your classes using constructor injection. Here is an example of how to do that:
public class ProductService
{
    private readonly IProductRepository _repository;

    public ProductService(IProductRepository repository)
    {
        _repository = repository;
    }

    // Product-related methods go here
}


This code shows a 'ProductService' class that depends on an 'IProductRepository' object. The 'IProductRepository' object is provided to the constructor of the 'ProductService' class and is stored in a private field for later use.

Setting up DI in ASP.NET Core
Setting up Dependency Injection (DI) in an ASP.NET Core application involves two primary steps: configuring the DI container and registering the services for injection. Here's a step-by-step guide to setting up DI in your ASP.NET Core application:

Step 1. Configure the DI Container

In the 'Startup.cs' file, in the 'ConfigureServices' method, you need to configure the DI container by adding the following line of code:
public void ConfigureServices(IServiceCollection services)
{
    // Add framework services.
    services.AddMvc();

    // Add your own services here.
    // ...

    // Configure the DI container
    services.AddScoped<IService, Service>();
}

In this example, we're adding a scoped service that implements the 'IService' interface, with an implementation in the 'Service' class. We're using the 'AddScoped' method to specify that a new service instance should be created for each HTTP request.

Step 2. Register the Services for Injection

To register a service for injection, you must create a service descriptor and add it to the 'IServiceCollection'. A service descriptor specifies the interface or abstract class that the service implements, the concrete class that provides the implementation, and the lifetime of the service.

Here's an example of how to register a service for injection:
services.AddScoped<IService, Service>();

In this example, we're registering a service that implements the IService interface and provides the implementation in the Service class. The AddScoped method specifies that the service should have a scoped lifetime, meaning a new service instance will be created for each HTTP request.

You can also use the AddTransient and AddSingleton methods to specify different lifetimes for your services:
    AddTransient: A new instance of the service is created each time it's requested
    AddScoped: A new instance of the service is created for each HTTP request
    AddSingleton: A single instance of the service is created for the lifetime of the application

Step 3. Inject the Services
Once you've registered your services for injection, you can inject them into your controllers or other classes using constructor injection. Here's an example of how to do that:
public class MyController : Controller
{
    private readonly IService _service;

    public MyController(IService service)
    {
        _service = service;
    }

    // Controller actions go here
}


In this example, we inject the 'IService' into the 'MyController' class using constructor injection. The 'IService' instance is stored in a private field for later use.

By following these steps, you can set up DI in your ASP.NET Core application, making it easier to manage dependencies between classes and promoting loose coupling between components.

Using DI in Controllers and Services
Dependency Injection (DI) is a powerful technique that can help you to manage the dependencies between your classes, making your code more modular and maintainable. This article will examine how to use DI in ASP.NET Core controllers and services.

Using DI in Controllers
Controllers are essential to an ASP.NET Core application and can benefit significantly from DI. To use DI in controllers, you need to inject the required services in the constructor of the controller.

Here's an example of a controller that uses DI:
public class HomeController : Controller
{
    private readonly ILogger<HomeController> _logger;
    private readonly IMyService _myService;

    public HomeController(ILogger<HomeController> logger, IMyService myService)
    {
        _logger = logger;
        _myService = myService;
    }

    public IActionResult Index()
    {
        _logger.LogInformation("Executing action Index.");
        var data = _myService.GetData();
        return View(data);
    }
}

In this example, the 'HomeController' injects two services using the constructor. The first service is an instance of 'ILogger<T>', used to log information. The second service is an instance of 'IMyService', which provides some business logic to get the data.

The constructor of the controller receives these services and stores them in private fields, making them available for use in the controller's action methods. In the example, the Index action method uses both services to log some information and retrieve data from the 'IMyService' instance.

Using DI in Services
Services are classes that provide some specific functionality to your application. They can be injected into your controllers or other services to provide their functionality. To use DI in services, you need to add the IService interface as a dependency in the constructor of the service and then inject the required services.

Here's an example of a service that uses DI:
public class MyService : IMyService
{
    private readonly IDataRepository _dataRepository;

    public MyService(IDataRepository dataRepository)
    {
        _dataRepository = dataRepository;
    }

    public IEnumerable<string> GetData()
    {
        var data = _dataRepository.GetData();
        return data.Select(x => x.Value);
    }
}


In this example, the 'MyService' class injects a single service, 'IDataRepository', using the constructor. The 'IDataRepository' instance is stored in a private field, making it available for use in the service's methods. In the example, the GetData method uses the 'IDataRepository' instance to get some data and then returns a filtered set of data.

Using DI in your services and controllers, you can promote loose coupling between your components, making your code more modular and maintainable. You can also easily replace or update your services without changing your controllers' code.

Using DI in Middleware

Dependency Injection (DI) is a powerful technique that can help you to manage the dependencies between your classes, making your code more modular and maintainable. This article will look at how to use DI in ASP.NET Core middleware.

Using DI in Middleware

Middleware is a powerful feature of ASP.NET Core that allows you to add custom logic to the request pipeline. Middleware typically adds application functionality such as authentication, logging, and error handling. Middleware can also be used to inject services and other dependencies.

To use DI in middleware, you need to add the required services in the constructor of the middleware. Here's an example of middleware that uses DI:
public class MyMiddleware
{
    private readonly RequestDelegate _next;
    private readonly ILogger<MyMiddleware> _logger;

    public MyMiddleware(RequestDelegate next, ILogger<MyMiddleware> logger)
    {
        _next = next;
        _logger = logger;
    }

    public async Task InvokeAsync(HttpContext context, IMyService myService)
    {
        _logger.LogInformation("Executing middleware.");
        var data = myService.GetData();
        context.Response.Headers.Add("My-Header", data);
        await _next(context);
    }
}

In this example, the 'MyMiddleware' injects two services using the constructor. The first service is an instance of 'RequestDelegate', the next middleware in the pipeline. The second service is an instance of 'ILogger<T>', used to log information. The middleware also requires an instance of 'IMyService', which provides some business logic to get the data.

The constructor of the middleware receives these services and stores them in private fields, making them available for use in the middleware's 'InvokeAsync' method. In the example, the 'InvokeAsync' method uses both services to log some information, retrieve data from the 'IMyService' instance, and add a custom header to the response.

Registering Middleware with DI
To register your middleware with the DI container, use the UseMiddleware method, which allows you to specify the middleware type and any dependencies. Here's an example of registering the MyMiddleware with DI:
public void Configure(IApplicationBuilder app)
{
    app.UseMiddleware<MyMiddleware>();
}


In this example, the 'MyMiddleware' is added to the request pipeline using the 'UseMiddleware' method. The method automatically resolves any dependencies that are required by the middleware.

Using DI in your middleware, you can promote loose coupling between your components, making your code more modular and maintainable. You can also easily replace or update your middleware without changing your application's code.

Advanced DI topics

Dependency Injection (DI) is a powerful technique that can help you to manage the dependencies between your classes, making your code more modular and maintainable. In this article, we'll look at some advanced topics in DI that can help you to get the most out of this technique.
Named and Typed Services

Sometimes, you may want to register multiple services of the same type but with different implementations. For example, you may have multiple implementations of a logging service or multiple implementations of a data store. You can use named and typed services to differentiate between the implementations in these cases.

Named services are used to register services with a specific name, which can be used to differentiate between them. Here's an example of registering two named services:
services.AddSingleton<ILogger, ConsoleLogger>("console");
services.AddSingleton<ILogger, FileLogger>("file");


In this example, we're registering two 'ILogger' services, one with the name "console" and the other with the name "file". When you want to use one of these services, you can specify the name in the constructor:
public class MyService
{
    private readonly ILogger _consoleLogger;
    private readonly ILogger _fileLogger;

    public MyService(
        [Named("console")] ILogger consoleLogger,
        [Named("file")] ILogger fileLogger)
    {
        _consoleLogger = consoleLogger;
        _fileLogger = fileLogger;
    }

    // ...
}


Typed services are used to register services with a specific implementation type, which can be used to differentiate between them. Here's an example of registering two typed services:
services.AddSingleton<ILogger, ConsoleLogger>();
services.AddSingleton<ILogger, FileLogger>();


In this example, we're registering two 'ILogger' services, one with the 'ConsoleLogger' implementation and the other with the 'FileLogger' implementation. When you want to use one of these services, you can specify the implementation type in the constructor:
public class MyService
{
    private readonly ILogger _consoleLogger;
    private readonly ILogger _fileLogger;

    public MyService(
        IEnumerable<ILogger> loggers)
    {
        _consoleLogger = loggers.OfType<ConsoleLogger>().SingleOrDefault();
        _fileLogger = loggers.OfType<FileLogger>().SingleOrDefault();
    }

    // ...
}


Lifetime of Services
When you register a service in the DI container, you can specify its lifetime. The lifetime determines how long the service should live in the container and when it should be disposed. The available lifetime options are:

    Singleton: The service is created once and reused throughout the application's lifetime.
    Transient: A new instance of the service is created each time it's requested.
    Scoped: A new instance of the service is created for each HTTP request.

Here's an example of registering a service with a scoped lifetime:
services.AddScoped<IMyService, MyService>();

In this example, we're registering 'IMyService' with a scoped lifetime. This means a new instance of 'MyService' will be created for each HTTP request.

Conditional Registration

You can use conditional registration to register a service only if a certain condition is met. For example, you may want to register a service only if a certain environment variable is set. Here's an example of conditional registration:
services.AddHttpClient();

if (Environment.GetEnvironmentVariable("USE_MOCK_DATA") == "true")
{
    services.AddTransient<IMyService, MockMyService>();
}
else
{
    services.AddTransient<IMyService, RealMyService>();
}


In this example, we're registering two implementations of 'IMyService', one for use when the "USE_MOCK_DATA" environment variable is set to "true" and the other for use when it's not set or set to any other value. This allows you to switch between the two implementations based on a configuration value.

Using Factory Methods

Sometimes, you may need to create a service instance using custom logic rather than just invoking its constructor. For example, you may need to read configuration data or perform other complex logic to create the service. You can use a factory method to create the service instance in these cases.

Here's an example of using a factory method:
services.AddSingleton<IMyService>(sp =>
{
    var configuration = sp.GetRequiredService<IConfiguration>();
    var connectionString = configuration.GetConnectionString("MyDb");
    return new MyService(connectionString);
});


In this example, we're registering 'IMyService' using a factory method. The factory method takes an 'IServiceProvider' as a parameter, which allows it to access other services in the DI container. In this case, we're using the 'IConfiguration' service to read the connection string from the app settings and then create a new instance of 'MyService' with the connection string.

Conclusion
This article explored how to use dependency injection (DI) in ASP.NET Core using C#. We covered the basics of DI, including what it is and why it's important. We then looked at how to set up DI in an ASP.NET Core application, including registering services and injecting dependencies into controllers, services, and middleware.

We also covered some advanced topics in DI, including named and typed services, a lifetime of services, conditional registration, and using factory methods. Using these techniques, you can write more modular and maintainable code, making your applications more robust and scalable.

In summary, DI is a powerful technique that can help you to manage the dependencies between your classes and make your code more modular and maintainable. With ASP.NET Core, using DI is easy and intuitive, and the framework provides many features that make it even more powerful. By taking the time to understand DI and the features available in ASP.NET Core, you can write more effective and efficient applications that are easier to maintain and extend over time.  

HostForLIFE.eu ASP.NET Core Hosting

European best, cheap and reliable ASP.NET hosting with instant activation. HostForLIFE.eu is #1 Recommended Windows and ASP.NET hosting in European Continent. With 99.99% Uptime Guaranteed of Relibility, Stability and Performace. HostForLIFE.eu security team is constantly monitoring the entire network for unusual behaviour. We deliver hosting solution including Shared hosting, Cloud hosting, Reseller hosting, Dedicated Servers, and IT as Service for companies of all size.


European ASP.NET Core Hosting - HostForLIFE :: Getting Specific YouTube Video using C# .NET and YouTube API

clock February 13, 2023 08:00 by author Peter

In this article, we will learn how to use the YouTube API to retrieve information about a specific video on YouTube, given its video ID. The process involves using Videos.List() method of the YouTubeService class to retrieve the information and specifying the video ID as a parameter.

In a previously published article [YouTube API Integration With C# .NET], we learned how to search for and retrieve a list of videos on YouTube using the YouTube API. The process involves installing the YouTube API client library, obtaining an API key, importing the necessary namespaces and libraries, initializing the YouTube service, and using the Search.List() method of the YouTubeService class to specify the search parameters.

Here is a step-by-step guide on how to use the Videos.List() method to retrieve information about a specific video using the YouTube API in C#:

Step 1. Prerequisites
To Install the YouTube API client library, obtaining an API key, importing the necessary namespaces and libraries, initializing the YouTube service, please see my previous article on [YouTube API Integration With C# .NET].

Step 2. Initialize the YouTubeService Class
The second step is to initialize the YouTubeService class. This class is responsible for making requests to the YouTube API and processing the responses. To initialize the class, you need to pass an instance of the BaseClientService. Initializer class to its constructor. This instance should contain your API key and the name of your application.
YouTubeService youtubeService = new YouTubeService(new BaseClientService.Initializer()
{
    ApiKey = "YOUR_API_KEY",
    ApplicationName = "YOUR_APPLICATION_NAME"
});


Step 3. Define the Video ID
Next, you need to define the video ID of the video you want to retrieve information about. You can find the video ID in the URL of the video. For example, if the URL of the video is https://www.youtube.com/watch?v=abcdefg", the video ID is "abcdefg".
string videoId = "VIDEO_ID";

Step 4. Prepare the Request
Use the Videos.List() method to retrieve information about a specific video. Pass the video ID to the method, and set the Part parameter to “snippet, contentDetails, statistics, status”.
VideosResource.ListRequest listRequest = youtubeService.Videos.List("snippet,contentDetails,statistics,status");
listRequest.Id = videoId;


If you pass the parameter "snippet, contentDetails, statistics, status" to the Part parameter of the Videos.List() method, the following information about the video will be returned:
    Snippet
    This includes information about the video's title, description, channel information, tags, and the video's publication date.
     
    ContentDetails
    This includes information about the video's duration, aspect ratio, definition, and dimensions.
     
    Statistics
    This includes information about the video's view count, like count, dislike count, comment count, and favourite count.
     
    Status
    This includes information about the video's upload status, privacy status, and license information.

Step 5. Execute the Request

Execute the request by calling the Execute() method of the listRequest object.
VideoListResponse response = listRequest.Execute();

Step 6. Access the Video Information
Finally, you can access the information about the video from the response object. You can use the response object to access information such as the video title, description, view count, and more.
foreach(var item in response.Items) {
    Console.WriteLine("Title: " + item.Snippet.Title);
    Console.WriteLine("Description: " + item.Snippet.Description);
    Console.WriteLine("View Count: " + item.Statistics.ViewCount);
}

Below is the complete code for getting a specific YouTube video:
using Google.Apis.YouTube.v3;
using Google.Apis.YouTube.v3.Data;
using Google.Apis.Services;
using System;
namespace YouTubeAPIDemo {
    class Program {
        static void Main(string[] args) {
            // Initialize the YouTubeService class
            YouTubeService youtubeService = new YouTubeService(new BaseClientService.Initializer() {
                ApiKey = "YOUR_API_KEY",
                    ApplicationName = "YOUR_APPLICATION_NAME"
            });
            // Define the video ID
            string videoId = "VIDEO_ID";
            // Prepare the request
            VideosResource.ListRequest listRequest = youtubeService.Videos.List("snippet,contentDetails,statistics,status");
            listRequest.Id = videoId;
            try {
                // Execute the request
                VideoListResponse response = listRequest.Execute();
                // Access the video information
                foreach(var item in response.Items) {
                    Console.WriteLine("Title: " + item.Snippet.Title);
                    Console.WriteLine("Description: " + item.Snippet.Description);
                    Console.WriteLine("View Count: " + item.Statistics.ViewCount);
                }
            } catch (Exception e) {
                // Log the error
                Console.WriteLine("An error occurred: " + e.Message);
            }
            Console.ReadLine();
        }
    }
}

Note
You should replace the placeholders "YOUR_API_KEY" and "YOUR_APPLICATION_NAME" with your actual API key and application name, and replace "VIDEO_ID" with the actual video ID of the video, you want to retrieve information about. So here we have seen a very basic example of how to get video details by Video ID.

In conclusion, YouTube API's Videos resource provides an efficient way for developers to access and retrieve information about videos.

You can explore more by clicking here to YouTube API documentation for the Video's resource. The Videos resource provides methods for retrieving information about videos on YouTube, including the video's metadata and status, as well as information about the channel that uploaded the video. The resource provides methods for retrieving specific videos by ID, as well as methods for retrieving a list of videos that match specific criteria. The documentation provides detailed information about the available parameters for each method, as well as information about the format of the returned data.

I hope you will find this article helpful. If you have any suggestions, then please feel free to ask in the comment section.

Thank you.

HostForLIFE.eu ASP.NET Core Hosting

European best, cheap and reliable ASP.NET hosting with instant activation. HostForLIFE.eu is #1 Recommended Windows and ASP.NET hosting in European Continent. With 99.99% Uptime Guaranteed of Relibility, Stability and Performace. HostForLIFE.eu security team is constantly monitoring the entire network for unusual behaviour. We deliver hosting solution including Shared hosting, Cloud hosting, Reseller hosting, Dedicated Servers, and IT as Service for companies of all size.


European ASP.NET Core Hosting - HostForLIFE :: .Net 6 Periodic Timer

clock February 9, 2023 07:33 by author Peter

.Net provides lots of types of Timer classes that you, as a developer, probably have come across in your day-to-day work. Below is the list:
    System.Web.UI.Timer
    System.Windows.Forms.Timer
    System.Timers.Timer
    System.Threading.Timer
    System.Windows.Threading.DispatcherTimer


.NET 6 introduces one more timer class, called PeriodicTimer. It doesn't rely on callbacks and instead waits asynchronously for timer ticks. So, if you don't want to use the callbacks as it has their own flaws WaitForNextTickAsync is a good alternative.

You can create the new PeriodicTimer instance by passing the one argument Period, the time interval in milliseconds between invocations
// create a new instance of PeriodicTimer which ticks after 1 second interval
PeriodicTimer secondTimer = new PeriodicTimer(new TimeSpan(0, 0, 1));


How to use Periodic Timer
You can call the WaitForNextTickAsync method in an infinite for or while loop to wait asynchronously between ticks.
while (await secondTimer.WaitForNextTickAsync())
{
     // add your async business logic here
}


Example
Let's write a small console application with two methods having their own PeridicTimer instances, one is configured to tick every minute and another one that ticks every second.

With every tick, increase the counter by one and print it in the console.
static async Task SecondTicker()
{
    PeriodicTimer secondTimer = new PeriodicTimer(new TimeSpan(0, 0, 1));

    while (await secondTimer.WaitForNextTickAsync())
    {
        secs++;
        Console.SetCursorPosition(0, 0);
        Console.Write($"secs: {secs.ToString("00")}");
    }
}


Another one, which sets the second counter to 0 as every minute elapses.
static async Task MinuteTicker()
{
    PeriodicTimer minuteTimer = new PeriodicTimer(new TimeSpan(0, 1, 0));

    while (await minuteTimer.WaitForNextTickAsync())
    {
        mins++;
        secs = 0;
        Console.SetCursorPosition(0, 1);
        Console.Write($"mins: {mins.ToString("00")}");
    }
}


Now let's run them in parallel
static int secs = 0, mins = 0;
static async Task Main(string[] args)
{
    Console.WriteLine("secs: 00");
    Console.WriteLine("mins: 00");

    var secondTicks = SecondTicker();
    var minuteTicks = MinuteTicker();
    await Task.WhenAll(secondTicks, minuteTicks);
}

That way we have two PeridicTimer instances running parallelly without blocking each other and here is the result.

Output

Key Notes

    This timer is intended to be used only by a single consumer at a time
    You can either use the  CancellationToken or call the Dispose() method to interrupt it and cause WaitForNextTickAsync() to return false

HostForLIFE.eu ASP.NET Core Hosting

European best, cheap and reliable ASP.NET hosting with instant activation. HostForLIFE.eu is #1 Recommended Windows and ASP.NET hosting in European Continent. With 99.99% Uptime Guaranteed of Relibility, Stability and Performace. HostForLIFE.eu security team is constantly monitoring the entire network for unusual behaviour. We deliver hosting solution including Shared hosting, Cloud hosting, Reseller hosting, Dedicated Servers, and IT as Service for companies of all size.


European ASP.NET Core Hosting - HostForLIFE :: Rate Limiting In .NET 7.0

clock January 31, 2023 07:02 by author Peter

Rate limiting in .NET is a technique used to control the rate at which requests are made to a specific endpoint or service. It is typically used to prevent the overuse of resources or to implement a pay-per-use pricing model. Rate limiting can be implemented in various ways, such as using built-in libraries in the .NET framework or using third-party libraries and services.

In .NET 7.0, the rate limiting feature is implemented using System.Net.Http.RateLimiting library. This library allows developers to configure rate limits for specific endpoints and to handle requests that exceed the rate limit. The library provides a RateLimiter class that can be used to create and configure rate limit rules, and a RateLimitedHttpClient class that can be used to add rate limiting behavior to an HttpClient instance.

There are multiple combinations of rate limiting algorithms to handle the flow of requests. Microsoft has decided to present the below four algorithms in .NET 7.0.

Concurrency Limit

Concurrency limiter limits how many concurrent requests can access a resource. If your limit is 50, then 50 requests can access a resource at once and the 51st request will not be processed. Once the request is completed, the number of allowed requests increased to 1, when the second request is complete, the number increased to 2 and this will continue till the count reaches 50.

Token Bucket Limit
This algorithm limits the number of requests based on a defined amount of allowed requests. For an instance, assume that we have an application with an imaginary bucket. This bucket can hold 10 tokens and every two minutes 2 tokens are added to this bucket. If a user makes a request, it takes a token so we are left with 9. 3 more request comes in and each takes a token and leaving us with 6 tokens. After two minutes have passed, we get 2 new tokens. Now the bucket has 8 tokens. 8 requests come in and take the remaining tokens and leaving the bucket with 0 tokens. If another comes, it is not allowed to access the resource until the bucket fills with tokens.

Fixed Window Limit

The fixed window algorithm uses the concept of a window with an amount of time. The request limit will be applied within this window before we move to the next window. In this algorithm, when we move to the next window, the request limit will be reset back to the starting point. Assume that we have a window of 3 seconds and a request limit of 10. If the application receives 11 requests within 3 seconds, 10 requests will have access to the resource and the 11th request will be rejected. Once the 3 seconds have passed, the window and the request limit will be reset.

Sliding Window Limit
The sliding window algorithm is like the fixed window algorithm but with an addition of segments. A segment is nothing but it is a part of the window. Assume that we have a window of 2 hours and split it into 4 thirty minutes segments. There is a current segment index that will be pointing to the newest segment in the window. The incoming request will be going to the current segment. Every thirty minutes, the window slides by one segment. If there were any requests in the past window segment, these are now refreshed and the request limit gets increased by the requests count from the past segment.

Let us look at simple service.

The tools which I have used for this tutorial are.

    VS 2022 Community Edition
    .NET 7.0
    Swagger

Fixed Window
Let us make the below changes.
Include the library System.Threading.RateLimiting in Program.cs
using System.Threading.RateLimiting;

Then add the below lines of code to include the Fixed Window limiter.
//Window Rate Limiter
builder.Services.AddRateLimiter(options => {
    options.AddFixedWindowLimiter("Fixed", opt => {
        opt.Window = TimeSpan.FromSeconds(3);
        opt.PermitLimit = 3;
        //opt.QueueLimit = 2;
        //opt.QueueProcessingOrder = QueueProcessingOrder.OldestFirst;
    });
});


Add the below line of code as well in Program.cs
app.UseRateLimiter();

The entire code from Program.cs below
using Microsoft.AspNetCore.RateLimiting;
using System.Threading.RateLimiting;
var builder = WebApplication.CreateBuilder(args);
// Add services to the container.
builder.Services.AddControllers();
// Learn more about configuring Swagger/OpenAPI at https://aka.ms/aspnetcore/swashbuckle
builder.Services.AddEndpointsApiExplorer();
builder.Services.AddSwaggerGen();
//Window Rate Limiter
builder.Services.AddRateLimiter(options => {
    options.AddFixedWindowLimiter("Fixed", opt => {
        opt.Window = TimeSpan.FromSeconds(3);
        opt.PermitLimit = 3;
        //opt.QueueLimit = 2;
        //opt.QueueProcessingOrder = QueueProcessingOrder.OldestFirst;
    });
});
var app = builder.Build();
// Configure the HTTP request pipeline.
if (app.Environment.IsDevelopment()) {
    app.UseSwagger();
    app.UseSwaggerUI();
}
app.UseAuthorization();
app.MapControllers();
app.UseRateLimiter();
app.Run();


Now add the below decorator at the WeatherForecastController.cs class- class level
[EnableRateLimiting("Fixed")]

The entire code from WeatherForecastController.cs as below
using Microsoft.AspNetCore.Mvc;
using Microsoft.AspNetCore.RateLimiting;
namespace WeatherService.Controllers {
    [ApiController]
    [Route("api/[controller]")]
    [EnableRateLimiting("Fixed")]
    public class WeatherForecastController: ControllerBase {
        private static readonly string[] Summaries = new [] {
            "Freezing",
            "Bracing",
            "Chilly",
            "Cool",
            "Mild",
            "Warm",
            "Balmy",
            "Hot",
            "Sweltering",
            "Scorching"
        };
        private readonly ILogger < WeatherForecastController > _logger;
        public WeatherForecastController(ILogger < WeatherForecastController > logger) {
                _logger = logger;
            }
            [HttpGet(Name = "GetWeatherForecast")]
        public IEnumerable < WeatherForecast > Get() {
            return Enumerable.Range(1, 5).Select(index => new WeatherForecast {
                Date = DateOnly.FromDateTime(DateTime.Now.AddDays(index)),
                    TemperatureC = Random.Shared.Next(-20, 55),
                    Summary = Summaries[Random.Shared.Next(Summaries.Length)]
            }).ToArray();
        }
    }
}

As per the configuration, within 3 seconds, we can raise 3 requests.

Let us test the endpoint.

Please execute the endpoint consecutively four times, three requests would access the resource, when we raise the fourth request, it will be rejected.

Sliding Window
The below needs to be added to Program.cs
//Sliding Window Rate Limiter
options.AddSlidingWindowLimiter("Sliding", opt => {
    opt.Window = TimeSpan.FromSeconds(10);
    opt.PermitLimit = 4;
    opt.QueueLimit = 2;
    opt.QueueProcessingOrder = QueueProcessingOrder.OldestFirst;
    opt.SegmentsPerWindow = 2;
});


Token Bucket
The below code goes into Program.cs
//Token Bucket Rate Limiter
options.AddTokenBucketLimiter("Token", opt => {
    opt.TokenLimit = 4;
    opt.QueueLimit = 2;
    opt.QueueProcessingOrder = QueueProcessingOrder.OldestFirst;
    opt.ReplenishmentPeriod = TimeSpan.FromSeconds(10);
    opt.TokensPerPeriod = 4;
    opt.AutoReplenishment = true;
});


Concurrency Limiter
This algorithm is used to control the async requests. The below code changes will be added to Program.cs
//Concurrency Limiter
options.AddConcurrencyLimiter("Concurrency", opt => {
    opt.PermitLimit = 10;
    opt.QueueLimit = 2;
    opt.QueueProcessingOrder = QueueProcessingOrder.OldestFirst;
});

I have explained the four Rate Limiter algorithms introduced in .NET 7.0. I have tested the Fixed Window Algorithm. I leave the rest of the three algorithms to you to validate and provide your comments in the comment box below.

HostForLIFE.eu ASP.NET Core Hosting

European best, cheap and reliable ASP.NET hosting with instant activation. HostForLIFE.eu is #1 Recommended Windows and ASP.NET hosting in European Continent. With 99.99% Uptime Guaranteed of Relibility, Stability and Performace. HostForLIFE.eu security team is constantly monitoring the entire network for unusual behaviour. We deliver hosting solution including Shared hosting, Cloud hosting, Reseller hosting, Dedicated Servers, and IT as Service for companies of all size.


European ASP.NET Core Hosting - HostForLIFE :: Generation of CAPTCHA Image Using Generic Handler for Login Page

clock January 30, 2023 07:33 by author Peter

This article explains how to create a CAPTCHA image using a generic handler.

Required Tools

  • Visual Studio
  • SQL Server 2005

Step 1
Create a new solution and add an empty web project.

Step 2
Add a generic handler page (.ashx).

Step 3
Replace the ProcessRequest method implementation with the following code.
<%@ WebHandler Language="C#" Class="ghCaptcha" %>

using System;
using System.Web;
using System.IO;
using System.Web.SessionState;
using System.Drawing;
using System.Drawing.Imaging;

public class ghCaptcha : IHttpHandler, IReadOnlySessionState
{
    public void ProcessRequest(HttpContext context)
    {
        MemoryStream memStream = new MemoryStream();
        string phrase = Convert.ToString(context.Session["Captcha"]);

        //Generate an image from the text stored in session
        Bitmap CaptchaImg = new Bitmap(180, 60);
        Graphics Graphic = Graphics.FromImage(CaptchaImg);
        Graphic.TextRenderingHint = System.Drawing.Text.TextRenderingHint.AntiAlias;

        //Set height and width of captcha image
        Graphic.FillRectangle(new SolidBrush(Color.Blue), 0, 0, 180, 60);
        Graphic.DrawString(phrase, new Font("Calibri", 30), new SolidBrush(Color.White), 15, 15);
        CaptchaImg.Save(memStream, System.Drawing.Imaging.ImageFormat.Jpeg);
        byte[] imgBytes = memStream.GetBuffer();

        Graphic.Dispose();
        CaptchaImg.Dispose();
        memStream.Close();

        //write image
        context.Response.ContentType = "image/jpeg";
        context.Response.BinaryWrite(imgBytes);
    }

    public bool IsReusable
    {
        get
        {
            return false;
        }
    }
}


Step 4
Build the page and resolve the namespace.
Since the .ashx is a generic handler, it processes HTTP requests and doesn't write session values. So we need to inherit the class with IReadOnlySessionState as in the following.

The following namespaces are used.
using System;
using System.Web;
using System.IO;
using System.Web.SessionState;
using System.Drawing;
using System.Drawing.Imaging;


Step 5
Prepare the Login page; add a new page named Login. aspx and add the following .aspx script.
<form id="form1" runat="server">
    <h1>
        Login</h1>
    <table id="tblLogin" width="40%" border="0" cellpadding="0" cellspacing="4" style="background-color: #cecece;"
        align="center">
        <tbody>
            <tr>
                <td align="center">
                    <asp:Label ID="lblError" runat="server"></asp:Label>
                </td>
            </tr>
            <tr>
                <td width="30%" align="right">
                    User ID :
                </td>
                <td width="70%">
                    <asp:TextBox ID="txtLogin" runat="server" Width="175px" MaxLength="20" AutoCompleteType="Disabled"></asp:TextBox>
                </td>
            </tr>
            <tr>
                <td align="right">
                    Password :
                </td>
                <td>
                    <asp:TextBox ID="txtPassword" runat="server" Width="175px" MaxLength="20" AutoCompleteType="Disabled"
                        TextMode="Password"></asp:TextBox>
                </td>
            </tr>
            <tr>
                <td>
                </td>
                <td colspan="2" align="left">
                    <div>
                        <asp:Image ImageUrl="ghCaptcha.ashx" runat="server" ID="imgCaptcha" />
                    </div>
                </td>
            </tr>
            <tr>
                <td align="right">
                    Enter Code :
                </td>
                <td>
                    <asp:TextBox ID="txtCode" runat="server" Width="175px" MaxLength="5" AutoCompleteType="Disabled"></asp:TextBox>
                </td>
            </tr>
            <tr>
                <td colspan="2" align="center">
                    <asp:Button ID="btnLogin" runat="server" Text="Login" />
                </td>
            </tr>
        </tbody>
    </table>
    </form>


The page has the following controls:

Assign an ImageUrl property of an Image control as Path of the ghCaptcha.ashx file.

Step 6

The following is the code behind Login.aspx.cs.
#region " [ using ] "
using System;
using System.Web.UI;
#endregion

public partial class Login : System.Web.UI.Page
{
    protected void Page_Load(object sender, EventArgs e)
    {
        if (!Page.IsPostBack)
        {
            UpdateCaptchaText();
        }
    }

    #region " [ Button Event ] "
    protected void btnRefresh_Click(object sender, ImageClickEventArgs e)
    {
        UpdateCaptchaText();
    }


    protected void btnLogin_Click(object sender, EventArgs e)
    {

    }
    #endregion
    #region " [ Private Function ] "
    private void UpdateCaptchaText()
    {
        txtCode.Text = string.Empty;
        Random randNum = new Random();

        //Store the captcha text in session to validate
        Session["Captcha"] = randNum.Next(10000, 99999).ToString();
        imgCaptcha.ImageUrl = "~/ghCaptcha.ashx?" + Session["Captcha"];
    }
    #endregion
}

The value of Session["Captcha"] is updated in the Page_Load event of Login.aspx.cs and is accessed in the handler page and session code used to generate the CAPTCHA image.

Step 7

Build and run it.
The Login Page Visuals os as below.

Step 8
The following are enhancements (included in the source code download).
A Refresh button beside the CAPTCHA image for changing the CAPTCHA without a page postback


Page validation

HostForLIFE.eu ASP.NET Core Hosting

European best, cheap and reliable ASP.NET hosting with instant activation. HostForLIFE.eu is #1 Recommended Windows and ASP.NET hosting in European Continent. With 99.99% Uptime Guaranteed of Relibility, Stability and Performace. HostForLIFE.eu security team is constantly monitoring the entire network for unusual behaviour. We deliver hosting solution including Shared hosting, Cloud hosting, Reseller hosting, Dedicated Servers, and IT as Service for companies of all size.


European ASP.NET Core Hosting - HostForLIFE :: How To Configure Log4net In .NET 7 API?

clock January 16, 2023 06:54 by author Peter

In this article, I'm going to explain how we can configure log4net in a .NET 7 API project. Before we go deep dive into how to configure log4net, let's first understand why we need to configure log4net in our project. let's first discuss why we need log4net.

Why do we need Log4net?
When we need a production-level application or an efficient product that needs to be improved day by day, then the question is how we can achieve improvement. The answer is, "by knowing our mistakes ", because we can't improve if we don't know where we need improvement. In our application, these things are done very efficiently by a logging framework, now the question is what is the logging framework? the answer is,  "logging framework is responsible for logging errors and other information that we may need for improvement". The next question is there are a bunch of logging frameworks available logging why do we need log4net? the answer is, "log4net is one of the most efficient logging frameworks and is owned by apache". I think that the requirements are clear now, let's go forward to the next question how we can configure log4net in a .NET7 API.

Please follow these steps to configure log4net,

The project of some learners may have already been created but some people will be about to start so, Let's start from the beginning.

Step 1
Open visual studio, at least Visual Studio 2022 if you are going to implement it into.NET 7 API otherwise you can use a lower version, first, click on create a new project.

Step 2
Next, choose ASP.NET Core Web API as a project template and click on the next button.

Step 3
Next, we see the configuration screen. Here you need to enter the project name and click on the next button.

Step 4
Next, we need an additional information window. Here we need to choose the target framework of our application here I have chosen.NET 7.0 and click on the create button.


Step 5
Now our project template is ready with a weather forecast controller. First we need to install the log4net package in our project. People who have already created the project can start from here. To install log4net you need to open the NuGet package manager. To open the NuGet package manager right-click on the project name and click on the NuGet package Manager.

Step 6
Now just click on the browse button and type lo4net in the search box.

Here we can see that log4net has already 149M downloads as it is a popular logging framework. Now just tap on log4net and click on install, it will ask for permission and then will be installed in your project.

After installation, we need to configure it with our project. The main part of the configuration starts from here. log4net is not a .NET library so it'll not be configured automatically, we need to configure it manually. Here we need a configuration file containing that information of configuration like where you want to store your log, the name of your log file, and the format of your file, etc. To do all these configurations we need a configuration file, let's move to our next step.

Step 7
Right-click on the project name and click on Add then click on New Item

Then search for configuration and choose Web Configuration File and enter the file name then click on add button

Configure Log4net In .NET 7 API

Now we need to add configuration settings in this file let's move toward to next step.

Step 8
Here we add this code
<?xml version="1.0" encoding="utf-8" ?>
<configuration>
    <log4net>
        <appender name="RollingLogFileAppender"
                  type="log4net.Appender.RollingFileAppender">
            <lockingModel type="log4net.Appender.FileAppender+MinimalLock"/>
            <file value="location put here ie D:\TestLog\" />
            <datePattern value="yyyy-MM-dd.'txt'"/>
            <staticLogFileName value="false"/>
            <appendToFile value="true"/>
            <rollingStyle value="Date"/>
            <maxSizeRollBackups value="100"/>
            <maximumFileSize value="15MB"/>
            <layout type="log4net.Layout.PatternLayout">
                <conversionPattern
                    value="%date [%thread] %-5level App  %newline %message %newline %newline"/>
            </layout>
        </appender>
        <root>
            <level value="INFO"/>
            <appender-ref ref="RollingLogFileAppender"/>
        </root>
    </log4net>
</configuration>

In this code, I have defined the setting related to logging like file-name, file-location, RollingLogFileAppender, etc that are required. You can also define the size of your file as I have defined 15 MB.
<maximumFileSize value="15MB"/>

You can increase or decrease the file size depending on your requirement. Now most of the things are ready we just need to load these settings and use the logger.

Step 9
Now we need to load the .config file and log the exception and related information. I'm going to use the WeatherForecastController. I have created a method with the name private void LogError(string message) to load the .config file and log the error.
private  void LogError(string message)
{
    var logRepository = LogManager.GetRepository(Assembly.GetEntryAssembly());
    XmlConfigurator.Configure(logRepository, new FileInfo("log4net.config"));
    ILog _logger = LogManager.GetLogger(typeof(LoggerManager));
    _logger.Info(message);
}


Here you have to put the same name that you entered at the time of adding the configuration file
XmlConfigurator.Configure(logRepository, new FileInfo("log4net.config"));

like I have entered log4net.config. Now you just need to call this method and pass the exception. Here I have created an exception manually by adding a method private int div(int x). This method generates a divide by zero type exception

private int div(int x)
{
  return x / 0;
}


Now I have called this method under the try block and called that LogError method in the catch block, and it will log the exception
[HttpGet(Name = "GetWeatherForecast")]
public IEnumerable < WeatherForecast > Get() {
  try {
    int x = div(50);
    return Enumerable.Range(1, 5).Select(index =>new WeatherForecast {
      Date = DateOnly.FromDateTime(DateTime.Now.AddDays(index)),
      TemperatureC = Random.Shared.Next( - 20, 55),
      Summary = Summaries[Random.Shared.Next(Summaries.Length)]

    }).ToArray();
  }
  catch(Exception ex) {
    LogError(ex.Message);
    throw;
  }
}


When we run the program and execute the following call we get an exception

Now if we check our log file then the log message would be written with the given format, let's have a look


In this article, we have created a log4net-configured API project. This one was a normal project structure if you want to use it on your product then I would suggest creating an Interface and defining logging methods there and then using them in your project after implementation.

HostForLIFE.eu ASP.NET Core Hosting

European best, cheap and reliable ASP.NET hosting with instant activation. HostForLIFE.eu is #1 Recommended Windows and ASP.NET hosting in European Continent. With 99.99% Uptime Guaranteed of Relibility, Stability and Performace. HostForLIFE.eu security team is constantly monitoring the entire network for unusual behaviour. We deliver hosting solution including Shared hosting, Cloud hosting, Reseller hosting, Dedicated Servers, and IT as Service for companies of all size.


About HostForLIFE

HostForLIFE is European Windows Hosting Provider which focuses on Windows Platform only. We deliver on-demand hosting solutions including Shared hosting, Reseller Hosting, Cloud Hosting, Dedicated Servers, and IT as a Service for companies of all sizes.

We have offered the latest Windows 2019 Hosting, ASP.NET 5 Hosting, ASP.NET MVC 6 Hosting and SQL 2019 Hosting.


Month List

Tag cloud

Sign in