To improve HTTP request testing, Microsoft has added an exceptional power feature. This post will explain how to use a http file and provide an example of a REST API. It is appropriate for users of all skill levels, including novices, intermediates, and experts.
We will cover.
- What is a .http file?
- Advantages of .http files?
- How to Create and Use .http files?
- How to send a request using .http files?
Prerequisites
- Visual Studio 2019 or a later version.
- Basic understanding of REST API.
Let’s start with
What is a .http file?
Let me ask you a question, do you know how you test APIs before a .http file? The answer would be third-party tools like Postman, Swagger, Insomnia, etc.
Microsoft has now introduced the. http file for conveniently sending HTTP requests and testing APIs directly from Visual Studio or an Integrated Development Environment. This feature enables developers to write and execute HTTP requests directly within the code editor, simplifying testing and ensuring accuracy.
Advantages of .http files?
- Effortless API Testing
- Reusability
- Increase development accuracy
- Consistency
- Seamless Workflow Integration
How to Create and Use .http files?
Let’s start by creating an "Asp. Net Core Web API" project for demonstration purposes.
Step 1. Create an “Asp.Net Core Web Api” project by selecting the below template.
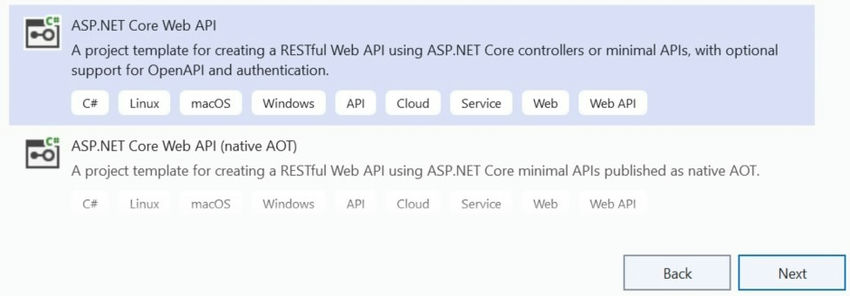
Step 2. Select “Additional Information” and click the “Create” button to create a .Net project.
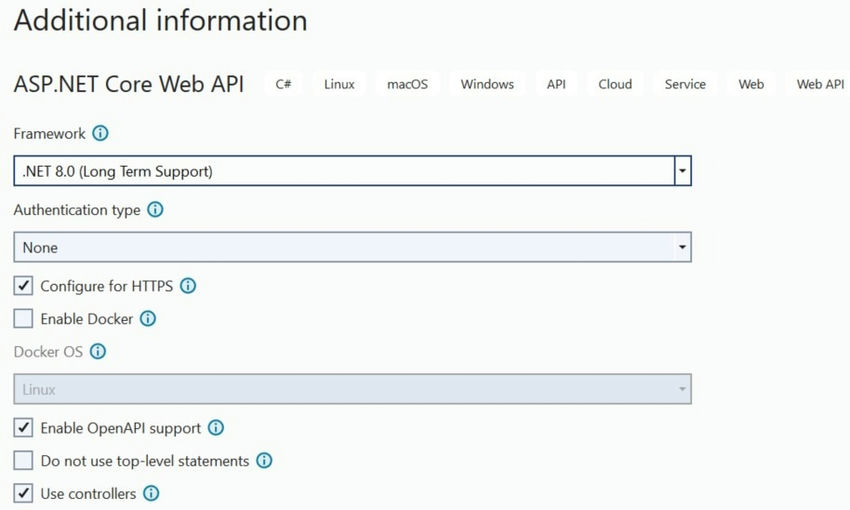
You have observed that we have chosen the check box “Enable OpenAPI support”. If this check box is selected, Visual Studio generates an ASP. The net core web API project is accompanied by a. http file.
Let’s keep this checked box checked for now.
Step 3. The Asp.Net Core Web Api project was created successfully with weatherForcast Controller and DemoAPI.http file.
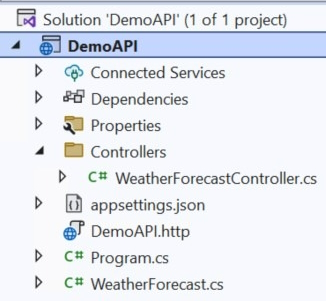
Let's open the weather forecast controller file.
WeatherForcastcontroller.cs
using Microsoft.AspNetCore.Mvc;
namespace DemoAPI.Controllers
{
[ApiController]
[Route("[controller]")]
public class WeatherForecastController : ControllerBase
{
private static readonly string[] Summaries = new[]
{
"Freezing", "Bracing", "Chilly", "Cool", "Mild", "Warm", "Balmy", "Hot", "Sweltering", "Scorching"
};
private readonly ILogger<WeatherForecastController> _logger;
public WeatherForecastController(ILogger<WeatherForecastController> logger)
{
_logger = logger;
}
[HttpGet(Name = "GetWeatherForecast")]
public IEnumerable<WeatherForecast> Get()
{
return Enumerable.Range(1, 5).Select(index => new WeatherForecast
{
Date = DateOnly.FromDateTime(DateTime.Now.AddDays(index)),
TemperatureC = Random.Shared.Next(-20, 55),
Summary = Summaries[Random.Shared.Next(Summaries.Length)]
})
.ToArray();
}
}
}
DemoApi.http
@DemoAPI_HostAddress = https://localhost:7063
# Send request or Debug
GET {{DemoAPI_HostAddress}}/weatherforecast/
Accept: application/json
###
Nice, Visual Studio has created a .http file for the controller WealthForcast. You have observed that we have two links.
“Send Request”: Send the request and open a new window with output. This will help to test the API,
“Debug”: It will allow you to debug the api.
Step 4. Let’s click on the “Send Request” link and observe the output.
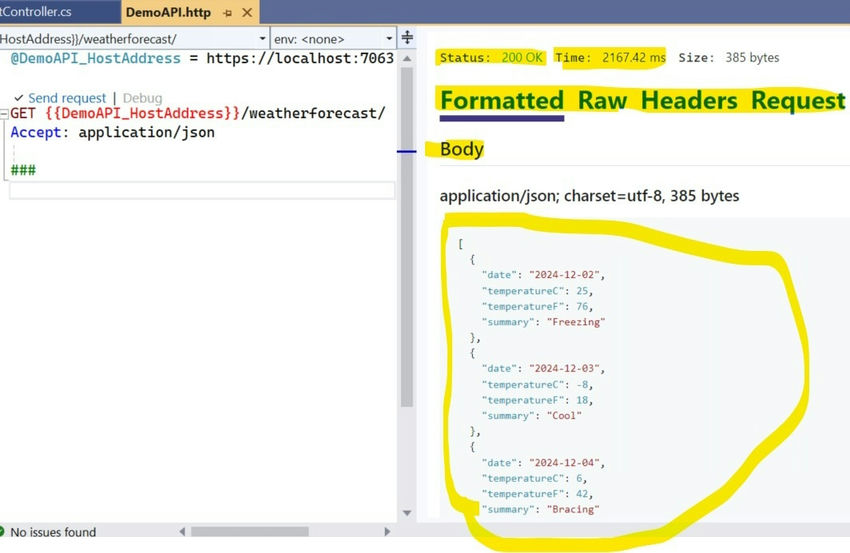
You can see the output with Header, Raw, Formatted, and request details. Let’s click on the Raw.
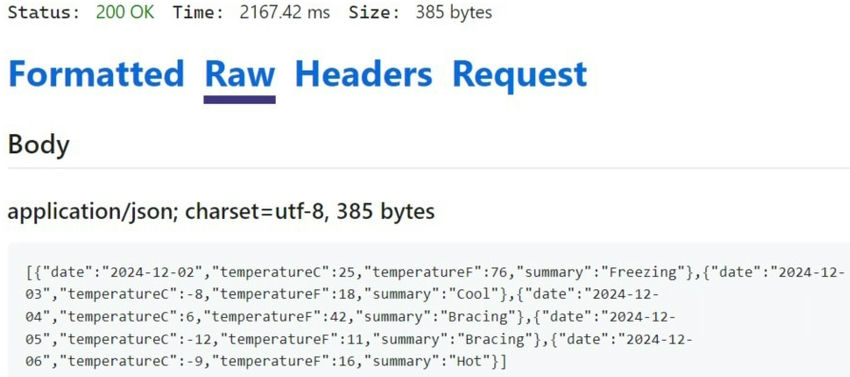
Now we can Raw details in JSON. It is nice and helpful. Isnt it?
Step 5. Now we will add a new endpoint and then create a .http file.
Please add the below code in the Wealthforcast. cs file.
[HttpGet("{ID}")]
public WeatherForecast Get(int ID)
{
return new WeatherForecast
{
Date = DateOnly.FromDateTime(DateTime.Now.AddDays(ID)),
TemperatureC = Random.Shared.Next(-20, 55),
Summary = Summaries[Random.Shared.Next(Summaries.Length)]
};
}
Step 6. Now we will add a new endpoint in the .http file.
Microsoft has provided “Endpoints Explorer” to generate an endpoint in the .http file.
In the visual studio “View->OtherWindows->Endpoint Explorer”.
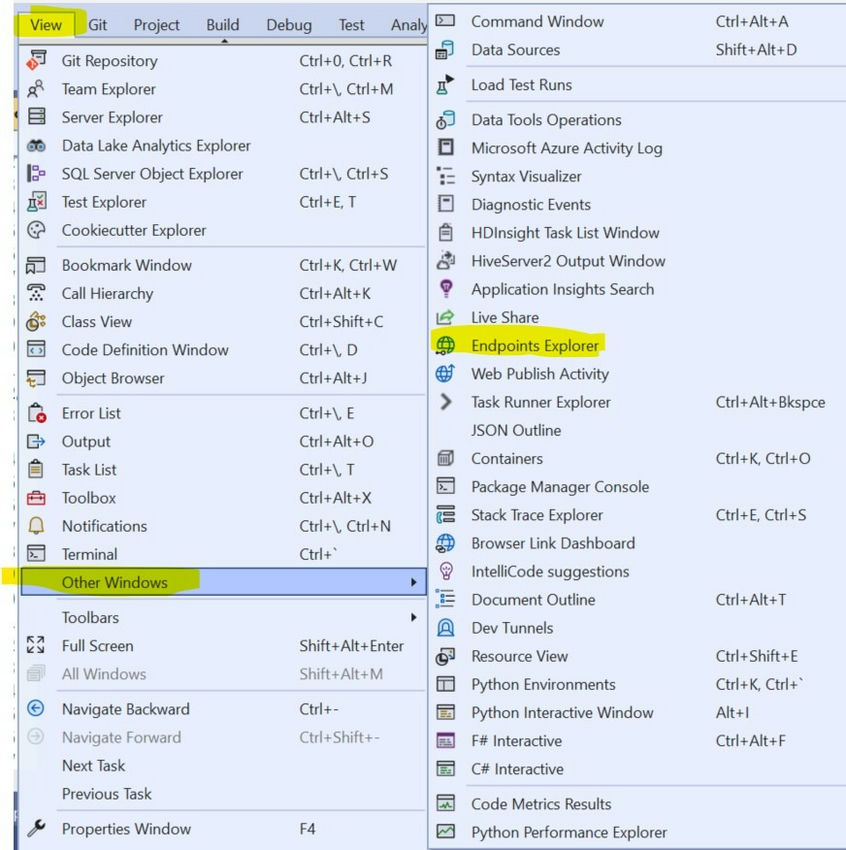
Step 7. Click on the “Endpoints Explorer” and click on “Generate Request”.
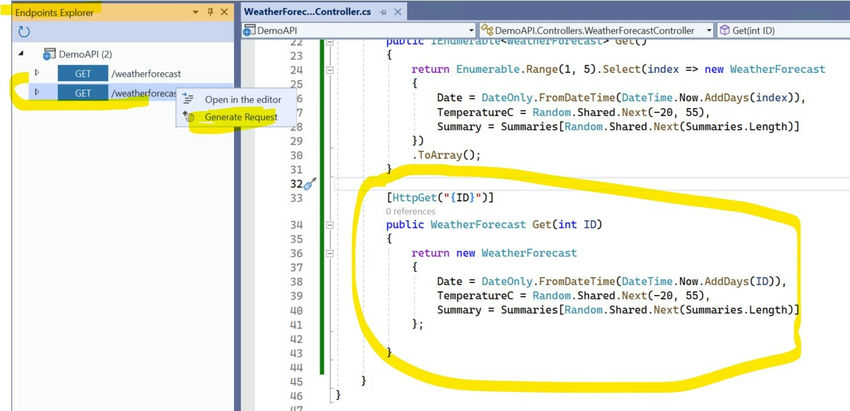
The file code below will be added in the “demo. http” file.
@DemoAPI_HostAddress = https://localhost:7063
# Send request for the default weather forecast
###
Send request | Debug
GET {{DemoAPI_HostAddress}}/weatherforecast/
Accept: application/json
###
# Send request for a specific weather forecast (ID = 0)
###
Send request | Debug
GET {{DemoAPI_HostAddress}}/weatherforecast/0
Accept: application/json
###
Output
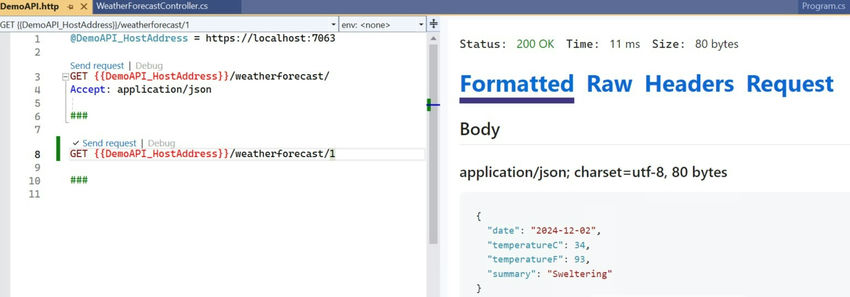
Similarity POST, PUT, and DELETE endpoints can be created.
That’s all for this article. Hope you learn and enjoy this article.
European Best, cheap and reliable ASP.NET hosting with instant activation. HostForLIFE.eu is #1 Recommended Windows and ASP.NET hosting in European Continent. With 99.99% Uptime Guaranteed of Relibility, Stability and Performace. HostForLIFE.eu security team is constantly monitoring the entire network for unusual behaviour. We deliver hosting solution including Shared hosting, Cloud hosting, Reseller hosting, Dedicated Servers, and IT as Service for companies of all size.
