.NET MAUI is a powerful platform for building cross-platform mobile applications, and with the right tools and resources, it's easy to add barcode scanning functionality to your app. In this tutorial, we'll walk you through the steps of implementing a barcode scanner in .NET MAUI using the ZXing.Net.MAUI plugin.
Project Setup
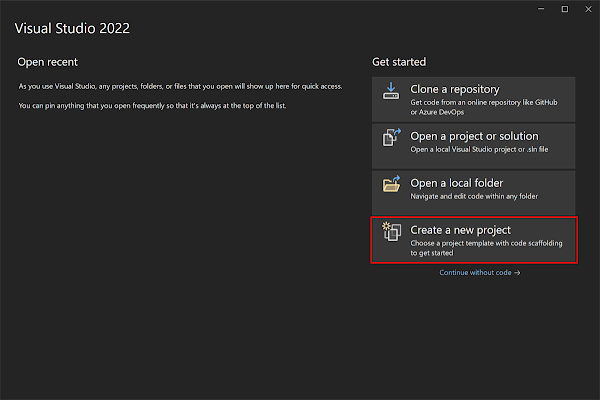
Launch Visual Studio 2022, and in the start, window click Create a new project to create a new project.
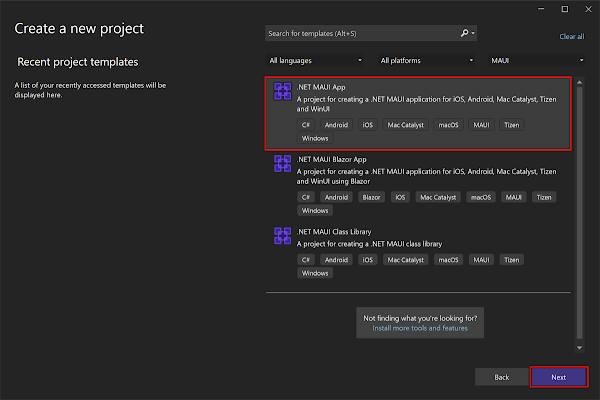
In the Create a new project window, select MAUI in the All project types drop-down, select the .NET MAUI App template, and click the Next button.
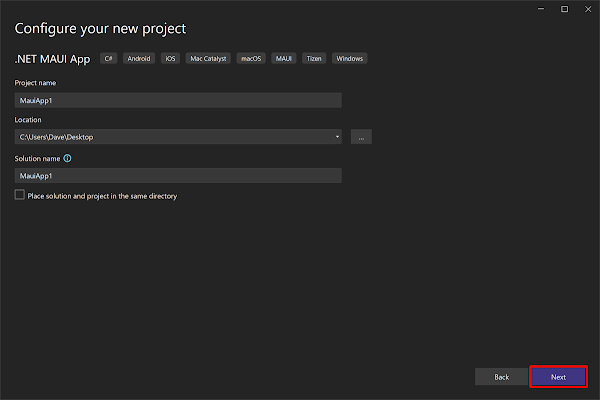
In the configure your new project window, name your project, choose a suitable location for it, and click the Next button. .Net MAUI - Zxing Barcode Scanner
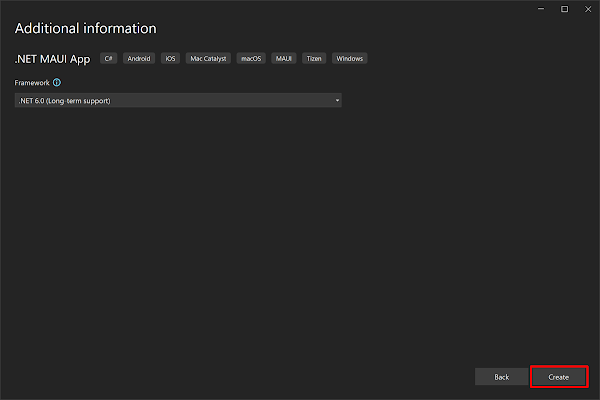
In the Additional information window, click the Create button.
Once the project is created, we can able to see the Android, iOS, Windows, and other running options in the toolbar. Press the emulator or run button to build and run the app.

Implementation
The successor to ZXing.Net.Mobile: barcode scanning and generation for .NET MAUI applications. First, we need to add the ZXing.Net.MAUI library to our project as a dependency. To do this, open the NuGet Package Manager and search for "ZXing.Net.MAUI". Install the package in your .NET MAUI project.
Install ZXing.Net.MAUI
Install the ZXing.Net.MAUI NuGet package on your .NET MAUI application. Make sure to initialize the plugin first in your MauiProgram.cs, see below
// Add the using to the top
using ZXing.Net.Maui;
// ... other code
public static MauiApp Create() {
var builder = MauiApp.CreateBuilder();
builder.UseMauiApp & lt;
App & gt;
().UseBarcodeReader(); // Make sure to add this line
return builder.Build();
}
Now we just need to add the right permissions to our app metadata. Find below how to do that for each platform.
For Android go to your "AndroidManifest.xml" file (under the Platforms\Android folder) and add the following permissions inside of the "manifest" node.
<uses-permission android:name="android.permission.CAMERA" />
For iOS go to your "info.plist" file (under the Platforms\iOS folder) and add the following permissions inside of the "dict" node:
<key>NSCameraUsageDescription</key>
<string>This app uses barcode scanning to...</string>
Make sure that you enter a clear and valid reason for your app to access the camera. This description will be shown to the user.
Using ZXing.Net.Maui
If you're using the controls from XAML, make sure to add the right XML namespace in the root of your file, e.g:
xmlns:zxing="clr-namespace:ZXing.Net.Maui.Controls;assembly=ZXing.Net.MAUI"
<zxing:CameraBarcodeReaderView
x:Name="cameraBarcodeReaderView"
BarcodesDetected="BarcodesDetected" />
Full Code of MainPage.xaml
<?xml version="1.0" encoding="utf-8" ?>
<ContentPage xmlns="http://schemas.microsoft.com/dotnet/2021/maui"
xmlns:x="http://schemas.microsoft.com/winfx/2009/xaml"
xmlns:zxing="clr-namespace:ZXing.Net.Maui.Controls;assembly=ZXing.Net.MAUI"
x:Class="MauiTutorial9.MainPage">
<Grid>
<zxing:CameraBarcodeReaderView
Grid.Row="0"
Grid.RowSpan="3"
x:Name="barcodeView"
BarcodesDetected="BarcodesDetected" />
<Label Grid.Row="0"
Text="Scan Barcode..."
TextColor="White"
FontSize="Subtitle"
HorizontalOptions="Center"
VerticalOptions="Center"/>
<Label Grid.Row="2"
Text=""
x:Name="lbl"
TextColor="White"
FontSize="Subtitle"
HorizontalOptions="Center"
VerticalOptions="Center"/>
</Grid>
</ContentPage>
Configure Reader options
cameraBarcodeReaderView.Options = new BarcodeReaderOptions {
Formats = BarcodeFormats.OneDimensional,
AutoRotate = true,
Multiple = true
};
Toggle Torch
cameraBarcodeReaderView.IsTorchOn = !cameraBarcodeReaderView.IsTorchOn;
Flip between the Rear/Front cameras
cameraBarcodeReaderView.CameraLocation
= cameraBarcodeReaderView.CameraLocation == CameraLocation.Rear ? CameraLocation.Front : CameraLocation.Rear;
Handle detected barcode(s)
protected void BarcodesDetected(object sender, BarcodeDetectionEventArgs e) {
foreach(var barcode in e.Results)
Console.WriteLine($ "Barcodes: {barcode.Format} -> {barcode.Value}");
}
Full code of MainPage.xaml.cs
using ZXing.Net.Maui;
namespace MauiTutorial9;
public partial class MainPage: ContentPage {
public MainPage() {
InitializeComponent();
}
protected void BarcodesDetected(object sender, BarcodeDetectionEventArgs e) {
MainThread.BeginInvokeOnMainThread(() => {
lbl.Text = $ "{e.Results[0].Format}->{e.Results[0].Format}";
barcodeView.IsDetecting = false;
});
}
}
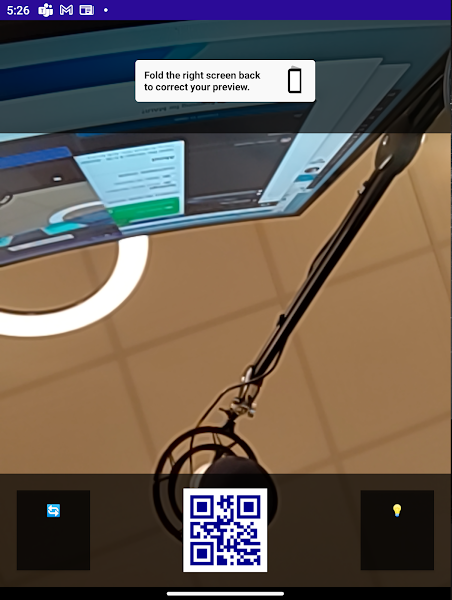
Demo
Full Code
<?xml version="1.0" encoding="utf-8" ?>
<ContentPage xmlns="http://schemas.microsoft.com/dotnet/2021/maui"
xmlns:x="http://schemas.microsoft.com/winfx/2009/xaml"
xmlns:zxing="clr-namespace:ZXing.Net.Maui.Controls;assembly=ZXing.Net.MAUI"
x:Class="MauiTutorial9.MainPage">
<Grid>
<zxing:CameraBarcodeReaderView
Grid.Row="0"
Grid.RowSpan="3"
x:Name="barcodeView"
BarcodesDetected="BarcodesDetected" />
<Label Grid.Row="0"
Text="Scan Barcode..."
TextColor="White"
FontSize="Subtitle"
HorizontalOptions="Center"
VerticalOptions="Center"/>
<Label Grid.Row="2"
Text=""
x:Name="lbl"
TextColor="White"
FontSize="Subtitle"
HorizontalOptions="Center"
VerticalOptions="Center"/>
</Grid>
</ContentPage>
using ZXing.Net.Maui;
namespace MauiTutorial9;
public partial class MainPage: ContentPage {
public MainPage() {
InitializeComponent();
}
protected void BarcodesDetected(object sender, BarcodeDetectionEventArgs e) {
MainThread.BeginInvokeOnMainThread(() => {
lbl.Text = $ "{e.Results[0].Format}->{e.Results[0].Format}";
barcodeView.IsDetecting = false;
});
}
}
Download Code
You can download the code from GitHub. If you have any doubts, feel free to post a comment. If you liked this article, and it is useful to you, do like, share the article & star the repository on GitHub.
European best, cheap and reliable ASP.NET hosting with instant activation. HostForLIFE.eu is #1 Recommended Windows and ASP.NET hosting in European Continent. With 99.99% Uptime Guaranteed of Relibility, Stability and Performace. HostForLIFE.eu security team is constantly monitoring the entire network for unusual behaviour. We deliver hosting solution including Shared hosting, Cloud hosting, Reseller hosting, Dedicated Servers, and IT as Service for companies of all size.
