There are various methods available to create a login system but here I'm introducing a way to design complete signup and login system using dependencies in asp.net core with SQL database.
What is a dependency?
The term dependency means to depend on anyone else which means if an object is dependent on other objects that is called a dependency. Dependency is a relationship between a component or class that can be thought of as a uses relationship generally the parameterized constructor that provides an object for a needed class. If you have more than one class that class is dependent on each other that is dependency. The dependency is injected into a parameterized constructor.
Step 1
Create a database from MSSQL.
create database dependencylogin
use dependencylogin;
create table users(id int primary key, Name varchar(50), Email varchar(50), Password varchar(50));
select * from users
Step 2
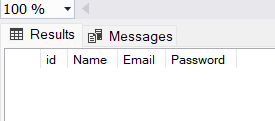
Create a table from the database and id is the primary key as well as identity with autoincrement.
Step 3
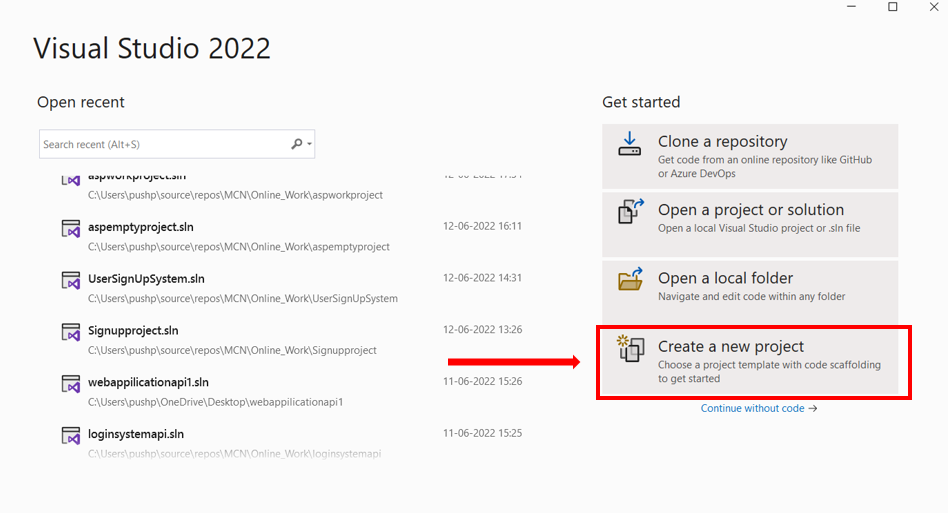
Open visual studio 2022 and click create a new project.
Step 4
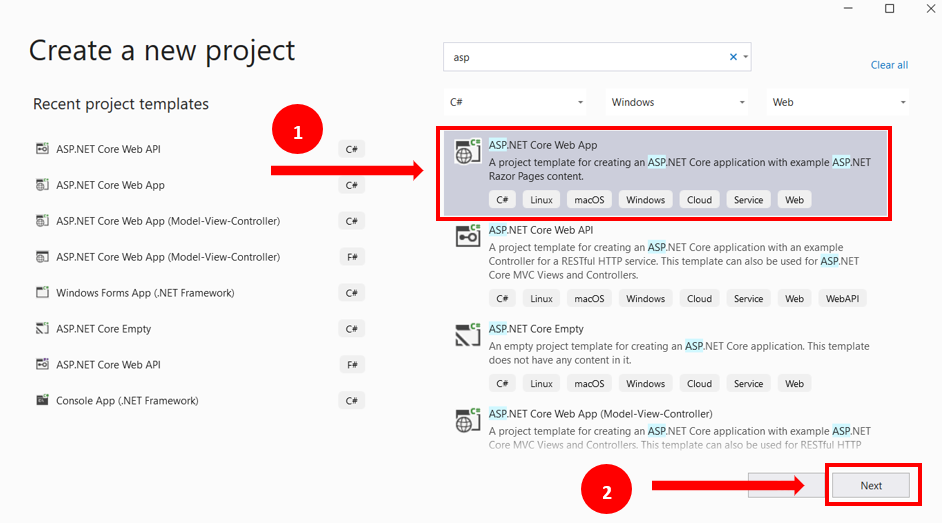
Select ASP.Net core web App project and click on the Next button.
Step 5
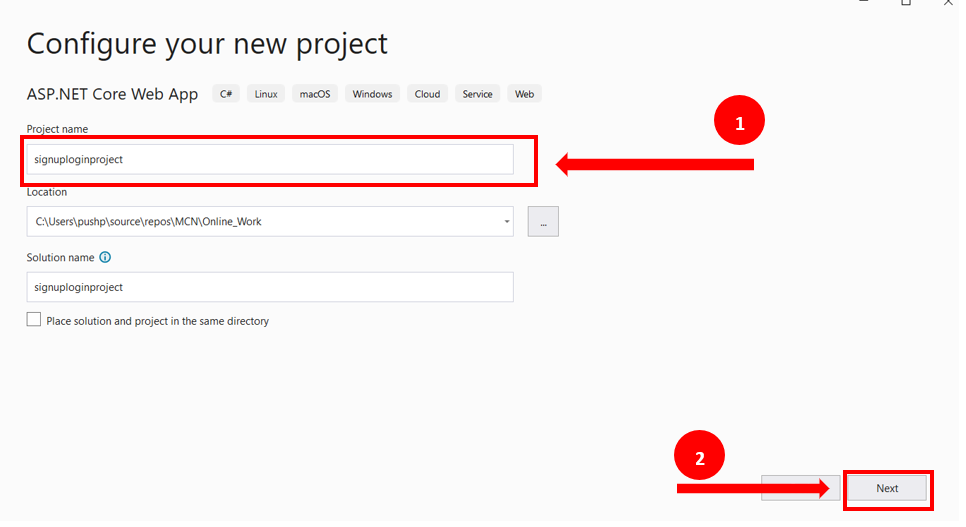
Write the name of the project and click on the Next button.
Step 6
Click on the Create button for creating a project.
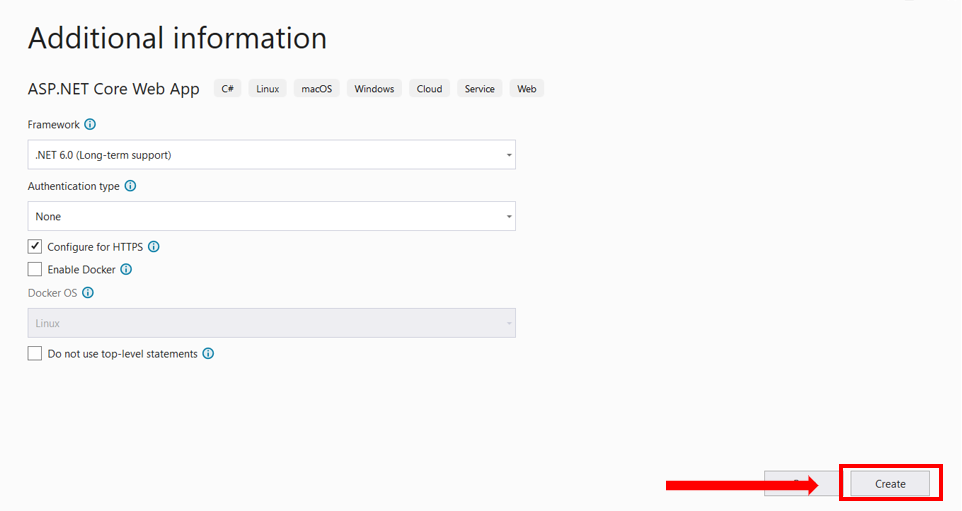
Step 7
Now my project is ready for use.
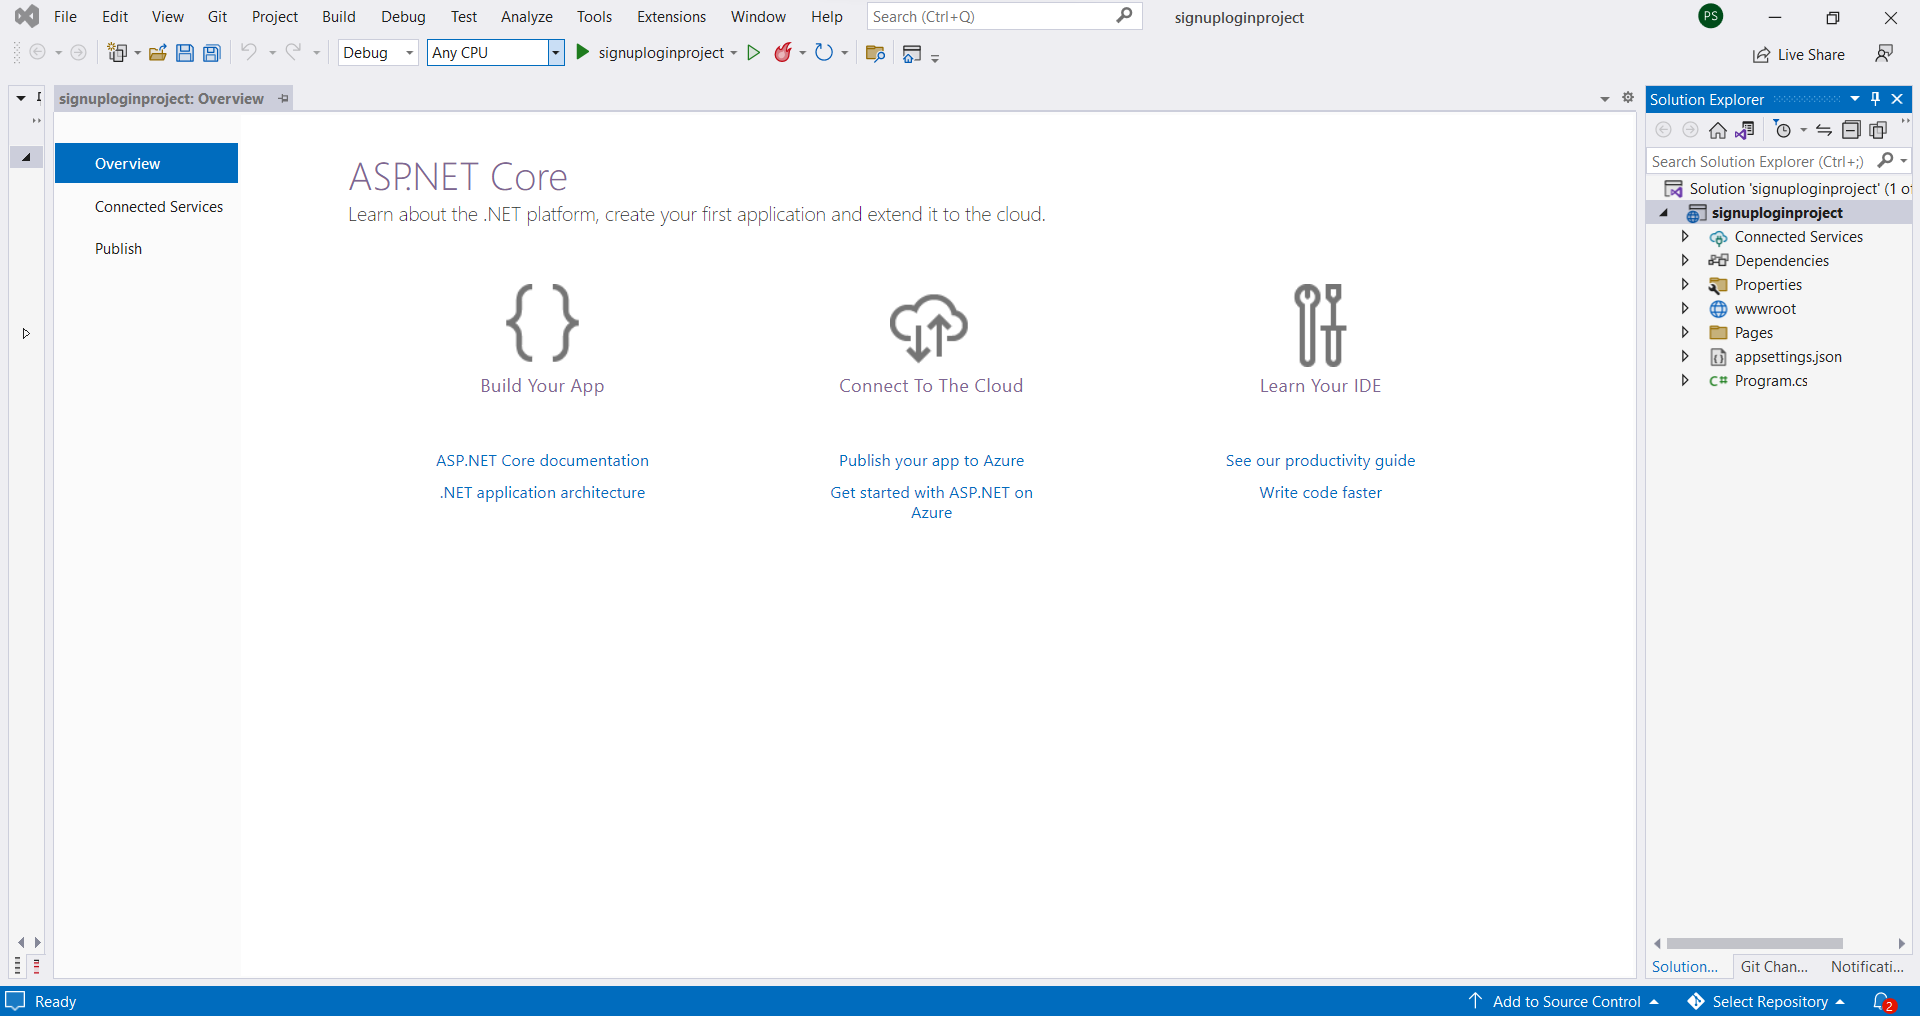
Step 8
Here create a new folder on solution explorer. Right-click on the project name in solution explorer and select Add option then select the new folder option then write the name of the folder.
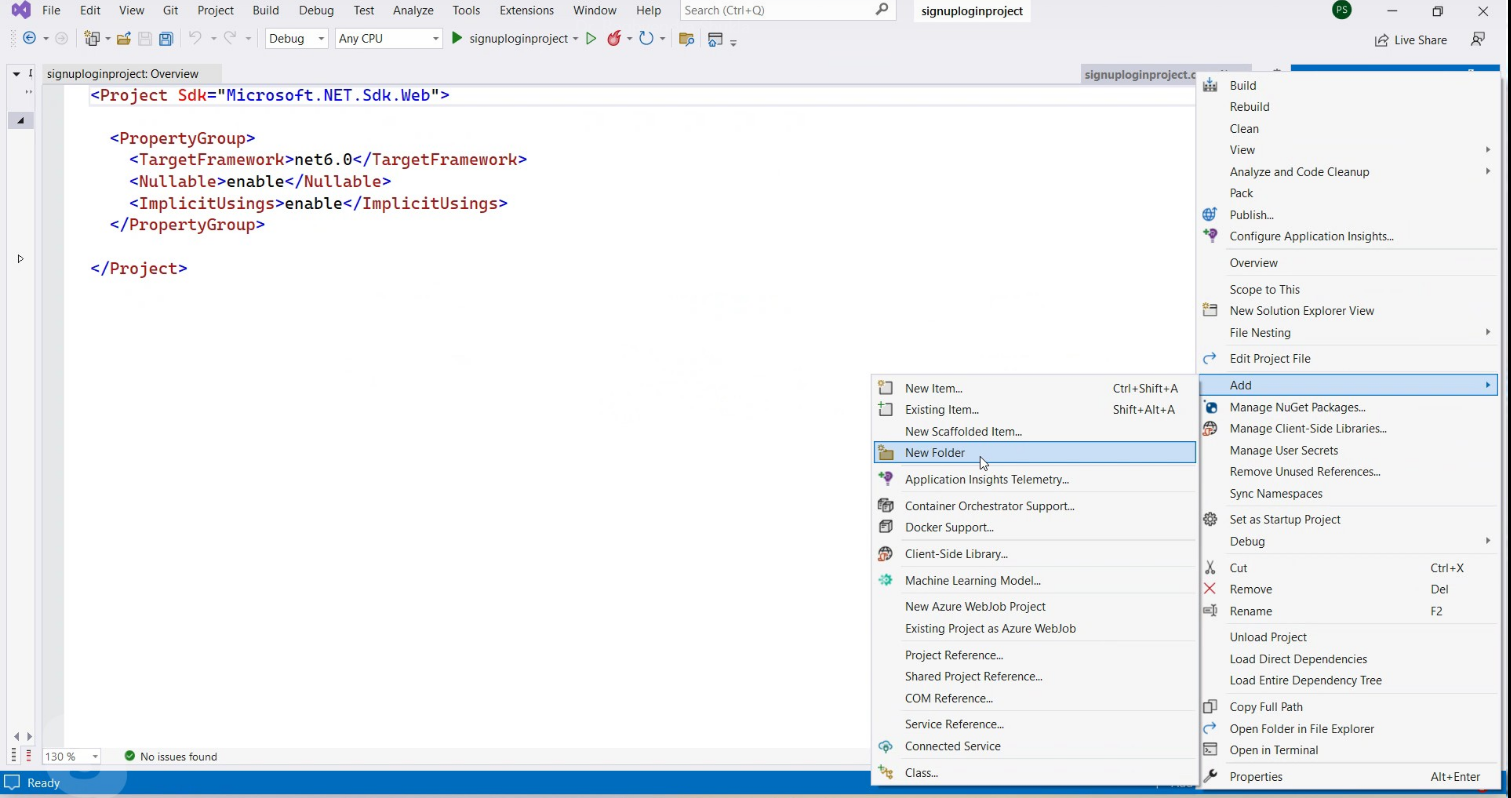
Write the folder name as Models.
Step 9
In Models, folder right-click to choose to Add option and move to the class option, create a class with the class name as a connection.
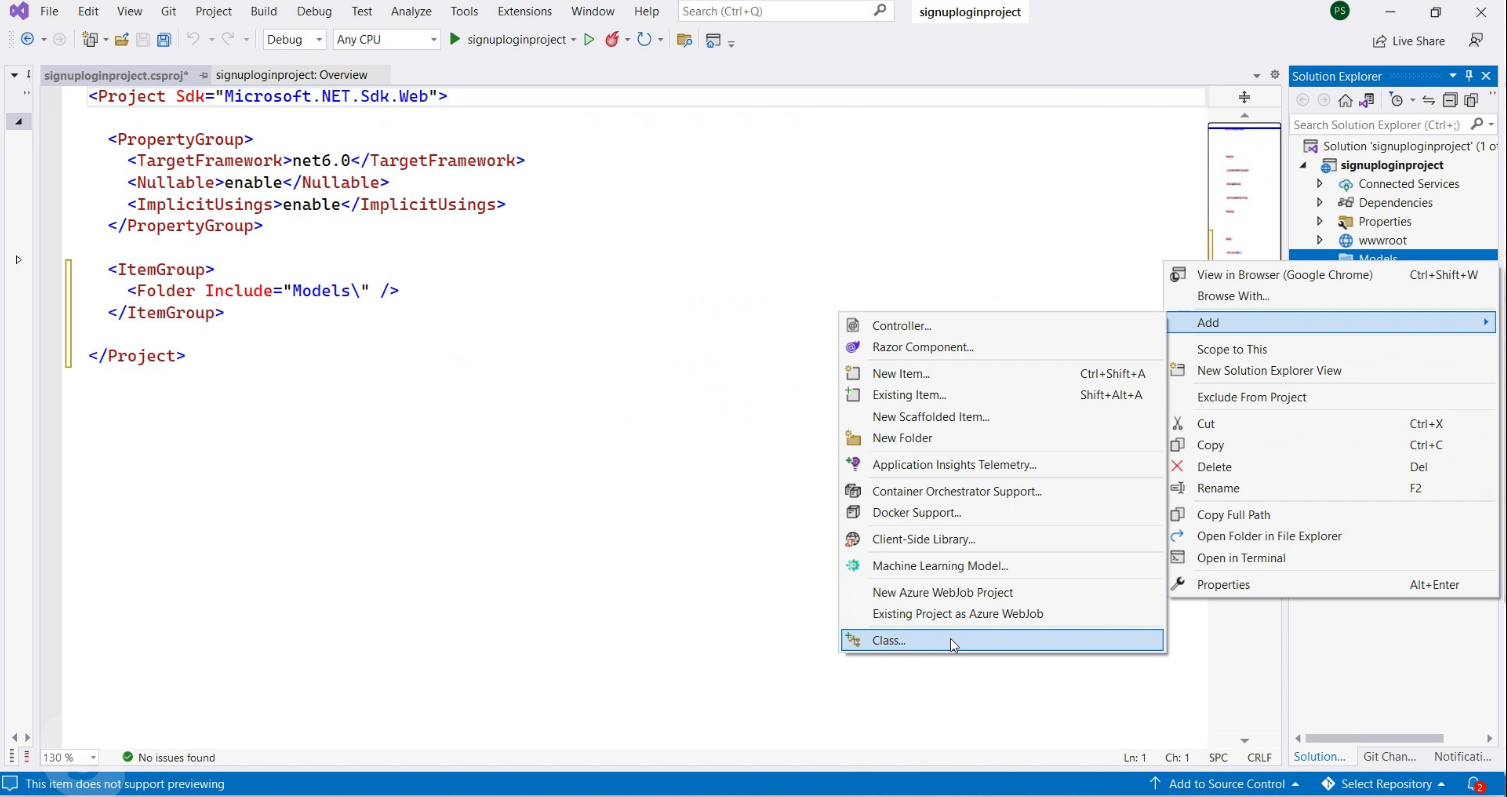
Step 10
To make a property connection string name then create a constructor and pass the connection string.
namespace signuploginproject.Models
{
public class connection
{
public string ConnectionString { get; set; }
public connection()
{
this.ConnectionString = @"Data Source=LAPTOP-2L6RE54T;Initial Catalog=dependencylogin;Integrated Security=True";
}
}
}
Step 11
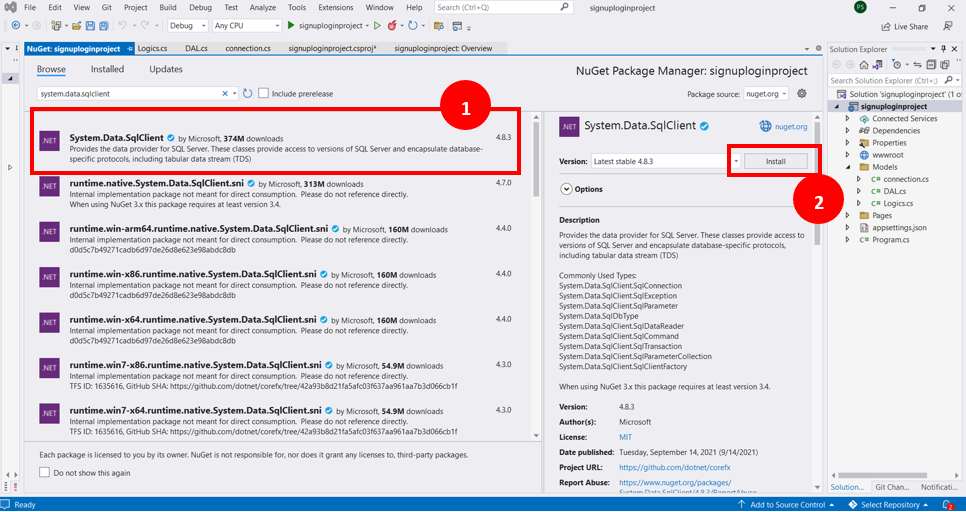
To install the System.Data.SqlClient package from NuGet Package Manager.
Step 12
Similar to creating another class on the Models folder the class name is DAL. Make a connection class object and pass under the constructor.
using System.Data.SqlClient;
namespace signuploginproject.Models
{
public class DAL
{
connection conn;
public DAL(connection conn)
{
this.conn = conn;
}
public string GetValue(string query)
{
SqlConnection sqlconnection = new SqlConnection(conn.ConnectionString);
SqlCommand cmd = new SqlCommand();
cmd.Connection = sqlconnection;
cmd.CommandText = query;
sqlconnection.Open();
var res = cmd.ExecuteScalar();
sqlconnection.Close();
return res.ToString();
}
public void SetValue(string query)
{
SqlConnection sqlconnection = new SqlConnection(conn.ConnectionString);
SqlCommand cmd = new SqlCommand();
cmd.Connection = sqlconnection;
cmd.CommandText = query;
sqlconnection.Open();
cmd.ExecuteNonQuery();
sqlconnection.Close();
}
}
}
Step 13
Similarly create one more class on the Models folder. The class name is Logics. Here create a DAL class object and pass a Logics class constructor. A Logic class makes two different functions for login and signup.
namespace signuploginproject.Models
{
public class Logics
{
DAL DL;
public Logics(DAL dl)
{
DL = dl;
}
public bool Login(string email, string password)
{
string query = $"select password from users where email='{email}'";
var res = DL.GetValue(query);
return res == password;
}
public string submitdata(string name, string email, string password)
{
string query = $"insert into users (name,email,password) values ('{name}','{email}','{password}')";
DL.SetValue(query);
return "Data submitted";
}
}
}
Step 14
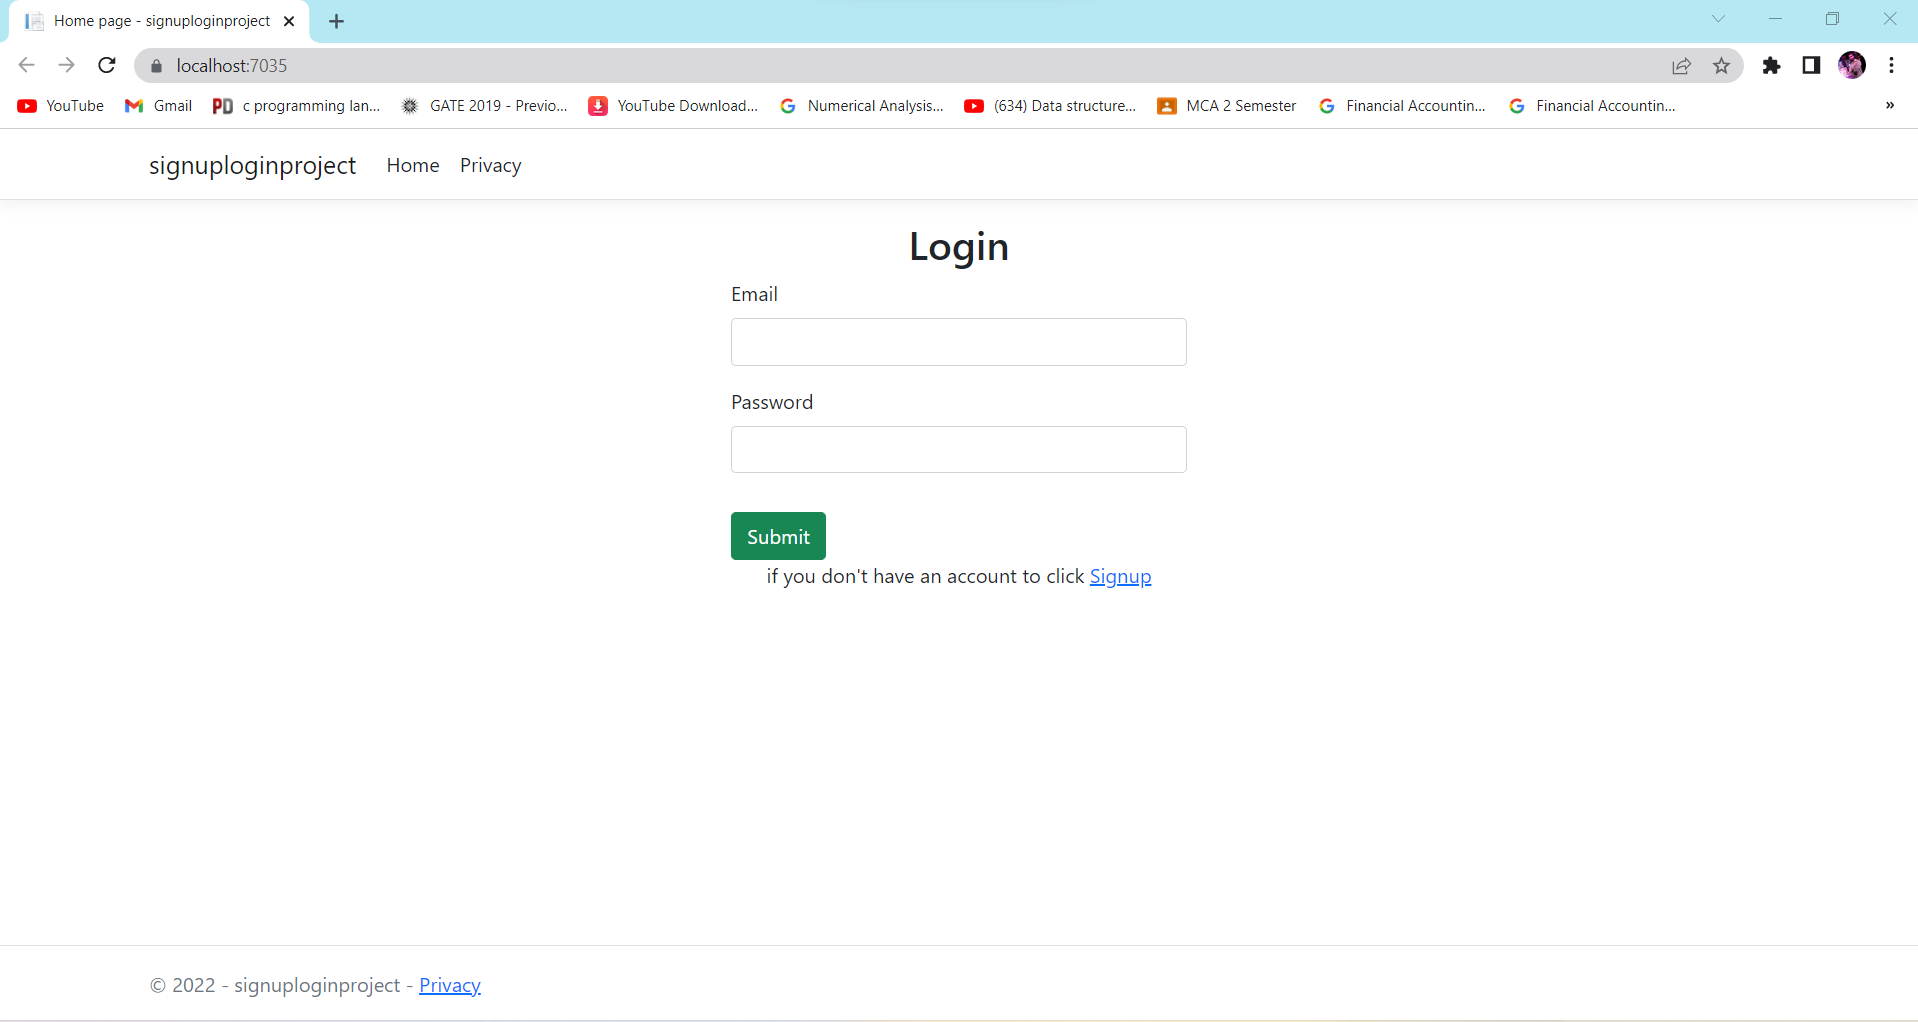
Design an Index page for the Login page.
@page
@model IndexModel
@{
ViewData["Title"] = "Home page";
}
<div class="container" style="width:30%">
<center>
<h2>Login</h2>
</center>
<form method="post">
<div class="mb-3">
<label class="form-label">Email</label>
<input type="email" name="email" class="form-control">
</div>
<div class="mb-3">
<label class="form-label">Password</label>
<input type="password" name="password" class="form-control">
</div>
<div class="btn-group" style="margin-top:15px;">
<button type="submit" class="btn btn-success">Submit</button>
</div>
</form>
<center>
<p>if you don't have an account to click <a href="/Signup"> Signup</a>
</p>
</center>
</div>
Login page
Step 15
Write a code on the Index model page.
using Microsoft.AspNetCore.Mvc;
using Microsoft.AspNetCore.Mvc.RazorPages;
using signuploginproject.Models;
namespace signuploginproject.Pages {
public class IndexModel: PageModel {
private readonly ILogger < IndexModel > _logger;
public IndexModel(ILogger < IndexModel > logger, Logics logic) {
_logger = logger;
this.logi = logic;
}
public void OnGet() {}
Logics logi;
public IActionResult OnPost(string email, string password) {
bool res = logi.Login(email, password);
if (res == true) {
return Redirect("/dashboard");
} else {
return Redirect("/error");
}
}
}
}
Step 16
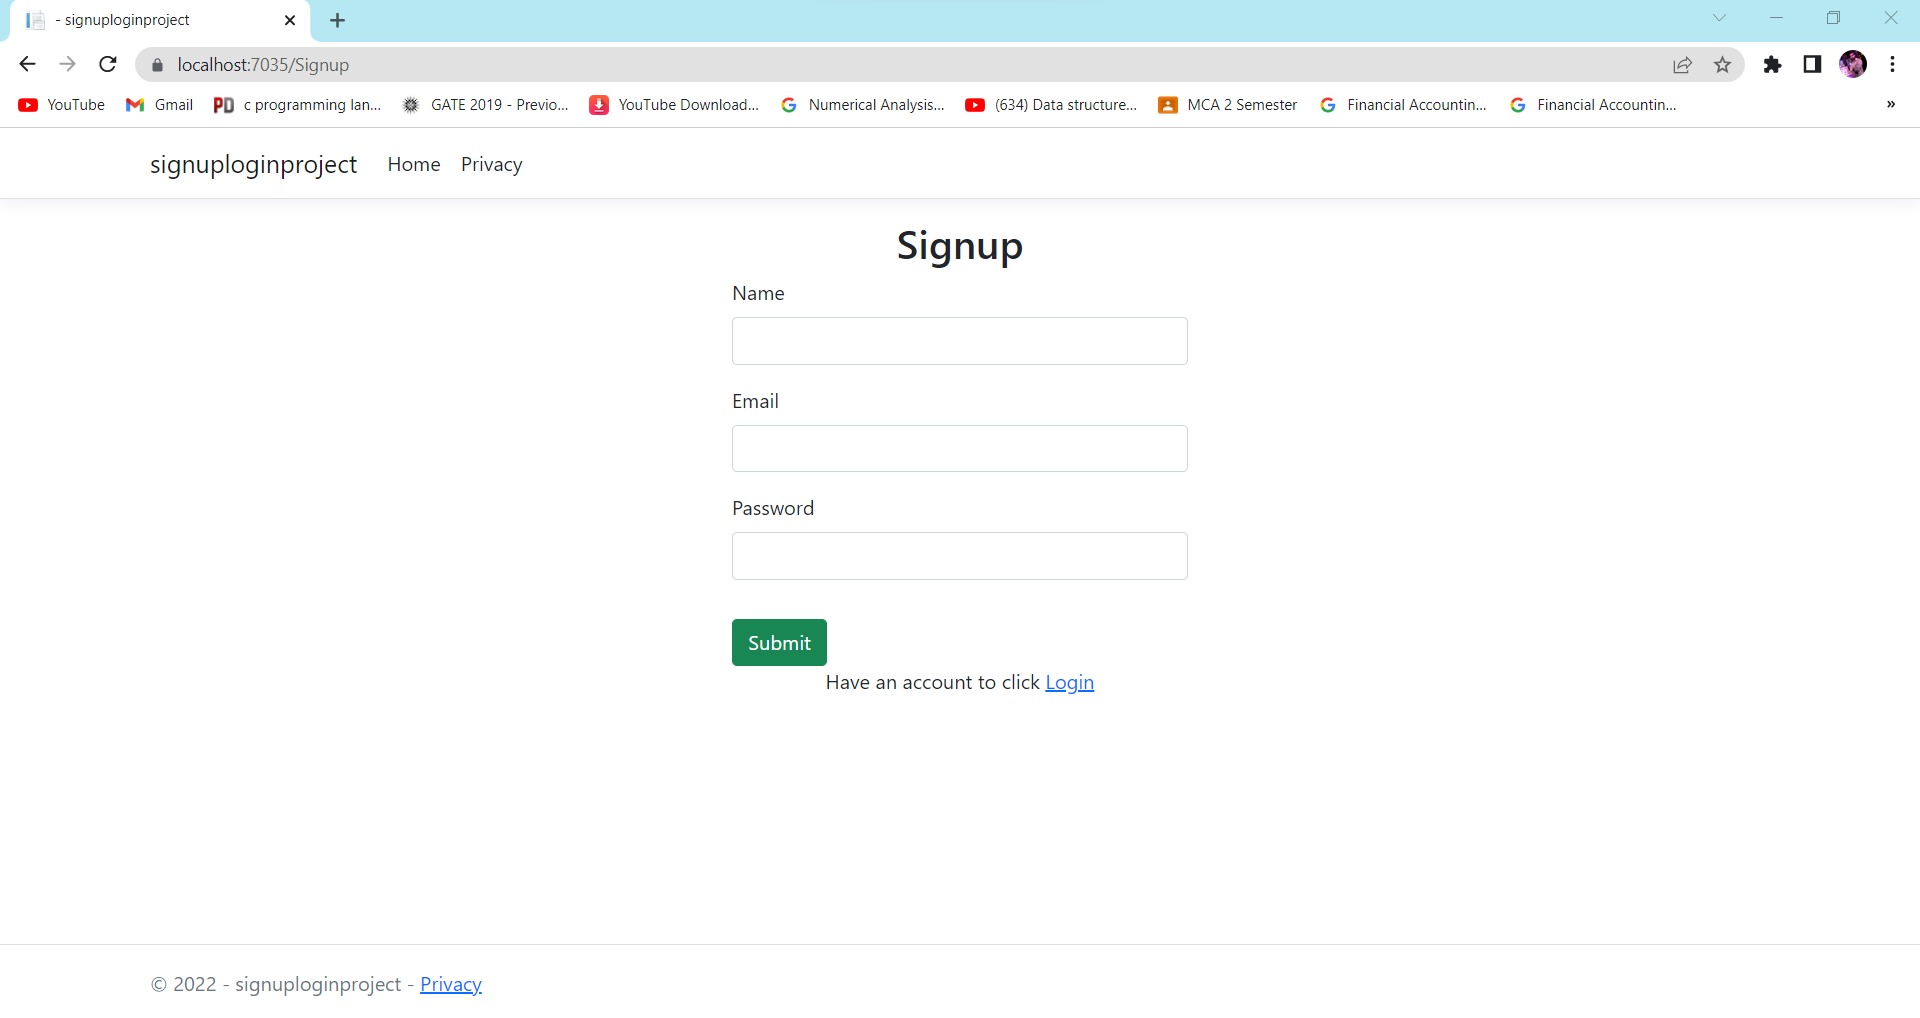
Create a new razor page for signup and design a signup form.
@page
@model signuploginproject.Pages.signupModel
@{
}
<div class="container" style="width:30%">
<center>
<h2>Signup</h2>
</center>
<form method="post">
<div class="mb-3">
<label class="form-label">Name</label>
<input type="text" name="name" class="form-control">
</div>
<div class="mb-3">
<label class="form-label">Email</label>
<input type="email" name="email" class="form-control">
</div>
<div class="mb-3">
<label class="form-label">Password</label>
<input type="password" name="password" class="form-control">
</div>
<div class="btn-group" style="margin-top:15px;">
<button type="submit" class="btn btn-success">Submit</button>
</div>
</form>
<center>
<p>Have an account to click <a href="/Index"> Login</a>
</p>
</center>
</div>
Signup Page
Step 17
Write code on the signup model page.
using Microsoft.AspNetCore.Mvc;
using Microsoft.AspNetCore.Mvc.RazorPages;
using signuploginproject.Models;
namespace signuploginproject.Pages {
public class signupModel: PageModel {
public signupModel(Logics logic) {
this.logi = logic;
}
public void OnGet() {}
Logics logi;
public IActionResult OnPost(string name, string email, string password) {
var rees = logi.submitdata(name, email, password);
return Redirect("/index");
}
}
}
Step 18
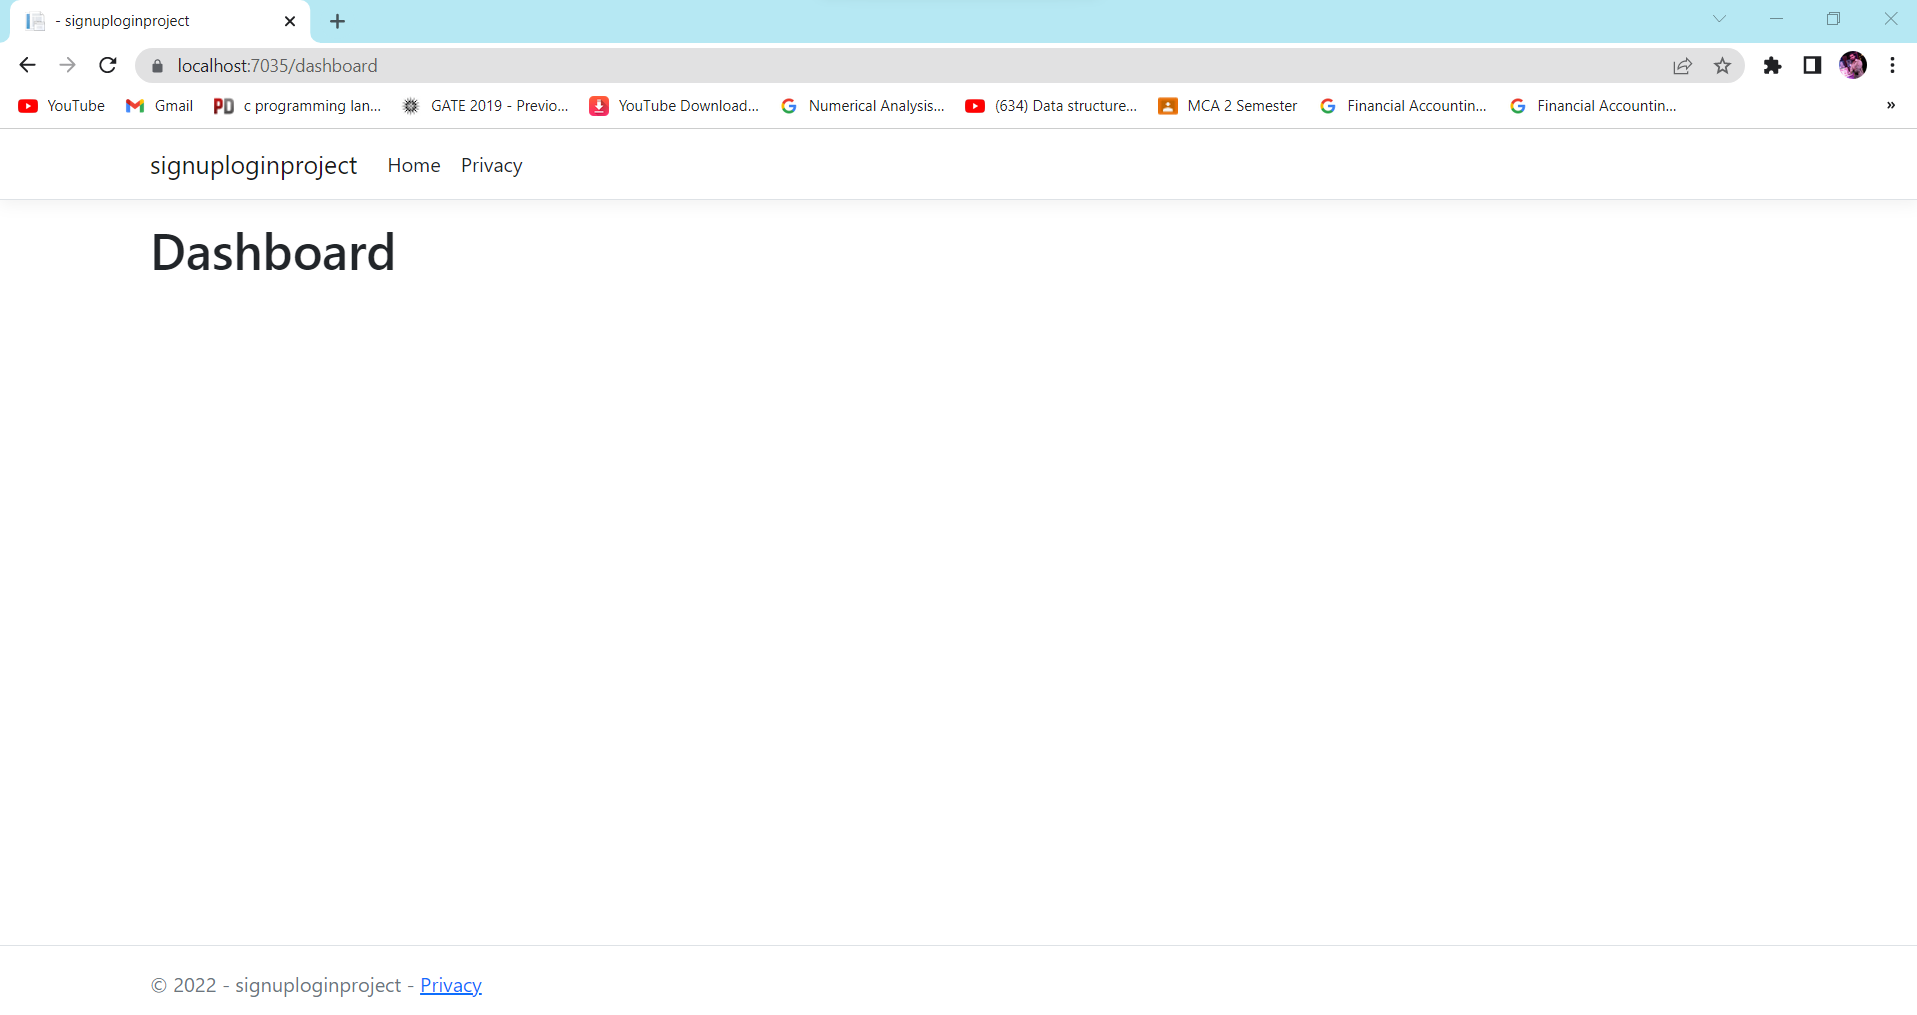
Create a new razor page for the dashboard page and write the code.
@page
@model signuploginproject.Pages.dashboardModel
@{
}
<h1>Dashboard</h1>
Dashboard Page
Step 19
Add the services to the program.cs file for providing a class object when needed. To click on the program.cs file and write the code on container services.
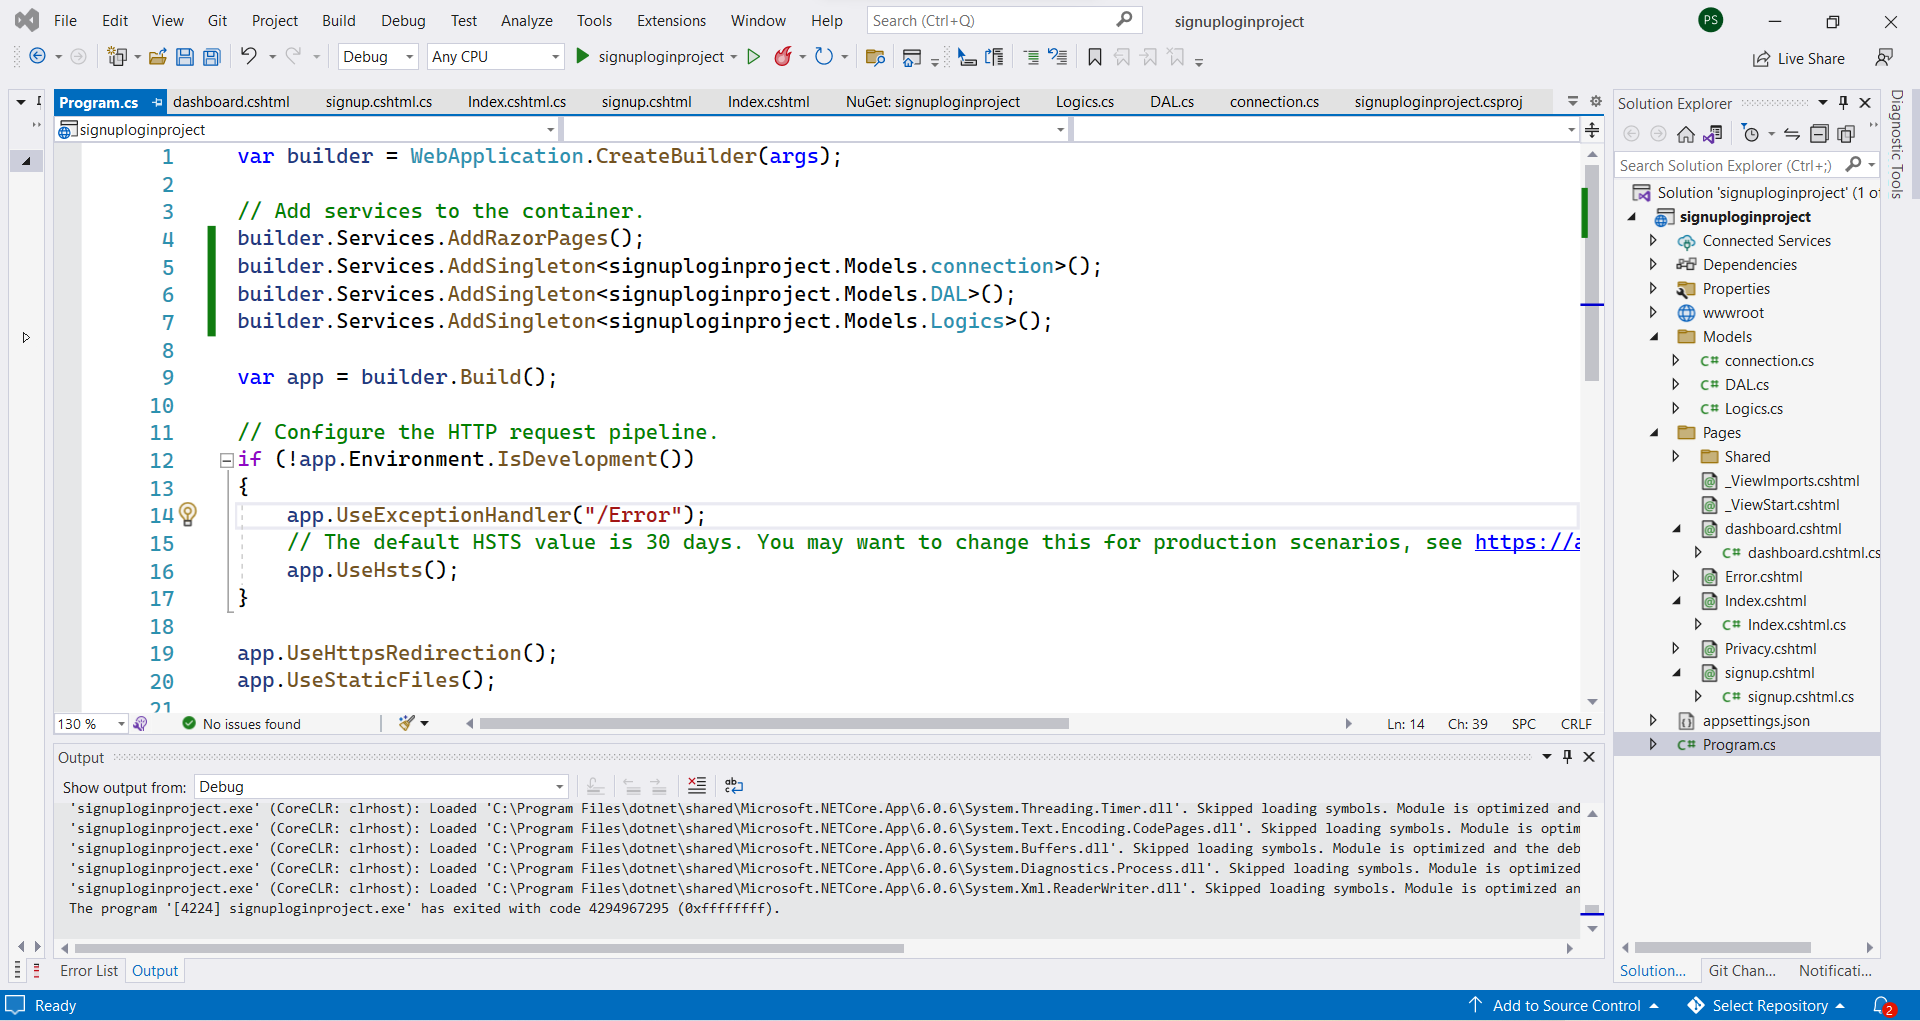
To build and execute the project.
European best, cheap and reliable ASP.NET hosting with instant activation. HostForLIFE.eu is #1 Recommended Windows and ASP.NET hosting in European Continent. With 99.99% Uptime Guaranteed of Relibility, Stability and Performace. HostForLIFE.eu security team is constantly monitoring the entire network for unusual behaviour. We deliver hosting solution including Shared hosting, Cloud hosting, Reseller hosting, Dedicated Servers, and IT as Service for companies of all size.
