In this tutorial article, we will learn how to build a web API from ASP.NET 6 to handle CRUD operations with a database in MySQL.
Resources required
To follow this article step by step or run the included demo, it is necessary to have the following tools in operation:
MySQL.
.NET 6 SDK.
Visual Studio 2019/2022.
The web development workload and ASP.NET for Visual Studio 2019/2022.
The process to follow,
In the tutorial, we will have three important parts:
Review the database we are going to use.
Establish database access from ASP.NET through the Entity Framework.
Set the handlers and their methods for the web service.
As a case study for this tutorial, user data will be handled through CRUD (Create, Read, Update, and Delete) operations.
1. The database for the application domain.
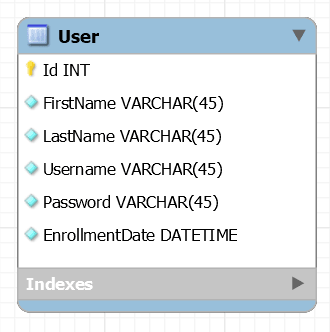
The database that we will use in this example is made up of a single table called: User, with the attributes: Id, FirstName, LastName, Username, Password, and EnrrollmentDate; in MySQL.
SQL statements for the creation of the User table are as follows:
CREATE TABLE `user` (
`Id` INT NOT NULL PRIMARY KEY,
`FirstName` VARCHAR(45) NOT NULL,
`LastName` VARCHAR(45) NOT NULL,
`Username` VARCHAR(45) NOT NULL,
`Password` VARCHAR(45) NOT NULL,
`EnrollmentDate` datetime NOT NULL
);
Very well, with the database established, we can already start with the implementation of our first project for the development of API Rest services.
2. Establish database access from ASP.NET through Entity Framework.
ASP.NET 6 Web API project.
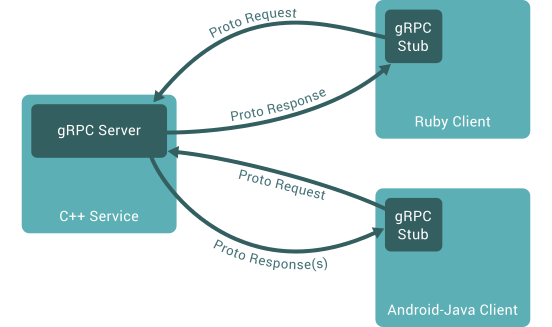
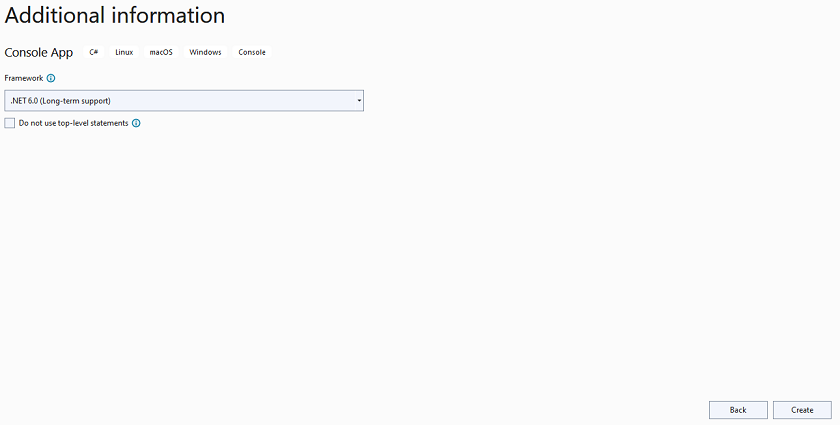
In Visual Studio, the first thing we'll do is create a new project of the type ASP.NET Core Web API:
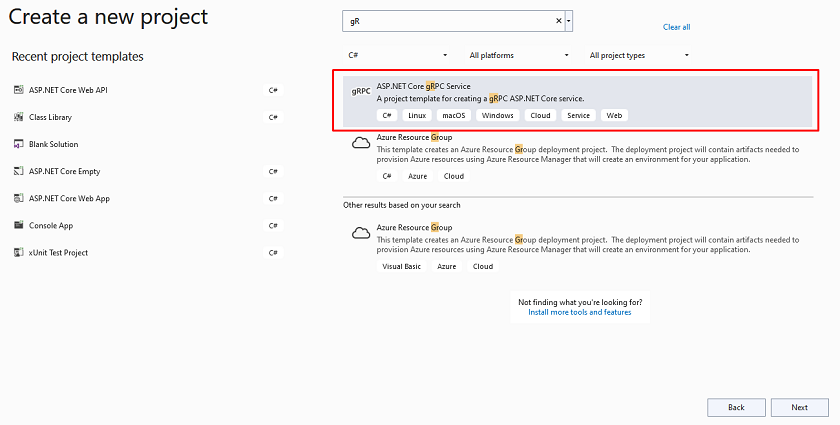
Then, in the following steps, we can specify the Framework.
With this project, we'll create access to the database and implement a corresponding controller to work with that data and provide the web API.
Database access with Entity Framework.
To establish the entities through classes and the connection of the database, we can use the Database First approach of the Entity Framework, which allows us to scaffold from the database to the project, that is, generate classes automatically according to the entities established in the database and the connection in the project.
For this purpose, it's necessary to install three NuGet packages,
Microsoft.EntityFrameworkCore.Design
Microsoft.EntityFrameworkCore.Tools
MySql.EntityFrameworkCore
In case you are working with SQL Server, the NuGet package to install will be: Microsoft.EntityFrameworkCore.SQLServer.
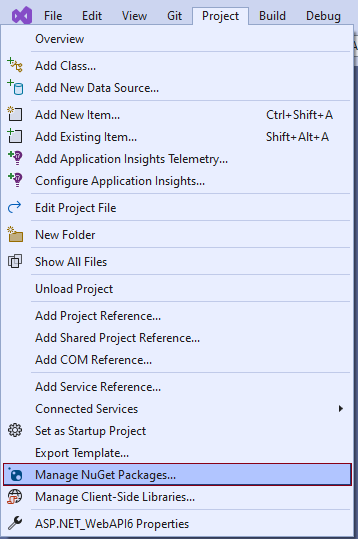
Note: To find the admin center of NuGet packages, we can go to the option: Menu -> Project -> Manage NuGet Packages...
With the installation of these NuGet packages, we'll now open the package manager console to write a command that will allow us to perform scaffolding from the database:
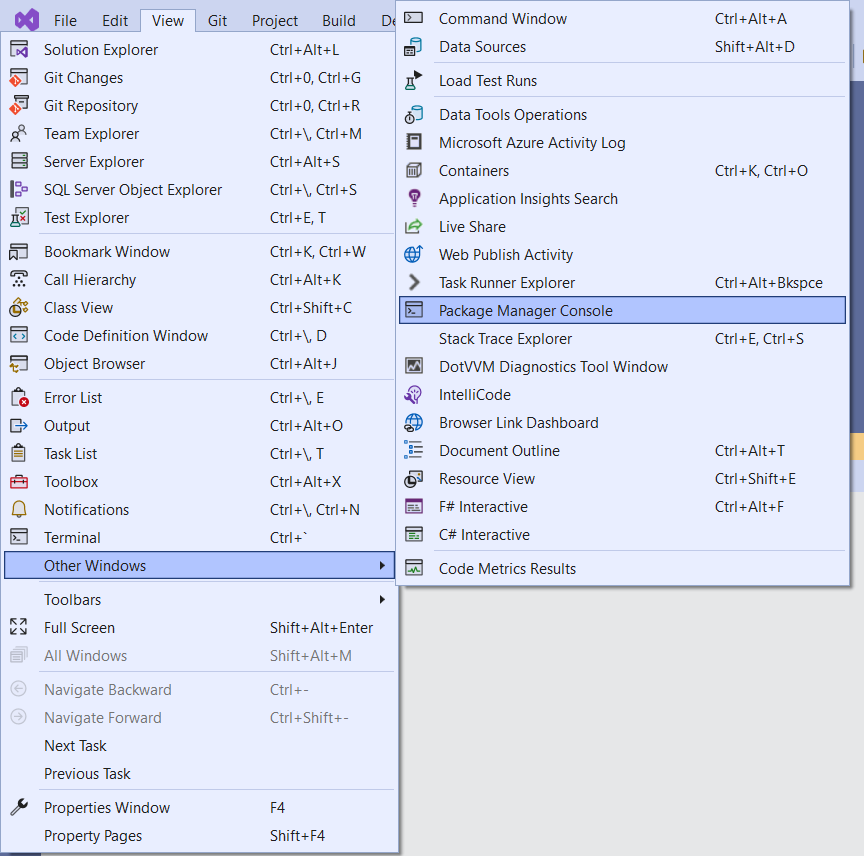
Command
Scaffold-DbContext "server=servername;port=portnumber;user=username;password=pass;database=databasename" MySql.EntityFrameworkCore -OutputDir Entities -f
The result is as follows:
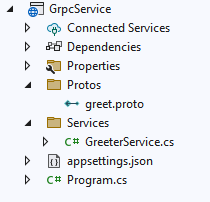
Here, the User class is defined as follows,
public partial class User
{
public int Id { get; set; }
public string FirstName { get; set; }
public string LastName { get; set; }
public string Username { get; set; }
public string Password { get; set; }
public DateTime EnrollmentDate { get; set; }
}
And the DBContext, which has the configuration with the database, whose main method OnConfiguring will look something like this,
protected override void OnConfiguring(DbContextOptionsBuilder optionsBuilder)
{
if (!optionsBuilder.IsConfigured)
{ optionsBuilder.UseMySQL("server=localhost;port=3306;user=root;password=;database=database");
}
}
Now, it's not the most appropriate that the connection string to the database is specified in the OnConfiguring method. For this, within our project, we can find the appsettings.json file, in which we can define this configuration,
"AllowedHosts": "*",
"ConnectionStrings": {
"DefaultConnection": "server=localhost;port=3306;user=root;password=;database=demo;"
}
Then, in the Program class, we'll add as a service to the DBContext, and then we must reference the DefaultConnection the property specified in the appsettings.json file:
builder.Services.AddEntityFrameworkMySQL().AddDbContext < DBContext > (options => {
options.UseMySQL(builder.Configuration.GetConnectionString("DefaultConnection"));
});
});
In this case, returning to the class of the DBContext, we delete the connection string specified in the OnConfiguring method.
protected override void OnConfiguring(DbContextOptionsBuilder optionsBuilder)
{}
With these steps, we have already ready the connection and the necessary configurations to work with the database in ASP.NET with the help of Entity Framework.
3. Set the controllers and their methods for the web service.
In order to transport the data between the processes for the management of the database and the processes for working with web services, it's advisable to establish DTO classes for each entity of the project, in this case, a DTO for the entity User.
To do this, we'll create a new folder within the project called DTO and create a class called UserDTO, whose attributes will be the same as the User class defined in the Entities section above:
public class UserDTO
{
public int Id { get; set; }
public string FirstName { get; set; }
public string LastName { get; set; }
public string Username { get; set; }
public string Password { get; set; }
public DateTime EnrollmentDate { get; set; }
}
Controllers for the Web API.
Now what we'll do is add the controllers, in this case, the controller for the user, which will allow establishing methods to perform CRUD operations on the tables of the database and expose them through the Web API. On the Controllers folder, we'll add a controller called UserController:
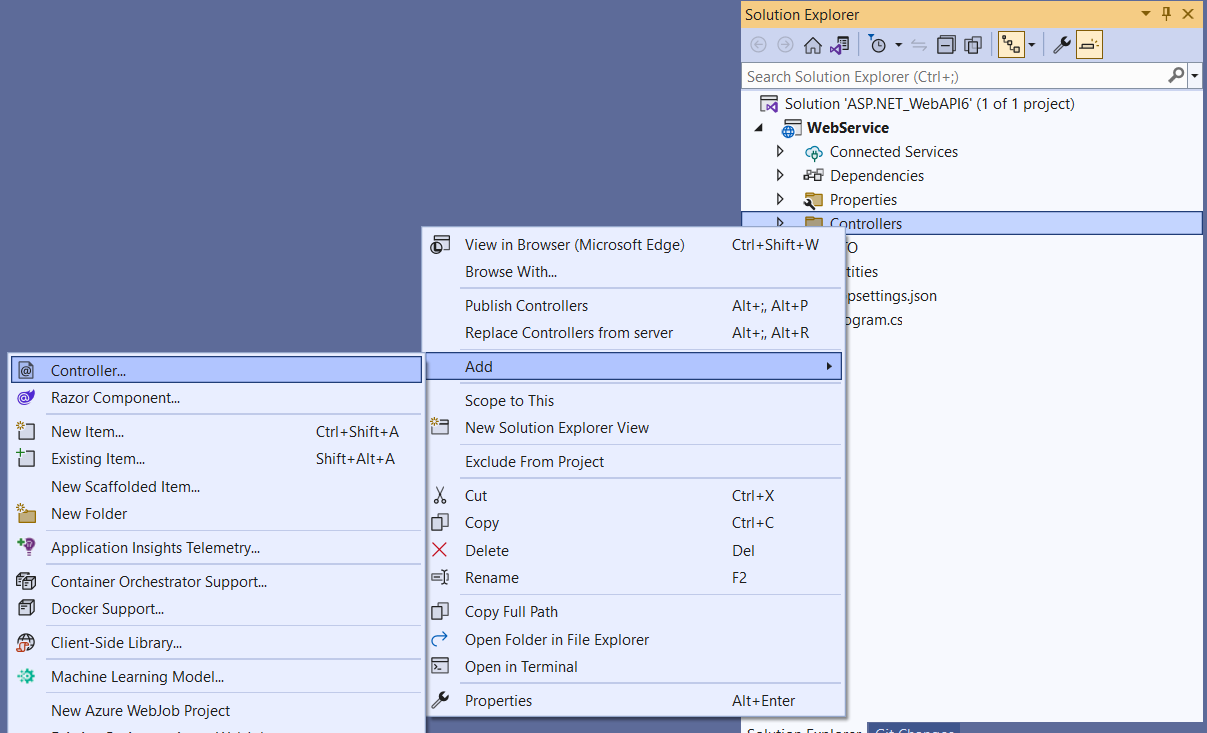
The definition of the class and its constructor will look like this:
[ApiController]
[Route("api/[controller]")]
public class UserController : ControllerBase
{
private readonly DBContext DBContext;
public UserController( DBContext DBContext)
{
this.DBContext = DBContext;
}
...
}
Now, the goal is to perform CRUD operations. In this sense, we'll use methods to access the information (Get), insert data (Post), modify (Put), and delete a record (Delete).
The following is the final code for each of the methods:
A. Get the list of all registered users.
[HttpGet("GetUsers")]
public async Task<ActionResult<List<UserDTO>>> Get()
{
var List = await DBContext.User.Select(
s => new UserDTO
{
Id = s.Id,
FirstName = s.FirstName,
LastName = s.LastName,
Username = s.Username,
Password = s.Password,
EnrollmentDate = s.EnrollmentDate
}
).ToListAsync();
if (List.Count < 0)
{
return NotFound();
}
else
{
return List;
}
}
B. Obtain the data of a specific user according to their Id.
[HttpGet("GetUserById")]
public async Task < ActionResult < UserDTO >> GetUserById(int Id) {
UserDTO User = await DBContext.User.Select(s => new UserDTO {
Id = s.Id,
FirstName = s.FirstName,
LastName = s.LastName,
Username = s.Username,
Password = s.Password,
EnrollmentDate = s.EnrollmentDate
}).FirstOrDefaultAsync(s => s.Id == Id);
if (User == null) {
return NotFound();
} else {
return User;
}
}
C. Insert a new user.
[HttpPost("InsertUser")]
public async Task < HttpStatusCode > InsertUser(UserDTO User) {
var entity = new User() {
FirstName = User.FirstName,
LastName = User.LastName,
Username = User.Username,
Password = User.Password,
EnrollmentDate = User.EnrollmentDate
};
DBContext.User.Add(entity);
await DBContext.SaveChangesAsync();
return HttpStatusCode.Created;
}
D. Update the data of a specific user.
[HttpPut("UpdateUser")]
public async Task < HttpStatusCode > UpdateUser(UserDTO User) {
var entity = await DBContext.User.FirstOrDefaultAsync(s => s.Id == User.Id);
entity.FirstName = User.FirstName;
entity.LastName = User.LastName;
entity.Username = User.Username;
entity.Password = User.Password;
entity.EnrollmentDate = User.EnrollmentDate;
await DBContext.SaveChangesAsync();
return HttpStatusCode.OK;
}
E. Delete a user based on their Id.
[HttpDelete("DeleteUser/{Id}")]
public async Task < HttpStatusCode > DeleteUser(int Id) {
var entity = new User() {
Id = Id
};
DBContext.User.Attach(entity);
DBContext.User.Remove(entity);
await DBContext.SaveChangesAsync();
return HttpStatusCode.OK;
}
With these methods and the steps followed up to this point, the web service is ready to run.
Test the implemented web API
To test the implemented API we can use Swagger UI, a visual tool that allows us to interact with the methods of our service, and that in turn is already integrated into our ASP.NET 6 project.
For testing, we need to build and run the application:

Next, we can see the Swagger interface so that we can perform the corresponding tests according to the methods defined in our controller and in an interactive way:
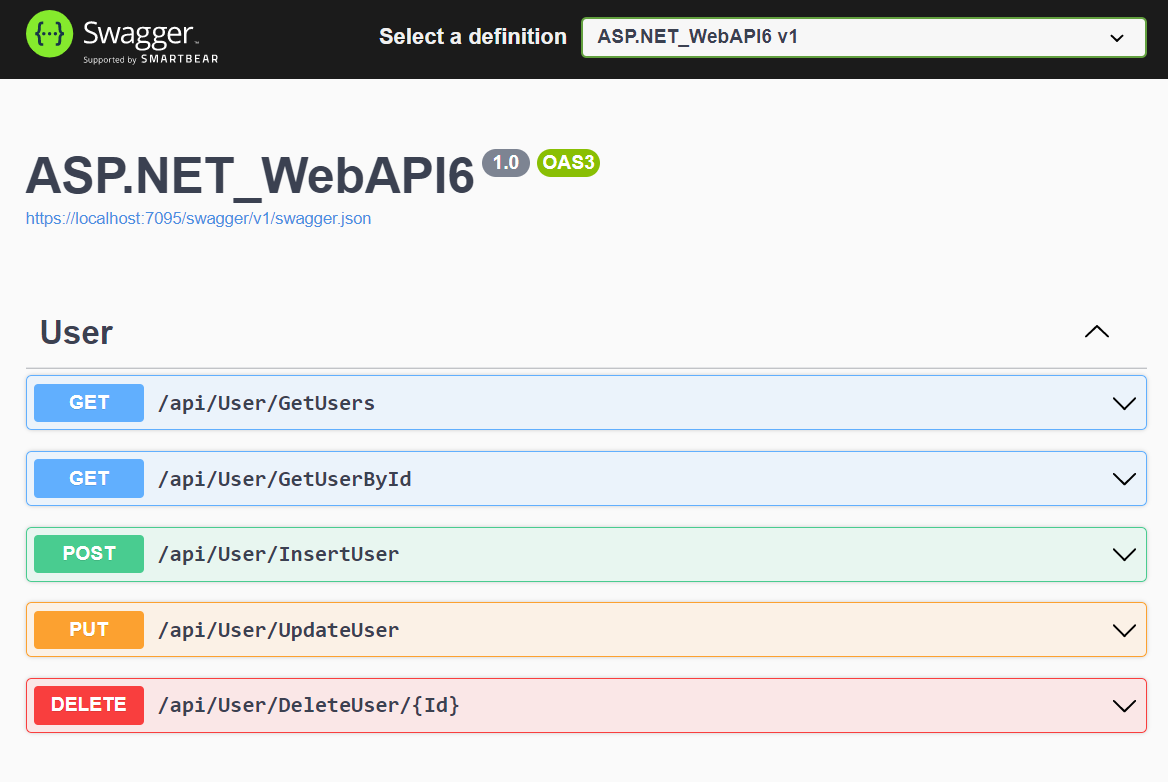
As this is a RestFul service, we may use any other program or application to consume these services. For example, here we can see a call to the GetUsers method from the Postman tool:
European best, cheap and reliable ASP.NET hosting with instant activation. HostForLIFE.eu is #1 Recommended Windows and ASP.NET hosting in European Continent. With 99.99% Uptime Guaranteed of Relibility, Stability and Performace. HostForLIFE.eu security team is constantly monitoring the entire network for unusual behaviour. We deliver hosting solution including Shared hosting, Cloud hosting, Reseller hosting, Dedicated Servers, and IT as Service for companies of all size.
