European ASP.NET 4.5 Hosting BLOG

BLOG about ASP.NET 4, ASP.NET 4.5 Hosting and Its Technology - Dedicated to European Windows Hosting Customer

ASP.NET Core 1.0 Hosting - HostForLIFE.eu :: How to Call Rest API in ASP.NET?

clock August 16, 2016 20:46 by author Peter

In this today's tutorial, I will show you how to call rest API in ASP.NET. As the Internet industry progresses, creating a REST API becomes more concrete with emerging best practices.As RESTful web services don't follow a prescribed standard except for HTTP, it's important to build your RESTful API in accordance with industry best practices to ease development and increase client adoption. A RESTful API is an application program interface (API) that uses HTTP requests to GET, PUT, POST and DELETE data.

RESTful APIs explicitly take advantage of HTTP methodologies defined by the RFC 2616 protocol. They simply use "PUT" to change the state of or update a resource, which can be an object, file or block; "GET" to retrieve a resource; POST" to create that resource; and "DELETE" to remove it.
using System; 
using System.Collections.Generic; 
using System.Linq; 
using System.Web; 
using System.Net; 
using System.IO; 
using System.Data; 
using System.Data.Common; 
using Golive_Web.Controller; 
namespace Golive.Controller 

public class APITEXT 

Database database = new Database("GoliveAPI"); 
public DataTable GetAPI() 

DbCommand cmd = database.GetStoredPocCommand("SP_TExt"); 
DataTable dtApi = database.ExecuteDataTable(cmd); 
return dtApi; 

public string GetData(String mobileNo, String ID, String APILink) 

try 

    string XML = "<AccDtls>" + "<Request>" + "<RequestUUID>Req_" + ID + "</RequestUUID>" + "<ServiceRequestId>AcctInq</ServiceRequestId>" + "<ServiceRequestVersion>10.2</ServiceRequestVersion>" + "<ChannelId>CTS</ChannelId>" + "<AccID>" + mobileNo + "</AccID> " + "</Request>" + "</AccDtls>"; 
    const string url = "http://100.98.2.208:6070/rbl/CTSFin"; 
    HttpWebRequest request = (HttpWebRequest) WebRequest.Create(url); 
    request.ContentType = "application/xml"; //set the content type to JSON 
    request.Method = "POST"; //make an HTTP POST 
    # 
    region test# endregion 
    using(var streamWriter = new StreamWriter(request.GetRequestStream())) 
        { 
            var resToWrite = XML; 
            streamWriter.Write(resToWrite); 
            streamWriter.Flush(); 
            streamWriter.Close(); 
        } 
        // Get the response. 
    WebResponse response = request.GetResponse(); 
    var streamReader = new StreamReader(response.GetResponseStream()); 
    string result = streamReader.ReadToEnd(); 
    return result; 

catch (Exception) 

    throw; 


}

HostForLIFE.eu ASP.NET Core 1.0 Hosting

European best, cheap and reliable ASP.NET hosting with instant activation. HostForLIFE.eu is #1 Recommended Windows and ASP.NET hosting in European Continent. With 99.99% Uptime Guaranteed of Relibility, Stability and Performace. HostForLIFE.eu security team is constantly monitoring the entire network for unusual behaviour. We deliver hosting solution including Shared hosting, Cloud hosting, Reseller hosting, Dedicated Servers, and IT as Service for companies of all size.


ASP.NET Core 1.0 Hosting - HostForLIFE.eu :: How to Read the Data from CSV File in ASP.NET?

clock August 3, 2016 23:41 by author Peter

I am gonna explaining how to read the data from CSV file using file upload control. A CSV is a comma separated values file, which allows data to be saved in a table structured format. CSVs look like a garden-variety spreadsheet but with a .csv extension (Traditionally they take the form of a text file containing information separated by commas, hence the name). CSV files can be used with any spreadsheet program, such as Microsoft Excel, Open Office Calc, or Google Spreadsheets. They differ from other spreadsheet file types in that you can only have a single sheet in a file, they can not save cell, column, or row styling, and can not save formulas.

Code
<asp:FileUpload ID="fpContacts" runat="server" /> 
<asp:Button ID="btnUpload" runat="server" Text="Upload" OnClick="btnUpload_Click" /></p> 

Here we need to add a new folder to the solution, why because, sometimes it will takes the fake file path. it is better to save the file and read data.

In .cs page, write the following code.
protected void btnUpload_Click(object sender, EventArgs e) 

 if (fpContacts.HasFile) 
 { 
     string spath = Server.MapPath("~/upload"); 
     string csv_file_path = spath + "\\" + fpContacts.FileName; 
     fpContacts.SaveAs(csv_file_path); 

     DataTable csvData = GetDataTableFromCSVFile(csv_file_path); 
 } 


public DataTable GetDataTableFromCSVFile(string csv_file_path) 

 DataTable csvData = new DataTable(); 
 try 
 { 
     using (TextFieldParser csvReader = new TextFieldParser(csv_file_path)) 
     { 
         csvReader.SetDelimiters(new string[] { "," }); 
         csvReader.HasFieldsEnclosedInQuotes = true; 
         //read column names 
         string[] colFields = csvReader.ReadFields(); 
         foreach (string column in colFields) 
         { 
             DataColumn datecolumn = new DataColumn(column); 
             datecolumn.AllowDBNull = true; 
             csvData.Columns.Add(datecolumn); 
         } 
         while (!csvReader.EndOfData) 
         { 
             string[] fieldData = csvReader.ReadFields(); 
             ContactEntity CEntity = new ContactEntity(); 
             B2B_BillsData BData = new B2B_BillsData(); 

             CEntity.ContactName = fieldData[0]; 
             CEntity.Email = fieldData[1]; 
             CEntity.Mobile = fieldData[2]; 
             CEntity.GroupId = ddlGroup.SelectedIndex; 
             CEntity.UserId = userid; 
             if (BData.InsertNewContact(CEntity) == true) 
             { 
                 lblMsg.ForeColor = Color.Green; 
                 lblMsg.Text = "Contact Saved successfully"; 
             } 
             csvData.Rows.Add(fieldData); 
         } 
     } 
 } 
 catch (Exception ex) 
 { 
     //MessageBox.Show(ex.Message); 
 } 
 return csvData; 
}

HostForLIFE.eu ASP.NET Core 1.0 Hosting

European best, cheap and reliable ASP.NET hosting with instant activation. HostForLIFE.eu is #1 Recommended Windows and ASP.NET hosting in European Continent. With 99.99% Uptime Guaranteed of Relibility, Stability and Performace. HostForLIFE.eu security team is constantly monitoring the entire network for unusual behaviour. We deliver hosting solution including Shared hosting, Cloud hosting, Reseller hosting, Dedicated Servers, and IT as Service for companies of all size.


ASP.NET Core 1.0 Hosting - HostForLIFE.eu :: Progress Bar In GridView

clock July 27, 2016 23:06 by author Peter

Now, I will show you how to create Progress Bar In GridView with ASP.NET. The ASP.NET GridView control is the successor to the v1.x DataGrid, adding the ability to take advantage of specific capabilities of ASP.NET data source controls. Whereas the v1.x DataGrid required a page developer to write custom code to handle simple operations such as paging, sorting, editing or deleting data, the GridView control can automatically handle these operations provided its bound data source control supports these capabilities.

To make Progress Bar in GridView.

Html Code:

<div> 
<asp:GridView ID="GridView1" HeaderStyle-BackColor="#3AC0F2" HeaderStyle-ForeColor="White" 
    runat="server" AutoGenerateColumns="false"> 
    <Columns> 
        <asp:BoundField DataField="Name" HeaderText="Name" ItemStyle-Width="150" /> 
        <asp:BoundField DataField="Percentage" HeaderText="Percentage" ItemStyle-Width="150" /> 
        <asp:TemplateField ItemStyle-Width="300"> 
            <ItemTemplate> 
                <div class='progress'> 
                    <div class="progress-label"> 
                        <%# Eval("Percentage") %></div> 
                </div> 
            </ItemTemplate> 
        </asp:TemplateField> 
    </Columns> 
</asp:GridView> 
</div> 
<style type="text/css"> 
.ui-progressbar 

    position: relative; 

.progress-label 

    position: absolute; 
    left: 50%; 
    top: 4px; 
    font-weight: bold; 
    text-shadow: 1px 1px 0 #fff; 

body 

    font-family: Arial; 
    font-size: 10pt; 

</style> 
<link rel="stylesheet" href="//code.jquery.com/ui/1.10.4/themes/start/jquery-ui.css"> 
<script type="text/javascript" src="//code.jquery.com/jquery-1.10.2.js"></script> 
<script type="text/javascript" src="//code.jquery.com/ui/1.10.4/jquery-ui.js"></script> 
<script type="text/javascript"> 
$(function () { 
    $(".progress").each(function () { 
        $(this).progressbar({ 
            value: parseInt($(this).find('.progress-label').text()) 
        }); 
    }); 
}); 
</script> 

Namespaces code:

using System.Data; 

Code:
protected void Page_Load(object sender, EventArgs e) 

if (!this.IsPostBack) 

    DataTable dt = new DataTable(); 
    dt.Columns.AddRange(new DataColumn[3] { new DataColumn("Id", typeof(int)), 
                    new DataColumn("Name", typeof(string)), 
                    new DataColumn("Percentage",typeof(string)) }); 
    dt.Rows.Add(1, "John Hammond", 45); 
    dt.Rows.Add(2, "Mudassar Khan", 37); 
    dt.Rows.Add(3, "Suzanne Mathews", 67); 
    dt.Rows.Add(4, "Robert Schidner", 12); 
    GridView1.DataSource = dt; 
    GridView1.DataBind(); 


HostForLIFE.eu ASP.NET Core 1.0 Hosting

European best, cheap and reliable ASP.NET hosting with instant activation. HostForLIFE.eu is #1 Recommended Windows and ASP.NET hosting in European Continent. With 99.99% Uptime Guaranteed of Relibility, Stability and Performace. HostForLIFE.eu security team is constantly monitoring the entire network for unusual behaviour. We deliver hosting solution including Shared hosting, Cloud hosting, Reseller hosting, Dedicated Servers, and IT as Service for companies of all size.


ASP.NET Core 1.0 Hosting - HostForLIFE.eu :: ASP.NET CompareValidator

clock July 21, 2016 20:57 by author Peter

In this article I will show you how to use compare validator to compare the two input values. Using compare validator we can compare two values from two different input controls or we can compare input value with some constant or fixed value.

Example of compare validator:

<html xmlns="http://www.w3.org/1999/xhtml">
<head runat="server">
    <title></title>
</head>
<body>
    <form id="form1" runat="server">
    <div>
        <ul style="list-style-type: none">
            <li>
                <asp:TextBox ID="txt1" runat="server" />
                =
                <asp:TextBox ID="txt2" runat="server" />
            </li>
            <li>
                <asp:Button ID="Button1" Text="Validate" runat="server" />
            </li>
        </ul>
        <br>
        <asp:CompareValidator ID="compareval" Display="dynamic" ControlToValidate="txt1"
            ControlToCompare="txt2" ForeColor="red" Type="String" EnableClientScript="false"
            Text="Values are not equal." runat="server" />
    </div>
    </form>
</body>
</html>


So in compare validator we need to set ControlToValidate and ControlToCompare in order to compare two input values.

HostForLIFE.eu ASP.NET Core 1.0 Hosting

European best, cheap and reliable ASP.NET hosting with instant activation. HostForLIFE.eu is #1 Recommended Windows and ASP.NET hosting in European Continent. With 99.99% Uptime Guaranteed of Relibility, Stability and Performace. HostForLIFE.eu security team is constantly monitoring the entire network for unusual behaviour. We deliver hosting solution including Shared hosting, Cloud hosting, Reseller hosting, Dedicated Servers, and IT as Service for companies of all size.


ASP.NET Core 1.0 Hosting - HostForLIFE.eu :: How to Generate Unique Data in GridView?

clock June 29, 2016 22:02 by author Peter

This time, I will show you how to generate Unique Data in GridView. This code is useful to avoiding data duplicacy in GridView:

HTML of page : EliminateGridview.aspx
<div> 
<h1> 
        Grid with duplicate data 
    </h1> 
<asp:GridView ID="gvDuplicate" runat="server" HeaderStyle-BackColor="gray" 
            AutoGenerateColumns="False" AlternatingRowStyle-BackColor="Yellow " BackColor="white" 
            BorderColor="blue" BorderStyle="None"> 
    <Columns> 
        <asp:BoundField DataField="Name" HeaderText="Name"> 
            <ItemStyle HorizontalAlign="Left" Width="20%" /> 
        </asp:BoundField> 
        <asp:BoundField DataField="City" HeaderText="City"> 
            <HeaderStyle Wrap="true"></HeaderStyle> 
            <ItemStyle HorizontalAlign="Left" Width="20%" Wrap="true" /> 
        </asp:BoundField> 
    </Columns> 
</asp:GridView> 
</div> 
<div> 
<h1> 
        Grid with unique data 
    </h1> 
<asp:GridView ID="gvUnique" runat="server" HeaderStyle-BackColor="gray" AutoGenerateColumns="False" 
            AlternatingRowStyle-BackColor="Yellow " BackColor="white" BorderColor="blue" 
            BorderStyle="None"> 
    <Columns> 
        <asp:BoundField DataField="Name" HeaderText="Name"> 
            <ItemStyle HorizontalAlign="Left" Width="20%" /> 
        </asp:BoundField> 
        <asp:BoundField DataField="City" HeaderText="City"> 
            <HeaderStyle Wrap="true"></HeaderStyle> 
            <ItemStyle HorizontalAlign="Left" Width="20%" Wrap="true" /> 
        </asp:BoundField> 
    </Columns> 
</asp:GridView> 
</div> 

Code behind page: EliminateGridview.aspx.cs

using System; 
using System.Collections.Generic; 
using System.Linq; 
using System.Web; 
using System.Web.UI; 
using System.Web.UI.WebControls; 
using System.Data; 
using System.Configuration; 

public partial class EliminateGridview: System.Web.UI.Page  

protected void Page_Load(object sender, EventArgs e)  

    if (!IsPostBack)  
    { 
        gvDuplicate.DataSource = gvUnique.DataSource = testData(); 
        gvDuplicate.DataBind(); 
        gvUnique.DataBind(); 
        RemoveDuplicateData(0); 
    } 


//generating datatable 
public DataTable testData()  

    DataTable dt = new DataTable(); 
    //Adding columns to datatable        
    dt.Columns.Add("Name"); 
    dt.Columns.Add("City"); 
    //Adding records to the datatable 
    dt.Rows.Add("Peter", "London"); 
    dt.Rows.Add("Peter", "Manchester"); 
    dt.Rows.Add("Peter", "Liverpool"); 
    dt.Rows.Add("Peter", "Bristol"); 
    dt.Rows.Add("Kevin", "Leeds"); 
    dt.Rows.Add("Kevin", "Glasgow"); 
    dt.Rows.Add("Kevin", "York"); 
    dt.Rows.Add("Anthony", "Cambridge"); 
    dt.Rows.Add("Anthony", "Bradford"); 
    dt.Rows.Add("Anthony", "Oxford"); 
    dt.Rows.Add("Steven", "Swansea"); 
    dt.Rows.Add("Richard", "Norwich"); 
    return dt; 

private void RemoveDuplicateData(int cellno)  

    string initialnamevalue = gvUnique.Rows[0].Cells[cellno].Text; 
    for (int i = 1; i < gvUnique.Rows.Count; i++) 
    { 

        if (gvUnique.Rows[i].Cells[cellno].Text == initialnamevalue)  
        { 
            gvUnique.Rows[i].Cells[cellno].Text = string.Empty; 
        }  
        else  
        { 
            initialnamevalue = gvUnique.Rows[i].Cells[cellno].Text; 
        } 
    } 


HostForLIFE.eu ASP.NET Core 1.0 Hosting

European best, cheap and reliable ASP.NET hosting with instant activation. HostForLIFE.eu is #1 Recommended Windows and ASP.NET hosting in European Continent. With 99.99% Uptime Guaranteed of Relibility, Stability and Performace. HostForLIFE.eu security team is constantly monitoring the entire network for unusual behaviour. We deliver hosting solution including Shared hosting, Cloud hosting, Reseller hosting, Dedicated Servers, and IT as Service for companies of all size.


ASP.NET Core 1.0 Hosting - HostForLIFE.eu :: How to Send (Pass) multiple parameters to WebMethod in jQuery AJAX POST in ASP.NET?

clock June 23, 2016 22:05 by author Peter

Today let me show you how to send (Pass) multiple parameters to WebMethod in jQuery AJAX POST in ASP.NET. Generally people face issues with jQuery AJAX POST call to WebMethod when multiple parameters have to be passed, due to syntax errors the WebMethod does not get called. Hence I have come up in an innovative way where using JSON object and JSON2 Stringify method one can easily post any number and any type of parameters to WebMethod using jQuery AJAX.

 
HTML Markup
The HTML Markup consists of a sample form with TextBoxes for accepting Name and Age and a Button to post the values to server’s WebMethod using jQuery AJAX.
<table border="0" cellpadding="0" cellspacing="0">
<tr>
    <td>
        Name:
    </td>
    <td>
        <asp:TextBox ID="txtName" runat="server" Text = "Peter" />
    </td>
</tr>
<tr>
    <td>
        Age:
    </td>
    <td>
        <asp:TextBox ID="txtAge" runat="server" Text = "29"/>
    </td>
</tr>
<tr>
    <td>
        <asp:Button ID="btnSubmit" Text="Submit" runat="server" />
    </td>
</tr>
</table>
 
 
WebMethod accepting multiple parameters
The following WebMethod accepts multiple parameters from client side using the jQuery AJAX.
C#
[System.Web.Services.WebMethod]
public static string SendParameters(string name, int age)
{
    return string.Format("Name: {0}{2}Age: {1}", name, age, Environment.NewLine);
}

 
VB.Net
<System.Web.Services.WebMethod()> _
Public Shared Function SendParameters(name As String, age As Integer) As String
    Return String.Format("Name: {0}{2}Password: {1}", name, age, Environment.NewLine)
End Function

 
Passing multiple parameters to WebMethod in jQuery AJAX POST in ASP.Net
When the Button is clicked, the Name and Age is fetched from their respective TextBoxes and are assigned to a JSON object in which I have created two properties with the name same as that of the WebMethod parameters.

The JSON object is now serialized to a JSON string using JSON2 Stringify method and then passed as parameter to the WebMethod.
In this technique there are no syntax errors and also there’s no need to convert values of TextBoxes to integer or some other Data Type.
<script type="text/javascript" src="http://ajax.googleapis.com/ajax/libs/jquery/1.8.3/jquery.min.js"></script>
<script type="text/javascript" src="http://cdnjs.cloudflare.com/ajax/libs/json2/20130526/json2.min.js"></script>
<script type="text/javascript">
$(function () {
    $("[id*=btnSubmit]").click(function () {
        var obj = {};
        obj.name = $.trim($("[id*=txtName]").val());
        obj.age = $.trim($("[id*=txtAge]").val());
        $.ajax({
            type: "POST",
            url: "CS.aspx/SendParameters",
            data: JSON.stringify(obj),
            contentType: "application/json; charset=utf-8",
            dataType: "json",
            success: function (r) {
                alert(r.d);
            }
        });
        return false;
    });
});
</script>

HostForLIFE.eu ASP.NET 4.6 Hosting
European best, cheap and reliable ASP.NET hosting with instant activation. HostForLIFE.eu is #1 Recommended Windows and ASP.NET hosting in European Continent. With 99.99% Uptime Guaranteed of Relibility, Stability and Performace. HostForLIFE.eu security team is constantly monitoring the entire network for unusual behaviour. We deliver hosting solution including Shared hosting, Cloud hosting, Reseller hosting, Dedicated Servers, and IT as Service for companies of all size.


ASP.NET 5 Hosting - HostForLIFE.eu :: Waiting Message in ASP.NET

clock June 23, 2016 20:54 by author Anthony

When someone calls your company and all agents are busy assisting other customers, they will be sent to the waiting queue. When they enter the waiting queue, the "Waiting Message" plays. An example of a common Waiting Message is, "All of our agents are currently busy. Please hold and we will answer your call as soon as possible."

Sometimes we need please wait message button in our website to inform the visitor that their submission still in progress. Today, we will explain about creating please wait message in the button on ASP.NET website. You can copy below code to please wait message in the button.


<%@ Page Language="C#" AutoEventWireup="true" CodeFile="PleaseWaitButton.aspx.cs"
   Inherits="PleaseWaitButton" %>

<!DOCTYPE html PUBLIC "-//W3C//DTD XHTML 1.0 Transitional//EN"
"http://www.w3.org/TR/xhtml1/DTD/xhtml1-transitional.dtd">
<html xmlns="http://www.w3.org/1999/xhtml">
<head runat="server">
   <title>Untitled Page</title>
</head>
<body>
   <form id="form1" runat="server">
       <div>
           <div>
               <asp:Button ID="Button1" runat="server" Text="Button" />
           </div>
       </div>
   </form>
</body>
</html>

using System;
using System.Data;
using System.Configuration;
using System.Collections;
using System.Web;
using System.Web.Security;
using System.Web.UI;
using System.Web.UI.WebControls;
using System.Web.UI.WebControls.WebParts;
using System.Web.UI.HtmlControls;

public partial class PleaseWaitButton : System.Web.UI.Page
{
   protected void Button1_Click(object sender, System.EventArgs e)
   {
       System.Threading.Thread.Sleep(5000);
       ClientScript.RegisterClientScriptBlock(this.GetType(), "reset",
 "document.getElementById('" + Button1.ClientID + "').disabled=false;", true);
   }

   protected void Page_Load(object sender, System.EventArgs e)
   {
       System.Threading.Thread.Sleep(5000);
       Button1.Attributes.Add("onclick", ClientScript.GetPostBackEventReference(Button1, "") + ";
this.value='Please wait...';this.disabled = true;");
   }

}


Finish, happy coding.


HostForLIFE.eu ASP.NET 4.6 Hosting
European best, cheap and reliable ASP.NET hosting with instant activation. HostForLIFE.eu is #1 Recommended Windows and ASP.NET hosting in European Continent. With 99.99% Uptime Guaranteed of Relibility, Stability and Performace. HostForLIFE.eu security team is constantly monitoring the entire network for unusual behaviour. We deliver hosting solution including Shared hosting, Cloud hosting, Reseller hosting, Dedicated Servers, and IT as Service for companies of all size.


ASP.NET 5 Hosting - HostForLIFE.eu :: Implementing Cookie Authentication in ASP.NET 5

clock June 9, 2016 20:03 by author Anthony

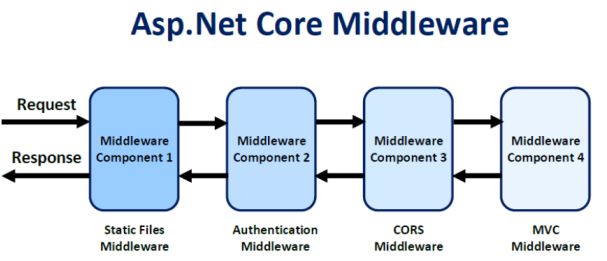
In this tutorial, I'm going to explain about cookie based authentication in ASP.NET 5. I am implementing a cookie authentication in ASP.NET MVC application. Similar to other middleware components in ASP.NET, Cookie Authentication is also a middleware component, which you need to plug into ASP.NET pipeline.

For implementing cookie authentication, you require reference of Cookie middleware, here is the project.json file.
{
    "dependencies": {
        "Microsoft.AspNet.Diagnostics": "1.0.0-beta1",
        "Microsoft.AspNet.Hosting": "1.0.0-beta1",
        "Microsoft.AspNet.Mvc": "6.0.0-beta1",
        "Microsoft.AspNet.Server.WebListener": "1.0.0-beta1",
        "Microsoft.AspNet.Security": "1.0.0-beta1",
        "Microsoft.AspNet.Security.Cookies": "1.0.0-beta1",
        "Microsoft.AspNet.StaticFiles": "1.0.0-beta1",
    },
    "commands": {
        "web": "Microsoft.AspNet.Hosting --server Microsoft.AspNet.Server.WebListener --server.urls http://localhost:5001"
    },
     "frameworks": {
        "aspnet50": {}
  }
}


All the components used in this project are available in ASP.NET Core Framework as well.

Now you need to plug the Cookie authentication module to use in ASP.NET pipeline, you can do this via Startup.cs file.

public class Startup
{
    public void Configure(IApplicationBuilder app)
    {
        app.UseErrorPage();
 
        app.UseServices(services =>
        {
            services.AddMvc();
        });
     
        app.UseCookieAuthentication(options => {
            options.LoginPath = new PathString("/Home/Login");
        });
        app.UseMvc();                       
    }       
}


Now, you need to apply the Authorize filter to protect resources, I am applying it in the class level. When there is a unauthorized request to such resource, filter returns 401 and the cookie middleware redirects to /Home/Login.

Note: You need to set the LoginPath property explicitly, otherwise it may not redirect.

Authorize]
public class HomeController : Controller
{
    public IActionResult Index()
    {
        return View();
    }
}


And here is the Login action method, this code is for illustration purpose only, I not validating against database, if username and password matches the hard coded credentials, identity is established with that username.

[AllowAnonymous]
public IActionResult Login()
{
    return View();
}
 
[HttpPost, AllowAnonymous]
public IActionResult Login(User user)
{
    if(user.UserName == "admin" && user.Password == "Password")
    {
        var claims = new[]
        {
            new Claim("name", user.UserName)
        };
        var identity = new ClaimsIdentity(claims,
            CookieAuthenticationDefaults.AuthenticationType);
        Context.Response.SignIn(identity);
 
        return Redirect("~/");
    }
    else
    {
        ModelState.AddModelError("LogOnError",
            "The user name or password provided is incorrect.");
    }
    return View(user);
}
 
public IActionResult Logout()
{
    Context.Response.SignOut
    (CookieAuthenticationDefaults.AuthenticationType);
    return View("Login");
}


And here is the Login view

@using(Html.BeginForm())
{
    @Html.LabelFor(model => model.UserName)
    @Html.EditorFor(model => model.UserName)
    @Html.LabelFor(model => model.Password)
    @Html.PasswordFor(model => model.Password)
    <input type="submit" value="Sign In" />
    <br/>
    @Html.ValidationMessage("LogOnError")
}


To verify the implementation, install the required packages using kpm restore command, once it finishes, execute k web command. If web server is started, browse http://localhost:5001/, which will redirect to /Home/Login page, where you can enter the credentials, you will redirect back to /Home/Index page.

HostForLIFE.eu ASP.NET 5 Hosting
European best, cheap and reliable ASP.NET hosting with instant activation. HostForLIFE.eu is #1 Recommended Windows and ASP.NET hosting in European Continent. With 99.99% Uptime Guaranteed of Relibility, Stability and Performace. HostForLIFE.eu security team is constantly monitoring the entire network for unusual behaviour. We deliver hosting solution including Shared hosting, Cloud hosting, Reseller hosting, Dedicated Servers, and IT as Service for companies of all size.


HostForLIFE.eu Proudly Launches ASP.NET Core 1.0 RC2 Hosting

clock June 4, 2016 00:57 by author Peter

HostForLIFE.eu was established to cater to an underserved market in the hosting industry; web hosting for customers who want excellent service. HostForLIFE.eu - a cheap, constant uptime, excellent customer service, quality, and also reliable hosting provider in advanced Windows and ASP.NET technology. HostForLIFE.eu proudly announces the availability of the ASP.NET Core 1.0 RC2 hosting in their entire servers environment.

ASP.NET is Microsoft's dynamic website technology, enabling developers to create data-driven websites using the .NET platform and the latest version is 5 with lots of awesome features. ASP.NET Core 1.0 RC2 is a lean .NET stack for building modern web apps. Microsoft built it from the ground up to provide an optimized development framework for apps that are either deployed to the cloud or run on-premises. It consists of modular components with minimal overhead.

A key change that occurred between RC1 and RC2 is the introduction of the .NET command-line interface.  This tool replaces the dnvm, dnx, and dnu utilities with a single tool that handles the responsibilities of these tools. In RC1 an ASP.NET application was a class library that contained a Startup.cs class. When the DNX toolchain run your application ASP.NET hosting libraries would find and execute the Startup.cs, booting your web application. Whilst the spirit of this way of running an ASP.NET Core application still exists in RC2, it is somewhat different. As of RC2 an ASP.NET Core application is a .NET Core Console application that calls into ASP.NET specific libraries. What this means for ASP.NET Core apps is that the code that used to live in the ASP.NET Hosting libraries and automatically run your startup.cs now lives inside a Program.cs.

HostForLIFE.eu hosts its servers in top class data centers that is located in Amsterdam (NL), London (UK), Paris (FR), Frankfurt(DE) and Seattle (US) to guarantee 99.9% network uptime. All data center feature redundancies in network connectivity, power, HVAC, security, and fire suppression. All hosting plans from HostForLIFE.eu include 24×7 support and 30 days money back guarantee. The customers can start hosting their ASP.NET Core 1.0 RC2 site on their environment from as just low €3.00/month only.

HostForLIFE.eu is a popular online ASP.NET based hosting service provider catering to those people who face such issues. The company has managed to build a strong client base in a very short period of time. It is known for offering ultra-fast, fully-managed and secured services in the competitive market.

HostForLIFE.eu offers the latest European ASP.NET Core 1.0 RC2 hosting installation to all their new and existing customers. The customers can simply deploy their ASP.NET Core 1.0 RC2 website via their world-class Control Panel or conventional FTP tool. HostForLIFE.eu is happy to be offering the most up to date Microsoft services and always had a great appreciation for the products that Microsoft offers.

Further information and the full range of features ASP.NET Core 1.0 RC2 Hosting can be viewed here http://hostforlife.eu


HostForLIFE.eu supports ASP.NET State Server Service for session :: Moving Session Out-of-Process with StateServer

clock June 2, 2016 20:47 by author Peter

Recently suddenly met a problem with the ASP.NET SessionState. It isn’t a fault of the SessionState itself, but likely a problem with my configuration or uses. Essentially the state was being reset too often. Although I had a timeout value of 1440 minutes, users were getting kicked out after 10-15 minutes. I eventually found out that (for some reason) the IIS worker process was being reset (although it wasn’t configured to self-reset), probably due to an unrecoverable  error in a number of our legacy-based code. And since our SessionState was set to InProc, all of the session data was stored in-the-process and was thus lost whenever it died.

I started researching the alternatives and discovered the proper way to configure the StateServer that comes with ASP.NET to move your sessions out-of-process. This way, you'll literally reset IIS (or if the StateServer is on another machine, reboot your IIS server machine) while not losing session. This seemed like a very appealing situation, and one that many people online endorse as best practice. Another benefit of moving the SessionState out-of-process is that you set yourself up nicely for eventually moving to multiple web servers, or even running simultaneous multiple instances of your application pools on the same machine to spice up performance.

Let’s start from the top. The SessionState is a collection of data that is persisted across multiple web requests to ASP.NET. This can be authentication information, a shopping cart, a theme, or whatnot – essentially any information that you want the server to remember for the next time the user “does something” on your site. This can also be accomplished on the page level with ViewState, but that sends more data back and forth between the client and your server.

If you’re using the cookie method of “tagging” your SessionState (which you should, because cookieless is vulnerable to session hijacking), you’ll have a tiny little harmless cookie called ASP.NET_SessionId which contains a unique session ID that looks something like “okeiohntcofecw55svocxwiz”. This ID is sent to the web server to let the server know which session to retrieve.

If the SessionState is running InProc, all ASP.NET has to do is look at the memory it has of that session information and retrieve or set the values required. However, if that process gets reset (due to an IIS reset, power outage, reboot, failed process, etc) then it no longer has a record of that session information, so that SessionId is no longer valid and the user is “kicked off”.

Additionally, if you increase the number of worker processes per application pool, thinking you’ll be getting better performance on a multiprocessor server, you’ll find that the users continually get kicked off, because each process doesn’t know about the session state of the other so they continually reset the session on each other. This is the same problem you’ll encounter if you try to move to two load-balanced web servers.

The StateServer Solution
Included with .NET is a Windows service called the ASP.NET State Service. This is disabled by default, so if you’re reading this far you may not know about it. This service runs as an additional process so that if the IIS worker process gets reset, the state service is still running with all the session information.

You can even run this State Service on another Windows Server machine. This way, you can have one machine managing your session state, while you can have one or more web servers handling requests. An example situation might look something like this:

(I was trying to find a shape to use for the StateServer to differentiate it from the others… and I chose the “eCommerce Server” shape. As in cash = cache… get it?)

Even though that might be what a more advanced operation might look like, you will likely (such as in development or for a small-load web server) run the StateServer on the same machine as IIS.

Keep in mind that the SessionState is still being stored in memory with the StateServer solution… there’s no persisting of the state to disk. So if the StateServer process gets restarted or rebooted, so does your session information.

The SQL Server Solution
Another solution supported natively by ASP.NET is to use SQL Server to persist state information to disk. This way, even the server handling your state can be rebooted without losing session. This may be the preferred way of doing things for very high-end operations or situations where you need to maintain that information for security or contractual purposes. However, I will not be discussing that here, because I haven’t tried it myself. There’s many resources to learn about this on the web, such as this article from Microsoft.

Enabling StateServer
To enable the ASP.NET State Service, all you have to do is configure the service on both your development and production machines.
Click Start / Run or type Win + R.

  1.     Type in services.msc and press Enter or click OK.
  2.     Locate the ASP.NET State Service in the Services (local) list.
  3.     Right click on it and choose Properties.
  4.     Change the Startup Type to Automatic so that it starts on boot.
  5.     Click the Start button to get it started now.
  6.     Click OK to close the dialog.

Now, if you pull up Task Manager, you’ll notice a nice little aspnet_state.exe process running in addition to the IIS worker process (w3wp.exe). This process is the new StateServer that will maintain all your state data. But in order to use it, we must enable your ASP.NET web site to use the out-of-process StateServer.
Modifying your Web.Config

For the site that you’d like to have use the out-of-process StateServer, first open your web.config file for that site.

Locate (or add) a sessionState element in the system.web section of the config file, like this:

Note the cookieless=”UseCookies” and mode=”StateServer” attributes. These are required to use the StateServer in a cookie’d fashion.

The timeout attribute is the time, in minutes, that you want the session to remain valid.

Also note that this example above is for the StateServer running on the same machine as IIS. With no connection string specified, it looks for a StateServer running on the local machine. If you need to move the StateServer onto another machine, you must match up your MachineKeys and set a StateServer connection string for IIS to connect to. Google is your friend.

Now, your site should be using the StateServer for all of its session data. You may (or may not, but it might be a good idea) need to restart IIS for this to be optimally configured.

Non-Serializable Session Data
The only caveat in this post, and it’s a big one, is that you will receive an error if you try to store non-Serializable data into the session now that you have an out-of-process state (i.e. a System.Data.DataView). Serializable classes are those that have the Serializable attribute set and are optimized for serialization (i.e. a System.Data.DataTable).

You will need to review and test your code (or write new code accordingly) to make sure that you are not storing non-Serializable data to your session when using out-of-process state. If you are using custom classes to store session data, review them for serializable members and properties, and then mark them as serializable.

Final Thoughts
I’ve seen developers proclaim online that all ASP.NET devs should design their applications around an out-of-process session model, and now that I’ve discovered it, I am inclined to agree. If you design from the beginning to be compatible with a StateServer or SQL database state server, you can easily make the jump from one web server to two. A few things to think about are the amount of memory available to the state service, latency and the connection between servers if the StateService is running on another machine, and how to minimize state since it’s now being transferred between processes.

HostForLIFE.eu ASP.NET State Server
European best, cheap and reliable ASP.NET hosting with instant activation. HostForLIFE.eu is #1 Recommended Windows and ASP.NET hosting in European Continent. With 99.99% Uptime Guaranteed of Relibility, Stability and Performace. HostForLIFE.eu security team is constantly monitoring the entire network for unusual behaviour. We deliver hosting solution including Shared hosting, Cloud hosting, Reseller hosting, Dedicated Servers, and IT as Service for companies of all size.


About HostForLIFE

HostForLIFE is European Windows Hosting Provider which focuses on Windows Platform only. We deliver on-demand hosting solutions including Shared hosting, Reseller Hosting, Cloud Hosting, Dedicated Servers, and IT as a Service for companies of all sizes.

We have offered the latest Windows 2019 Hosting, ASP.NET 5 Hosting, ASP.NET MVC 6 Hosting and SQL 2019 Hosting.


Month List

Tag cloud

Sign in