Desktop support for .NET Core 3.0 has been in preview for some time, it is slated to be released later this year. As per indicators by Microsoft, .NET Core will receive more updates compared to full .NET Framework, keeping this in mind, it makes sense to start thinking about migrating existing applications and creating new ones on .NET Core if the application still has some years to go.
Desktop support in .NET Core has not been completely migrated yet; however, it is possible to create and migrate WinForms applications using the preview bits. In this article, we'll consider the creation and migration of a WinForms application in .NET Core 3.0 that uses ComponentOne controls.
Creating a New .NET Core 3.0 Application
To create a new .NET Core 3.0 application, it's recommended to download VS 2019 and the nightly build of the .NET Core 3.0 SDK. Make sure that you’ve installed the .NET Framework 4.7.2 and .NET Core 2.1 development tools in the Visual Studio Installer. This software will be necessary whether you plan on creating a new project or migrating an existing one to .NET Core 3.0.
The simplest way to work with .NET Core 3.0 (for now) is to use dotnet.exe command line utility. It can be used to create a new project, add/restore dependencies, build, etc.
.NET Core 3 - Using x64 and x86 Versions
Visual Studio uses the appropriate version depending on your .NET Core 3 project’s target platform – x86 or x64. It uses last installed version for both platforms. So, if you intend to build your project for both platforms, you must download and install both platform SDK versions with the same version.
These are the typical paths for .NET Core 3 command line utility:
Let’s use x64 version of dotnet.exe to simplify it for further description.
Create a New Visual Studio Project
First, you’ll need to open the Visual Studio Developer Command Prompt to create a project through the command line. Currently, the tooling for Visual Studio is very limited in its support of .NET Core 3.0, so it’s easiest to create a project through the command line interface.
First, we’ll create the project:
“c:\Program Files\dotnet\dotnet.exe” **new** winforms -o TestAppWinFormsCore
Once this is finished, we’ll navigate into the project directory:
cd TestAppWinFormsCore
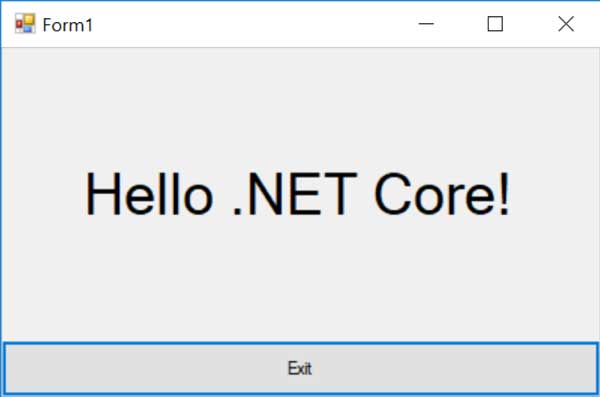
Finally, we can run the project to make sure that it works:
“c:\Program Files\dotnet\dotnet.exe” run
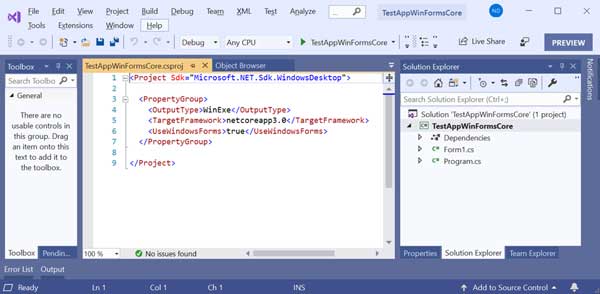
Now that the project has been created, we can use Visual Studio 2019 to open it and modify its contents.
In the Visual Studio 2019, open the TestAppWinFormsCore.csproj file we just created.
You should see something like this in Visual Studio:
.NET Core 3.0 uses a new project type and has no design-time support currently, so the process of adding controls will be a little different than what you may be accustomed to. We need to add C1 libraries manually to the project to make use of them, also, we should add the controls manually to Form1.cs because of missing design-time support.
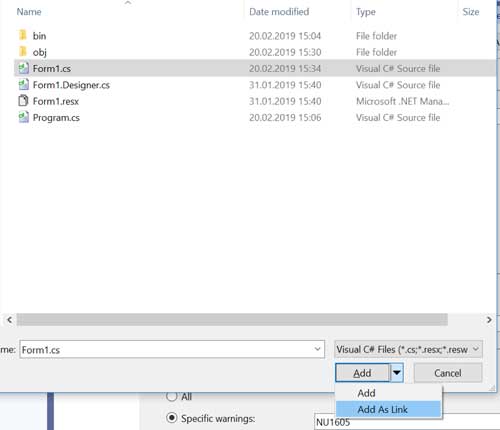
Because of this, let’s use a trick. We'll add the classic .NET Framework WinForms project in order to use its Form designer:
1. Right-click on Solution node and Add – New Project… - Windows Forms Desktop project (with .Net Framework, say version 4.0). The name of new project is by default WindowsFormsApp1.
2. Remove the existing Form1 from WindowsFormsApp1 project
3. Add Form1.cs from TestAppWinFoirmsCore project as link:
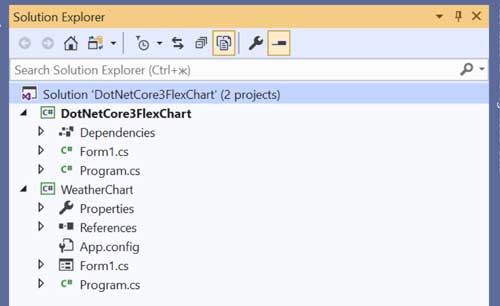
After that, the following view of Solution Explorer appears:
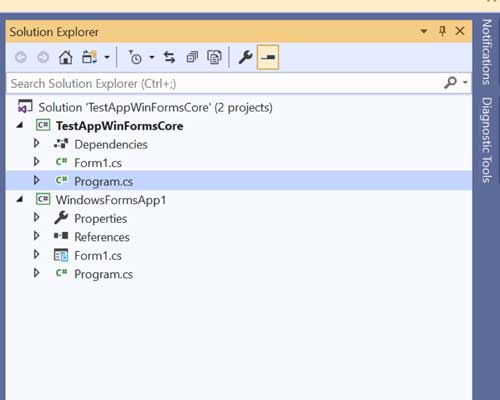
Now, we can edit Form1 form in the usual way:
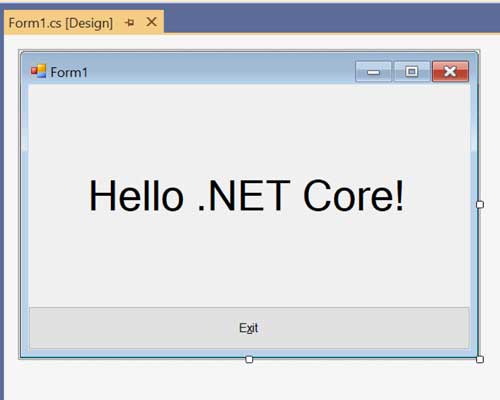
Now, remove unneeded “Hello .NET Core!” label and add some C1 control, for example C1DockingTab:
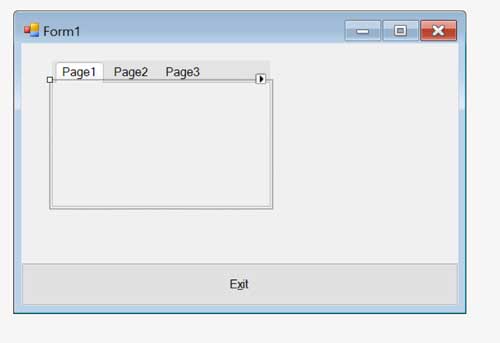
Launch WindowsFormsApp1 application and observe C1DockingTab on Form1. But this will be a .Net Framework 4 application.
Adding C1DockingTab caused adding C1.Win.C1Command.4 reference to WindowsFormsApp1 project. Therefore, the same reference should be added to TestAppWinFormsCore project also. For this let’s take a look in the properties of the C1.Win.C1Command.4 reference (right-click – Properties…) and find the path to the assembly. It looks like C:\Program Files (x86)\ComponentOne\WinForms Edition\bin\v4.0\C1.Win.C1Command.4.dll. Add this reference to the TestAppWinFormsCore project (right-click on Dependencies – Add reference… - Browse… - choose C:\Program Files (x86)\ComponentOne\WinForms Edition\bin\v4.0\C1.Win.C1Command.4.dll).
You should be able to run the code at this point, though you’ll notice a ComponentOne nag screen since the TestAppWinFormsCore project doesn’t contain any licensing information.
We can correct this by adding a licenses.licx file to the project. To do so, right-click on TestAppWinFormsCore project and select Add -> Existing Items. And browse the licenses.licx file from WindowsFormsApp1/Properties folder.
Build and rerun the app and you should no longer see a nag screen.
And now this is a genuine .NET Core 3.0 WinForms app. You can see this in the Modules window. All system references are from C:\Program Files\dotnet... folder.
Migrating an Existing Project to .NET Core 3.0
It is possible to migrate an existing project to .NET Core 3.0, though the process may require a few more steps than you would expect. Also, before trying to migrate a project, it’s worth running Microsoft’s portability analyzer tool on the project you want to convert.
The tool can give you an idea (ahead of time) how compatible your project will be with .NET Core 3.0, and it points out potential problems you may run into (included unsupported APIs).
If you’ve made up your mind to try to migrate a project, it’s easiest to begin the process by creating a project through dotnet.exe as described above.Let’s look at the WeatherChart sample migration. This sample demonstrates the C1FlexChart control possibilities.
First, we’ll create a new DotNetCore3FlexChart project from the command line:
“c:\Program Files\dotnet\dotnet.exe” **new** winforms -o DotNetCore3FlexChart
Once this is finished, we’ll navigate into the project directory and open DotNetCore3FlexChart.csproj from Visual Studio 2019.
Next, add the WeatherChart project to the DotNetCore3FlexChart solution. WeatherChart project is placed in Documents\ComponentOne Samples\WinForms\C1FlexChart\CS\WeatherChart\WeatherChart\WeatherChart.csproj by default.
Here, we'll use the WeatherChart project in our .NET Core 3.0 project. Therefore, the WeatherChart project reference should be added to DotNetCore3FlexChart dependencies (right-click on Dependencies – Add Reference… - Projects - WeatherChart)

After that, open Project.cs from DotNetCore3FlexChart project and change the following line:
Application.Run(new Form1());
by
Application.Run(new WeatherChart.Form1());
It means that the .NET Core 3.0 app (DotNetCore3FlexChart) will run WeatherChart.Form1 from WeatherChart assembly instead of own Form1\.
That’s all!
If you run the WeatherChart project it will be launched as .NET Framework 4.0 app.
But if you run the DotNetCore3FlexChart project then the WeatherChart assembly will be launched in .NET Core 3.0 environment.
.NET Core 3.0 Preview Caveats
Using the .NET Core 3.0 Preview for any kind of day-to-day work isn’t recommended at this point, as it’s obviously still work in progress. As the steps above illustrate, much of the project creation and migration processes require a lot of manual configuration from the user, and it’s possible to find some bugs and unfinished implementations presently.The lack of designer support also makes working with the preview somewhat difficult, though Microsoft has committed to adding this feature in the coming months.
Overall, .NET Core 3.0 will be an important change for developers, though this preview is merely the first step.