In this article, we are going to create WEB API in ASP.Net core using Entity Framework Core’s Code first approach. In this, we are creating a simple CRUD operation of employees and test it using Swagger. In this API we are not going to use authentication, we will add this in my upcoming articles.
In this article,
Create ASP.Net Core Web API Project
Add Entity Framework and Create Tables
Create Service to perform CRUD Operation
Implement Service in Controller
Test API Using Swagger
Create ASP.Net Core Web API Project
Step 1
Open Visual Studio and create a new project. Here I am using Visual Studio 2019. You can use as per your system and requirements.
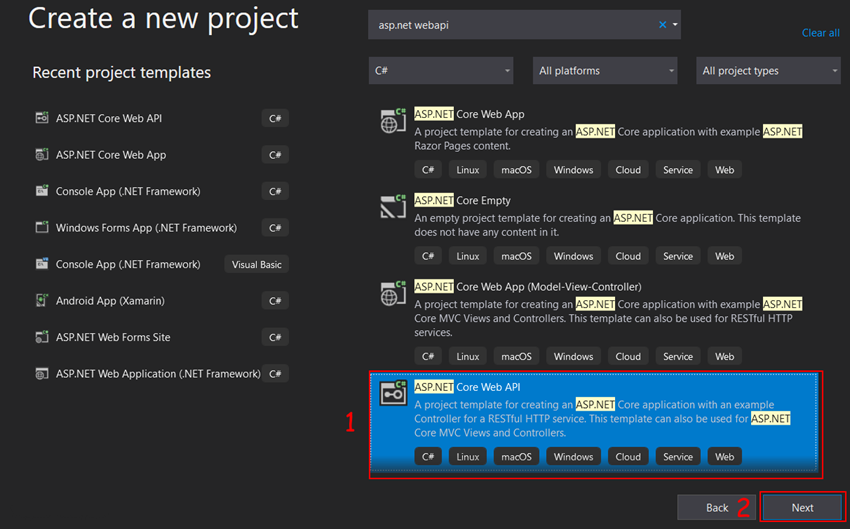
Step 2
Find and select Asp.Net Core Web API and then click on the Next button.
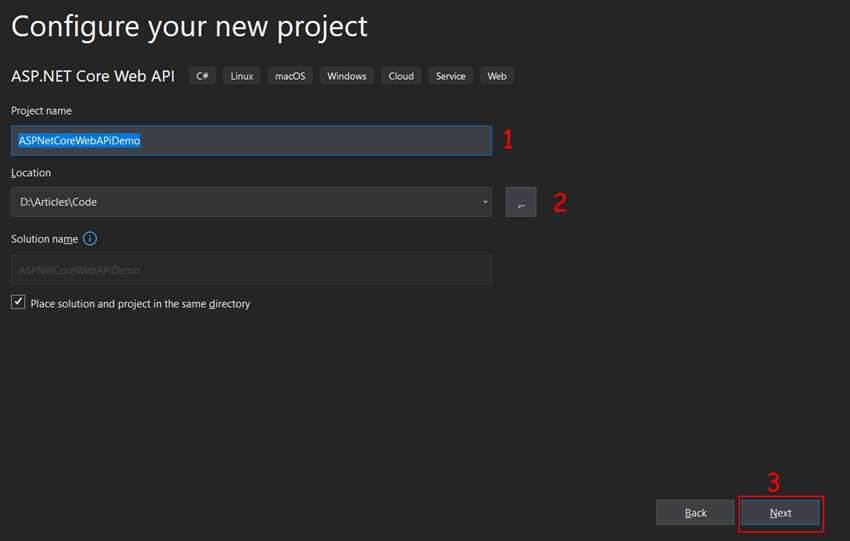
Step 3
In the next wizard, you have to enter the following things and then click on the Next button
Project Name
Location of your project (Path where you want to save your project)
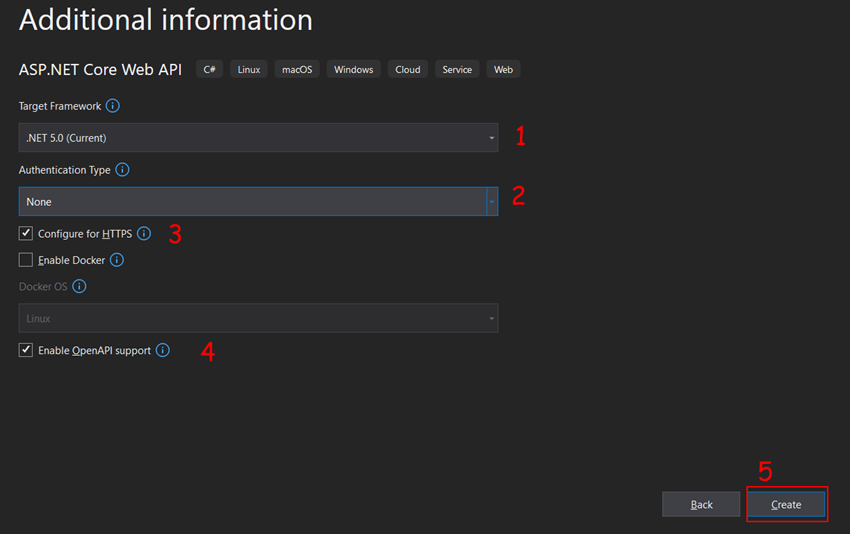
Step 4
In this wizard screen, you have to specify the following things and then click on create button.
- Target Framework, here I am using the current version installed in my system which is 5.
- Authentication type: Currently in this project, we are not using authentication so here I select none.
- Configure HTTPS: If you host your API with a secure HTTPS connection then you can check this box. It will add a redirection in your project which helps to redirect the http request to HTTPS automatically.
- Enable Docker: For this project, we are not using docker so leave unchecked
- Enable Open AI Support: If you want to implement Swagger in your project then you have to check this box. In this project, we are going to use a swagger so I check this box.
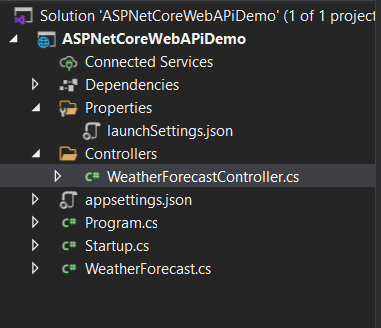
Now your project is created and you can see the project structure in the below image. Remove extra files like weather controller and model if you don’t want it.
Add Entity Framework and Create Tables
For using the Entity Framework in our project and create a table using the code first approach we have to follow the below steps.
Step 1
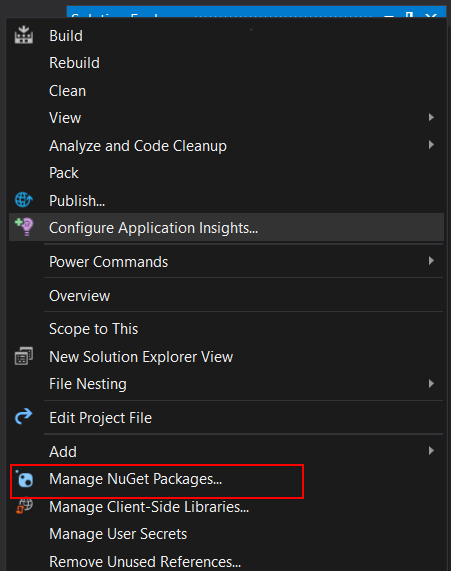
Right-click on the project name and click on Manage NuGet Packages.
Step 2
Install the Following NuGet Packages.
Microsoft.EntityFrameworkCore.SqlServer: This package is used to interact with SQL Server from our C# and .Net Core.
Microsoft.EntityFrameworkCore.Tools: This package is contained various commands like Add-Migration, Drop-Database, Get-DbContext, Get-Migration, Remove-Migration, Scaffold-DbContext, Script-Migration, Update-Database. In this article, we use Add-Migration and Update-Database commands.
Microsoft.Extensions.Configuration: Using this NuGet package we can read data from our app setting file. We will get our connection string from the app setting file.
Step 3
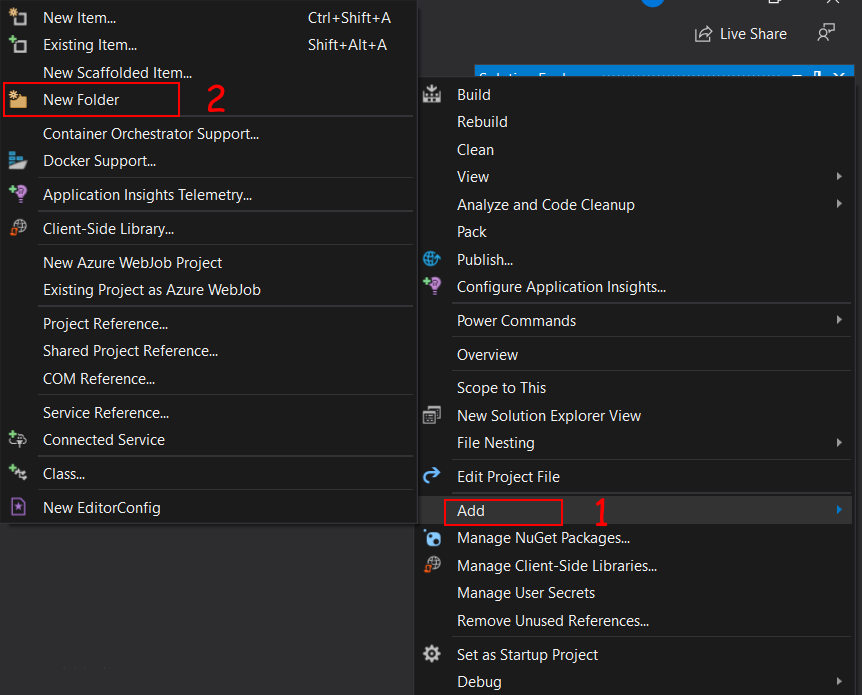
Now we add a new folder in our solution to contain various classes. For adding a new folder in our solution right click on project name the click on Add then click on New Folder and gave the name as Models.
Step 4
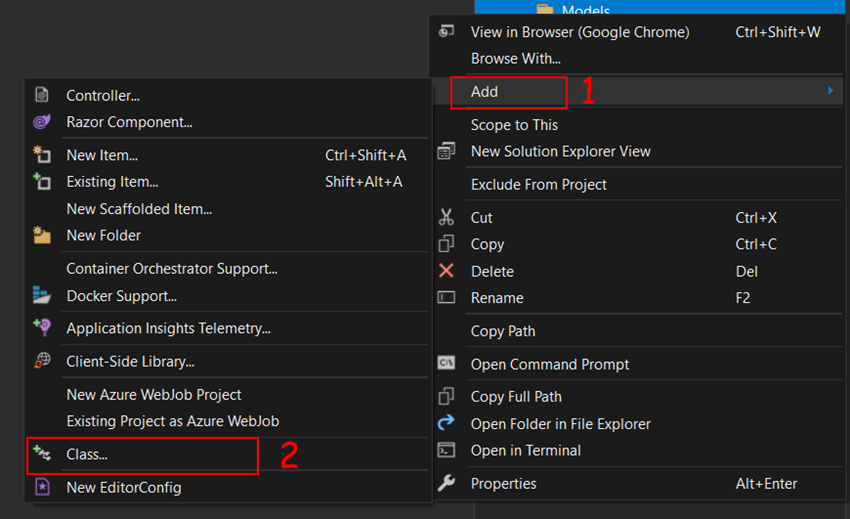
In this Models folder, we will use our entity classes. Right-click in this folder then Add then Class. Give a suitable name for your class.
Step 5
Add fields as you want to create in your table. Here I create an Employee class with the following fields. Here key attribute defines that use this column as the primary key.
public class Employees {
[Key]
public int EmployeeId {
get;
set;
}
public string EmployeeFirstName {
get;
set;
}
public string EmployeeLastName {
get;
set;
}
public decimal Salary {
get;
set;
}
public string Designation {
get;
set;
}
}
Step 6
Now we create a context class which use as a middleware to SQL Server. Add a new class in your Models folder and add constructor and Employee DbSet as seen below code.
public class EmpContext: DbContext {
public EmpContext(DbContextOptions options): base(options) {}
DbSet < Employees > Employees {
get;
set;
}
}
Step 7
Now we have to connect SQL Server with our project, for that, we need a connection string, and for this string, we are going to add the in-app setting file. Add your connection string as showing below.
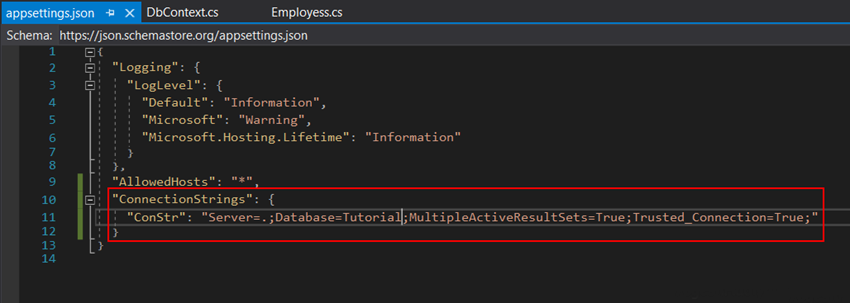
As see in the above code here I pass. (dot) as a server name because I used my local SQL Server. Then gave database name Tutorial, if this database does not exist then it will generate automatically. Here I have not given any username and password because I use windows authentication for this. If you want to use another method to login then pass username and password.
Step 8
Now we have to add Db Context in our startup file for this open startup file and add the following code.
services.AddDbContext<EmpContext>(x => x.UseSqlServer(Configuration.GetConnectionString("ConStr")));
In ConfigureService Method, we add our EmpContext class and pass connection string in it by getting from our appsetting file using Configure.GetConnectionString() method.
Step 9
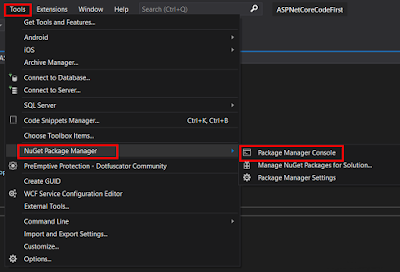
Now open Package Manager Console by click on Tool Menu then NuGet Package Manager then Package Manager Console.
Step 10
Add the following command.
Add-Migration Init
Here Init is our name of migration, you can give as per your choice. Hit enter.
Step 11
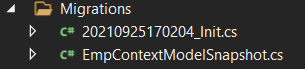
As you can see in your solution new folder named Migration is created and in this project, there are two files. One is EmpContextModelSnapshot and another one is *_Init, here * mean date time stamp.
Step 12
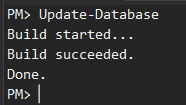
For now, our database and table are not created to make changes in the Server-side use below command.
Update-Database
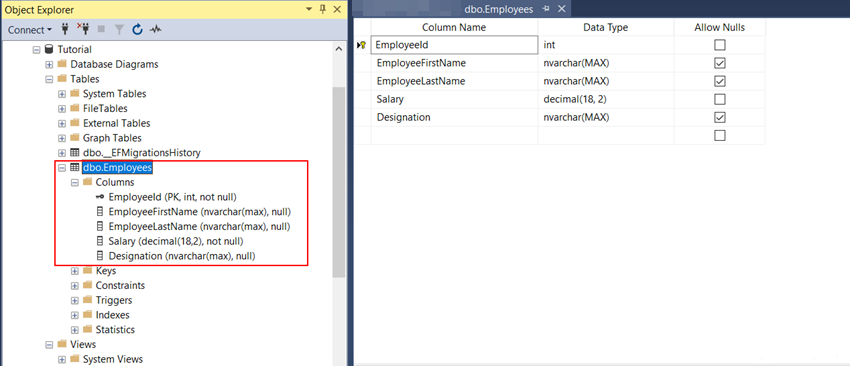
Now you can see in our SQL Server Employee table is created with the same fields as we add in our model.
Create New Response Model
To save and delete we are going to return a new model for send data to the user. To create a new folder called ViewModels In your solution because we want to store Entity classes and Other classes in a different place. Add a new class Called ResponseModel in this folder with the following properties as seen below code.
public class ResponseModel {
public bool IsSuccess {
get;
set;
}
public string Messsage {
get;
set;
}
}