
October 6, 2022 08:09 by
 Peter
PeterIn this tutorial, we are going to cover an approach through which we can read the configuration data in .NET Core - the options pattern.
Why the Options Pattern?
Options pattern gives the below features
It can be used to bind configuration data to strongly typed objects.
It adheres to two important software engineering principles - Encapsulation and Separation of Concerns.
It provides a mechanism to validate configuration data.
Please refer to the Microsoft documentation for more details.
Tools which I have used for this tutorial:
Visual Studio 2022 Community Edition – Preview version 17.4 (Preview 2)
.NET 6.0
Web API
Swagger
To begin with, let us create a sample project. The source code can be downloaded from GitHub.
Let us assume that we have the below configuration in appsettings.json
"OptionsTutorial": {
"InterfaceName" : "IOptions"
}
Create the following class:
public class OptionsTutorial
{
public const string Position = "OptionsTutorial";
public string InterfaceName { get; set; }
}
Rules which need to be followed to create this class:
Must be non-abstract with a public parameterless constructor.
All public read-write properties of the type are bound.
Fields are not bound. In the preceding code, “Position” is not bound.
The “Position” field is used so the string " OptionsTutorial " doesn't need to be hard coded in the app when binding the class to a configuration provider.
Bind the configuration data to strongly typed objects.
In Program.cs class, we need to add the below line to bind the configuration data.
builder.Services
.Configure< OptionsTutorial>(builder.Configuration.GetSection(OptionsTutorial.Position));
Use IOptions<T> Interface
This interface is registered as a Singleton and can be injected into any service lifetime.
This does not support:
Read configuration data after the application has started.
Named Options - Refer to the Microsoft documentation for more details.
Let us make a few code changes in WeatherForecastController.cs
Add the below variable at the beginning of the class.
private OptionsTutorial _optionsTutorial;
make the below code changes in Constructor.
public WeatherForecastController(ILogger<WeatherForecastController> logger, IOptions<OptionsTutorial> options)
{
_logger = logger;
this._optionsTutorial = options.Value;
}
Introduce a new action method as below
[HttpGet]
[Route("optionspattern")]
public IActionResult OptionsPattern()
{
var interfaceName = this._optionsTutorial.InterfaceName;
var message = $"interface name from OptionsTutorial - {interfaceName}";
return Ok(message);
}
Let us debug the action method and the result.

We can see that; the configuration data has been bound to the strongly typed object.
Use IOptionsSnapshot<T> Interface
This interface is useful in scenarios where options need to be recomputed on every request. Please refer to the Microsoft documentation for more details on this.
This interface has been registered as Scoped; hence it cannot be injected into Singleton Services.
It supports Names Options.
Add the below settings in Appsettings.json
"SnapShot": {
"InterfaceName": "IOptionsSnapshot"
}
Add the below interface and classes
public class SnapShot
{
public const string Position = "Snapshot";
public string InterfaceName { get; set; }
}
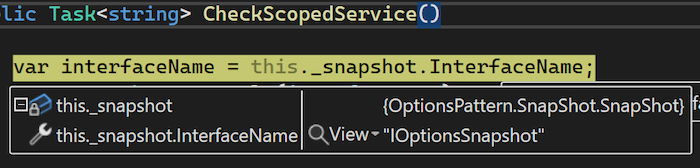
I have created two interfaces - ISnapShotCheckWithScope.cs and ISnapShotCheckWithSingleton.cs for validating the Singleton as well as Scoped service lifetime
Make the necessary changes in Program.cs
builder.Services.AddScoped<ISnapShotCheckWithScope, SnapShotCheckWithScope>();
/// UnComment this line and see whether the code executed or not.
/// you will get a runtime error
//builder.Services.AddSingleton<ISnapShotCheckWithSingleton, SnapShotCheckWithSingleton>();
As IOptionsSnapshot interface has been registered as Scoped, it cannot be injected into Singleton Services. Please look at the source code available in GitHub to understand more on this.
Let us go ahead and execute the Scoped controller.
Now change from Scoped to Singleton in Program.cs and see how this behaves.
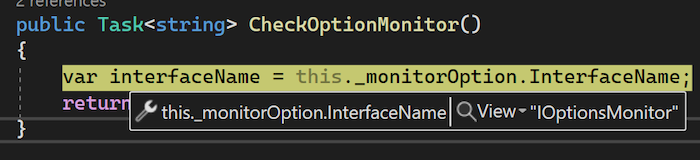
//builder.Services.AddScoped<IOptionsMonitorCheck, OptionMonitorCheck>();
//Uncomment each of the below one at a time and see how this behaves
builder.Services.AddSingleton<IOptionsMonitorCheck, OptionMonitorCheck>();
//builder.Services.AddTransient<IOptionsMonitorCheck, OptionMonitorCheck>();
Successfully execute.
Now let us change to Transient in Program.cs and see.
//builder.Services.AddScoped<IOptionsMonitorCheck, OptionMonitorCheck>();
//Uncomment each of the below one at a time and see how this behaves
//builder.Services.AddSingleton<IOptionsMonitorCheck, OptionMonitorCheck>();
builder.Services.AddTransient<IOptionsMonitorCheck, OptionMonitorCheck>();

Execute successfully.
We have seen how to read configuration data using Options pattern in .NET 6.0. This approach will ensure two engineering principles – encapsulation and separation of concerns. Hope this article helps you to understand the Options pattern at high level. Thank you for reading my article and please leave your comments in the comment box below.