Integrating Web API and ASP.NET has been the subject in many discussions and for this, I wrote this article to demonstrate an example of how to consume Web API in an ASP.NET website and how to view the information in a GridView.
If you are not familiar with ASP.NET and Visual Studio and how to setup an environment please refer to the following article.
Now, let's start consuming the Web API in an asp.net website step by step.
Step 1 - Create ASP.NET Website
Search "All Programs" and select "Microsoft Visual Studio 2022".
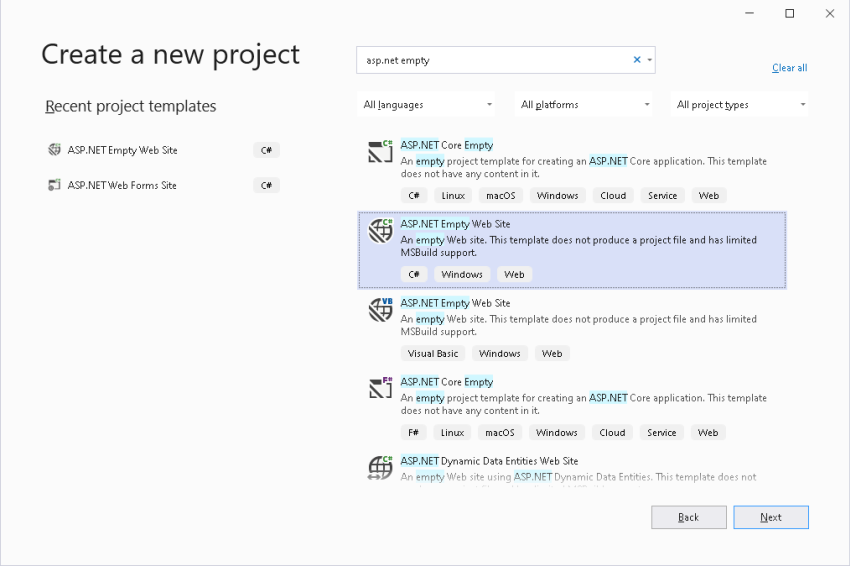
Click "Create a new project". Select "ASP.NET Empty Web Site", click "Next", give the website a name and click ok.
The following window will appear.
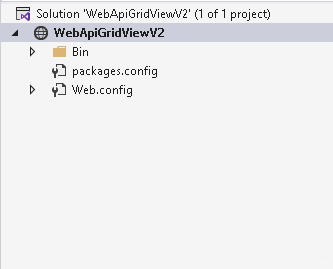
The next step creates the empty ASP.NET Web Site without adding the default page, and the project will look like the following.
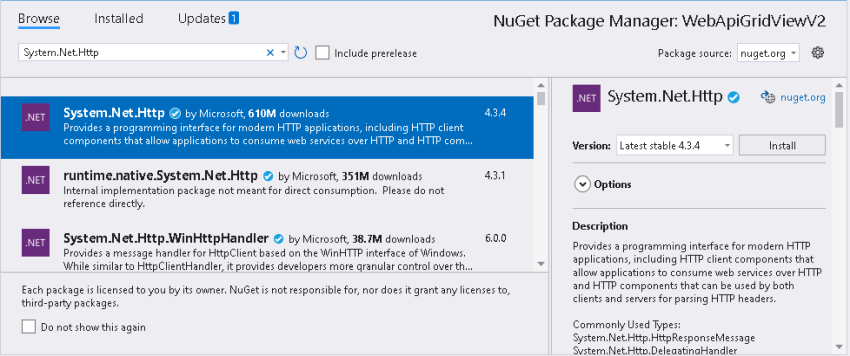
Step 2 - Install HttpClient library from NuGet
In order to consume HttpClient, this library needs to be installed from package manager as in the following picture.
Step 3 - Install WebAPI.Client library from NuGet
This package adds support for formatting and content negotiation to System.Net.Http, To install, go to package manager and search for "Microsoft.AspNet.WebApi.Client" and click install as in the following image.
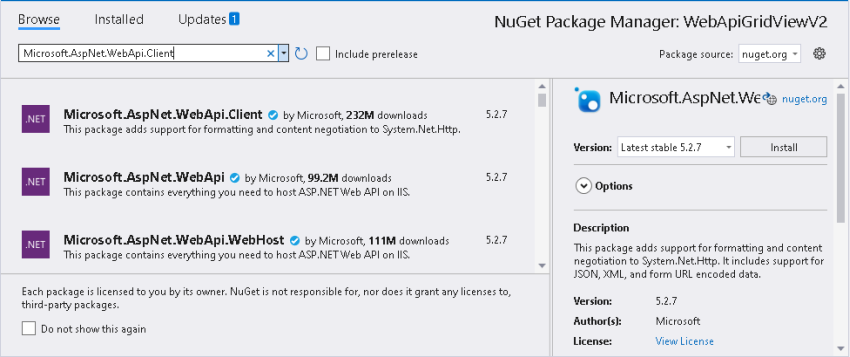
Installing the previous two packages will allow us to consume Web API in our project. Now, let's move to the next steps.
Step 4 - Create A New Web Form
Now, right-click on the project node and go to "Add" and then "Add New Item", choose "Web Form" and click add, the solution explorer will look like the following.
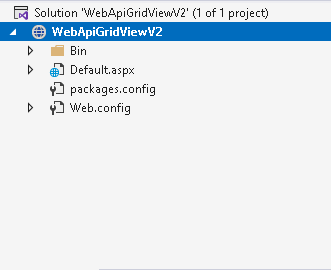
Step 5 - Add GridView To Web Form
Go to Toolbox on the left hand menu and choose "GridView", drag it to the HTML page, and click save as in the following picture.
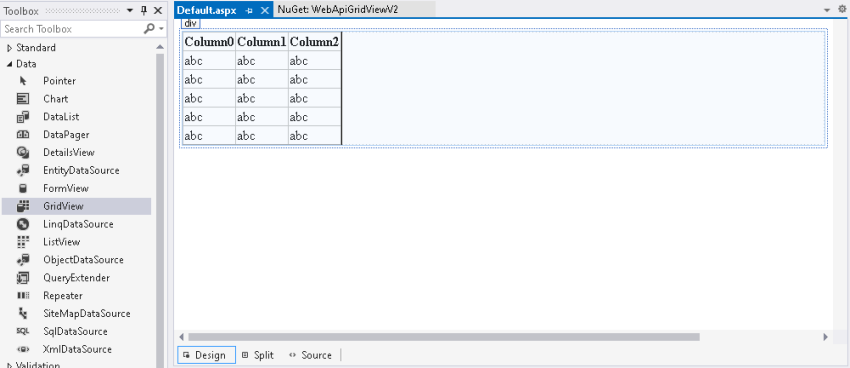
Step 6 - Add Class to Web Form Page
Now, let's add the class and code to consume to Web API to Web Form Page.
After modifying the code of Default.aspx.cs class, the code will look like the following.
Default.aspx.cs
using System;
using System.Collections.Generic;
using System.Linq;
using System.Web;
using System.Web.UI;
using System.Web.UI.WebControls;
using System.Net.Http;
using System.Net.Http.Headers;
using System.Data;
public partial class _Default: System.Web.UI.Page {
public class DataObject {
public string Version {
get;
set;
}
public string Key {
get;
set;
}
public string Type {
get;
set;
}
public string Rank {
get;
set;
}
public string EnglishName {
get;
set;
}
}
protected void Page_Load(object sender, EventArgs e) {
populateWebApiGridView();
}
public void populateWebApiGridView() {
string URL = "API_URL";
string urlParameters = "API_KEY";
DataTable dt = new DataTable();
dt.Columns.Add("Version", typeof(string));
dt.Columns.Add("Key", typeof(string));
dt.Columns.Add("Type", typeof(string));
dt.Columns.Add("Rank", typeof(string));
dt.Columns.Add("City", typeof(string));
HttpClient client = new HttpClient();
client.BaseAddress = new Uri(URL);
client.DefaultRequestHeaders.Accept.Add(new MediaTypeWithQualityHeaderValue("application/json"));
HttpResponseMessage response = client.GetAsync(urlParameters).Result;
if (response.IsSuccessStatusCode) {
var dataObjects = response.Content.ReadAsAsync < IEnumerable < DataObject >> ().Result;
foreach(var d in dataObjects) {
dt.Rows.Add(d.Version);
dt.Rows.Add(d.Key);
dt.Rows.Add(d.Type);
dt.Rows.Add(d.Rank);
dt.Rows.Add(d.EnglishName);
}
} else {
System.Diagnostics.Debug.WriteLine("{ 0} ({1})", (int) response.StatusCode, response.ReasonPhrase);
}
client.Dispose();
GridView1.DataSource = dt;
GridView1.DataBind();
}
}
Step 7 - Run the Web Site
European best, cheap and reliable ASP.NET hosting with instant activation. HostForLIFE.eu is #1 Recommended Windows and ASP.NET hosting in European Continent. With 99.99% Uptime Guaranteed of Relibility, Stability and Performace. HostForLIFE.eu security team is constantly monitoring the entire network for unusual behaviour. We deliver hosting solution including Shared hosting, Cloud hosting, Reseller hosting, Dedicated Servers, and IT as Service for companies of all size.
