In this article, we will see how to create a Stored Procedure in MySQL to search and bind the Customer details in our Blazor application using a Service with search parameter.
Blazor is a framework introduced by Microsoft. I love to work with Blazor as this makes our SPA full stack application development in simpler way and yes, now, we can use only one language, C#. Before Blazor, we were using ASP.NET Core with a combination of Angular or ReactJS. Now, with the help of Blazor support, we can create our own SPA application directly with C# Code.
We can develop two kinds of Blazor Applications which are Blazor Server App and another one is Blazor WebAssembly.
Blazor WebAssembly
WebAssembly or WASM runs on the client side. WebAssembly is the open web standard and works in browsers without support for any other plugins. WASAM uses JavaScript Interoperability to access the full functionality of browsers. Here we can see the structure of ASP.NET Core WASAM Application as the solution has only the client development as same structure of the ASP.NET Core Angular Stand-Alone Templates. For any server-side business logics or for using the Database we need to create an ASP.NET Core WEB API or other server-side project and bind the server-side data to the WASAM applications.
Blazor Server
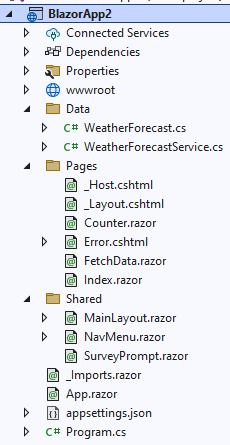
Blazor Server which runs in the ASP.NET Server means its runs on Server side. Blazor Server App uses the SignalR to continuously push updates to the client side. All the JavaScript calls, UI updates and all the app event handling using the SignalR with WebSocket protocol connections. Blazor Server app is much faster than the WASAM as the download size is smaller than the WASAM applications. Here we can see the structure of ASP.NET Core Blazor Server Application as the solution has Data folder where we can write all server-side business logic and can use the service to perform the Database related connections.
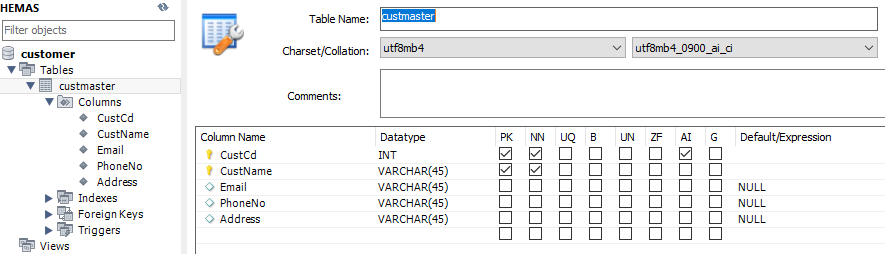
Creating the Database and Table
Here using MySQL workbench we create database named as customer and created a table named as custmaster.
Create the Stored Procedure
Let’s create the stored procedure to perform and search and customer details with customer name and customer email.
CREATE DEFINER=`shanu`@`%` PROCEDURE `sp_custGet`(IN CustName varchar(50),
IN Email varchar(50) )
BEGIN
Select CustCd,
CustName,
Email,
PhoneNo,
Address
FROM customer.custmaster
WHERE
CustName LIKE CONCAT('%', CustName , '%')
AND
Email LIKE CONCAT('%', Email , '%') ;
END
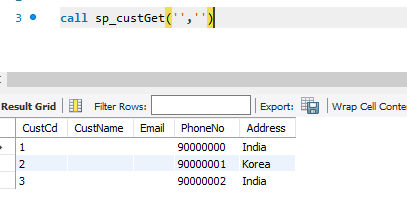
To test the Stored Procedure in MySQL we use the below code as a call with stored procedure name and now let's pass the empty parameter for both custname and email.
Blazor part
After installing all the prerequisites listed above and click Start >> Programs >> Visual Studio 2022 >> Visual Studio 2022 on your desktop. Click New >> Project.
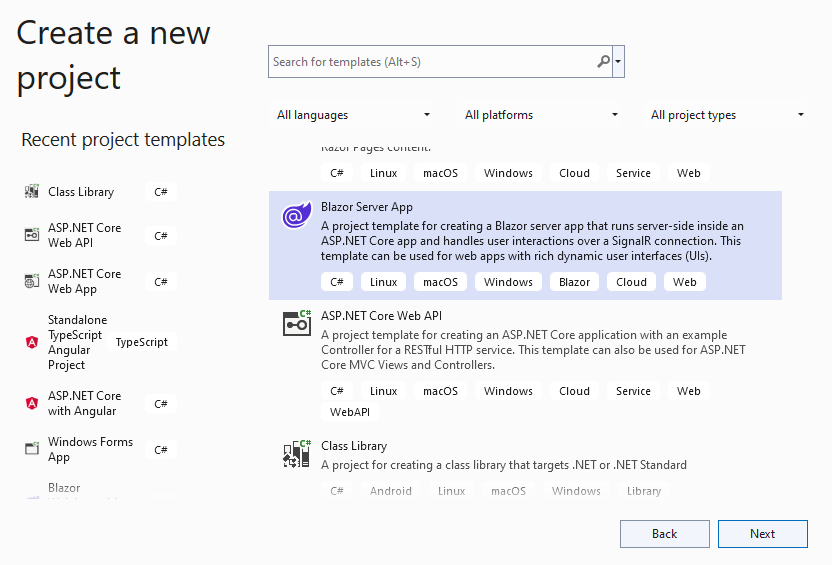
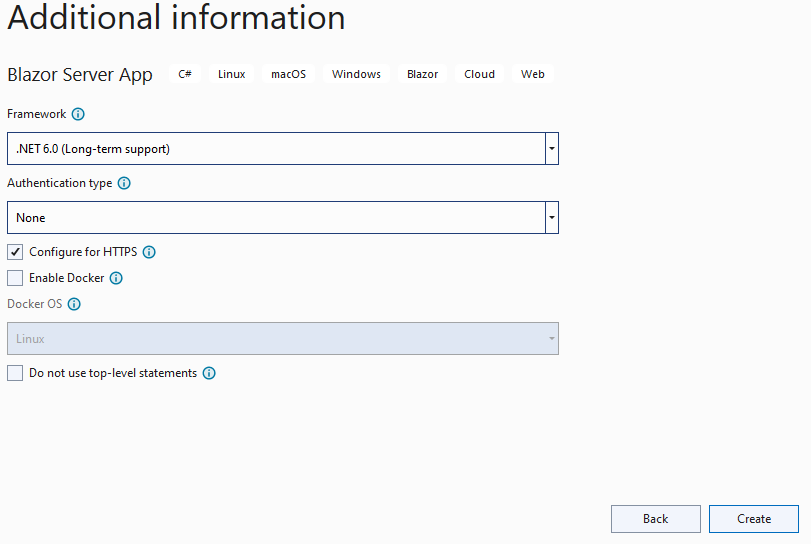
Search for Blazor Server App project and click Next.
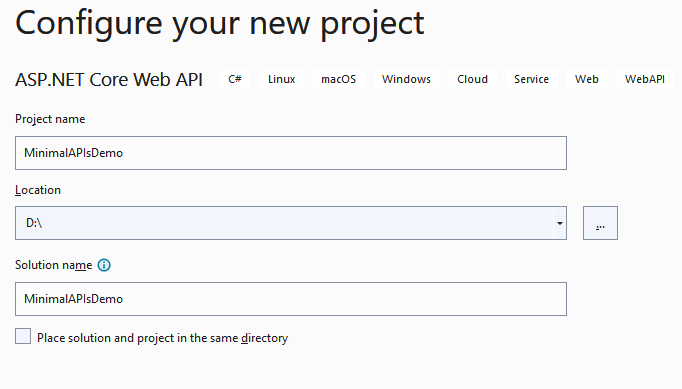
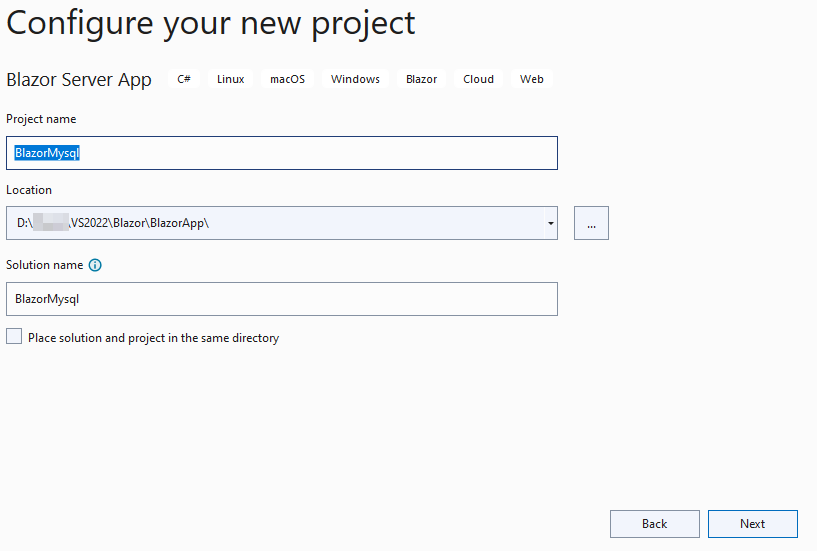
Enter your project name and click Next.
Select .NET 6.0 and click next to create your Blazor Application.
Step 2: Connection String
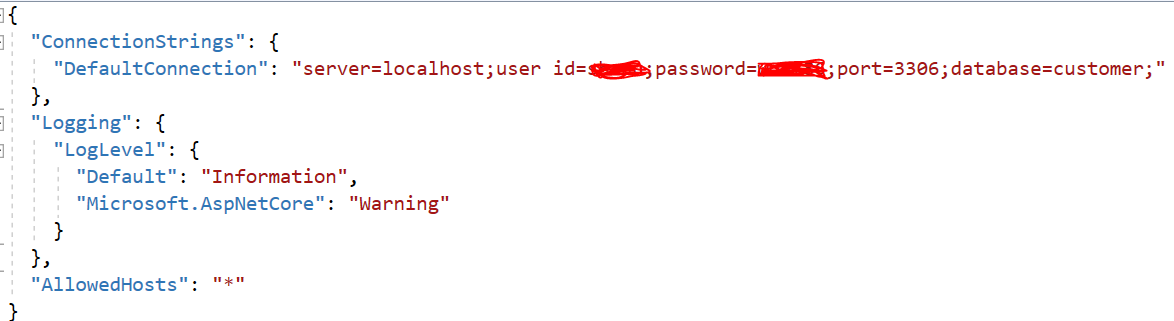
Open the appsettings.json file and add the MySQL connection string. Note add your MySQL server ID details.
"ConnectionStrings": {
"DefaultConnection": "server=localhost;user id=-------;password=--------;port=3306;database=customer;"
},
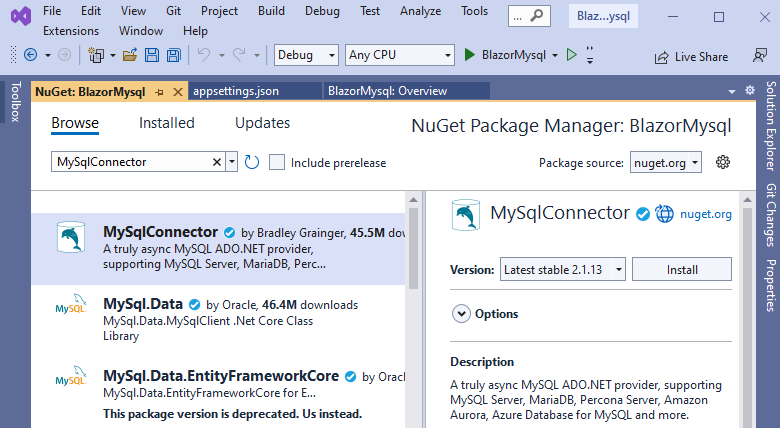
Step 3: Install the Packages
In order to work with MySQL Database in our Blazor application here we use the install the below mentioned packages :
MySqlConnector
Microsoft.EntityFrameworkCore
Step 4: Create Model Class
Next, we need to create the Model class for using in our application for binding the Customer Details.
Let’s create a new folder named as Models from our solution and then Right click the created Models folder and create new class file as “CustMaster.cs”.
In the class, we add the property field name which is the same as the below code:
public class custmaster{
public string CustCd { get; set; }
public string CustName { get; set; }
public string Email { get; set; }
public string PhoneNo { get; set; }
public string Address { get; set; }
}
Step 5: Create MySQL Connection Class
Now let’s create the MySQL connection class and for this let’s create a class file.
Right click the created Models folder and create new class file as mySQLSqlHelper.cs
using MySqlConnector;
namespace BlazorMysql.Models {
public class mySQLSqlHelper {
//this field gets initialized at Startup.cs
public static string conStr;
public static MySqlConnection GetConnection() {
try {
MySqlConnection connection = new MySqlConnection(conStr);
return connection;
} catch (Exception e) {
Console.WriteLine(e);
throw;
}
}
}
}
Now open the Program.cs file and lets assign the connection string from our appsetting.json to the mysqlHelper constring variable for connecting to the MySQL.
using BlazorMysql.Data;
using BlazorMysql.Models;
using Microsoft.AspNetCore.Components;
using Microsoft.AspNetCore.Components.Web;
var builder = WebApplication.CreateBuilder(args);
mySQLSqlHelper.conStr = builder.Configuration["ConnectionStrings:DefaultConnection"];
Step 6: Creating Customer MySql Connection class
Right Click the Data folder from the solution and add the new class named as custConnectoins .cs
In this class we create the GetCustDetails for connecting to Database and get the customer details by calling the Stored procedure with the required parameter passing and return to the list to our Service.
using BlazorMysql.Models;
using MySqlConnector;
using System.Data;
namespace BlazorMysql.Data {
public class custConnectoins {
public async Task < custmaster[] > GetCustDetails(string CustName, String Email) {
List < custmaster > list = new List < custmaster > ();
using(MySqlConnection conn = mySQLSqlHelper.GetConnection()) {
conn.Open();
using(MySqlCommand cmd = new MySqlCommand("sp_custGet", conn)) {
cmd.CommandType = CommandType.StoredProcedure;
cmd.Parameters.Add(new MySqlParameter {
ParameterName = "@CustNames",
DbType = DbType.String,
Value = CustName,
Direction = ParameterDirection.Input,
});
cmd.Parameters.Add(new MySqlParameter {
ParameterName = "@Emails",
DbType = DbType.String,
Value = Email,
Direction = ParameterDirection.Input,
});
using(MySqlDataReader reader = cmd.ExecuteReader()) {
while (reader.Read()) {
list.Add(new custmaster() {
CustCd = reader.GetInt32("CustCd"),
CustName = reader.GetString("CustName"),
Email = reader.GetString("Email"),
PhoneNo = reader.GetString("PhoneNo"),
Address = reader.GetString("Address"),
});
}
}
}
}
return list.ToArray();
}
}
}
Step 7: Working with Service Class
Next, we create the custMasterDetailSerivce.cs class and added the function named as GetCustDetails in order to bind the result to our Blazor apps.
using BlazorMysql.Models;
namespace BlazorMysql.Data {
public class custMasterDetailSerivce {
custConnectoins objUsers = new custConnectoins();
public async Task < custmaster[] > GetCustDetails(string CustName, String Email) {
custmaster[] custsObjs;
custsObjs = objUsers.GetCustDetails(CustName, Email).Result.ToArray();
return custsObjs;
}
}
}
Step 8: Add the Service
We need to add the services created by us to the Program.cs class.
builder.Services.AddSingleton<custMasterDetailSerivce>();
Step 9: Working with Client Project
First, we need to add the Razor Component page.
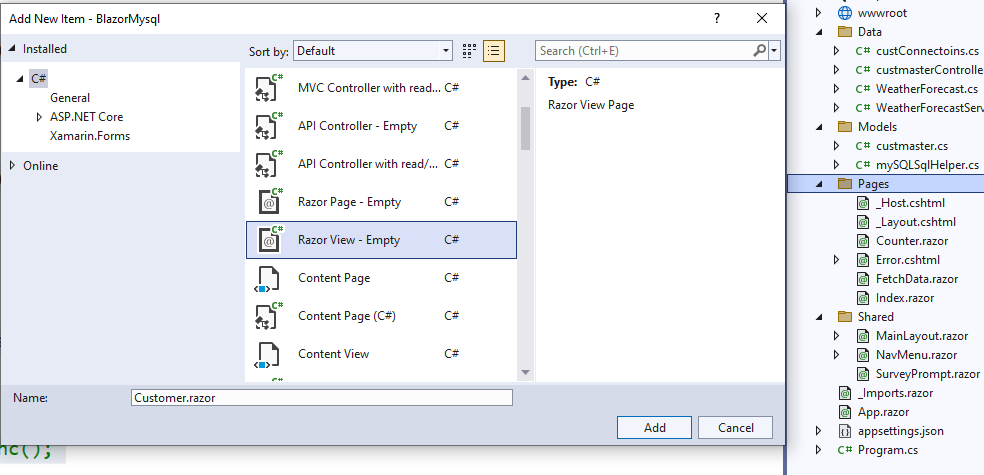
Add Razor Component
To add the Razor Component page, right click the Pages folder from the solution. Click on Add >> New Item >> Select Razor Component >> Enter your component name, here we have given the name as Customer.razor.
Note all the component files need to have the extension as .razor.
In Razor Component Page, we have three parts of code as first is the Import part where we import all the references and models for using in the component, HTML design and data bind part and finally we have the function part to Inject and call the service to bind in our HTML page and also to perform client-side business logic to be displayed in Component page.
Import Part
First, we import all the needed support files and references in our Razor View page. Here, we have first imported our Model and service class to be used in our view.
@page "/Customer"
@using BlazorMysql.Models
@using BlazorMysql.Data
@inject custMasterDetailSerivce CustomerService
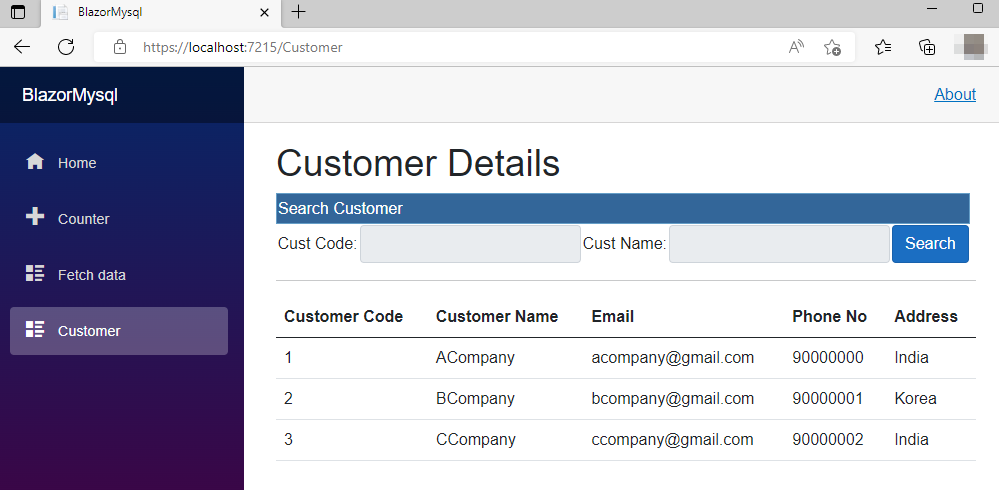
HTML Design and Data Bind Part
In design part, we bind the result in table and also, we design a search part with button.
<h1>Customer Details</h1>
<table >
<tr style="height: 30px; background-color:#336699 ; color:#FFFFFF ;border: solid 1px #659EC7;">
<td colspan="5" align="left">
Search Customer
</td>
</tr>
<tr>
<td>Cust Code:</td>
<td>
<input class="input-group-text" type="text" @bind-value="@CustName" />
</td>
<td>Cust Name:</td>
<td>
<input class="input-group-text" type="text" @bind-value="@Email" />
</td>
<td>
<input type="button" class="btn btn-primary" value="Search" @onclick="@searchDetails" />
</td>
</tr>
</table>
<hr />
@if (custDetails == null)
{
<p><em>Loading...</em></p>
}
else
{
<table class="table">
<thead>
<tr>
<th>Customer Code</th>
<th>Customer Name</th>
<th>Email</th>
<th>Phone No</th>
<th>Address</th>
</tr>
</thead>
<tbody>
@foreach (var cuDetails in custDetails)
{
<tr>
<td>@cuDetails.CustCd</td>
<td>@cuDetails.CustName</td>
<td>@cuDetails.Email</td>
<td>@cuDetails.PhoneNo</td>
<td>@cuDetails.Address</td>
</tr>
}
</tbody>
</table>
}
Function Part
Function part to get the Service result and bind the result in array and we have created function to search and bind the result when button clicked. Here, first we declare the customer Array to get bind the result and declared variables for search.
In OnInitializedAsync, we get the CustomerService result and bind the result in the ItemsArrays.
@code {
String CustName = "";
String Email = "";
private custmaster[] ? custDetails;
protected override async Task OnInitializedAsync() {
custDetails = await CustomerService.GetCustDetails(CustName, Email);
}
//SearchCustomer
async Task searchDetails() {
custDetails = await CustomerService.GetCustDetails(CustName, Email);
}
}
Navigation Menu
Now, we need to add this newly added customer Razor page to our left Navigation. For adding this, open the Shared Folder and open the NavMenu.cshtml page and add the menu.
<div class="nav-item px-3">
<NavLink class="nav-link" href="Customer">
<span class="oi oi-list-rich" aria-hidden="true"></span> Customer
</NavLink>
</div>
Build and Run the Application

Conclusion
Hope this article helps you to understand getting started with ASP.NET Core 6.0 and Blazor Application to work with MySQL Database with search functionality.
European best, cheap and reliable ASP.NET hosting with instant activation. HostForLIFE.eu is #1 Recommended Windows and ASP.NET hosting in European Continent. With 99.99% Uptime Guaranteed of Relibility, Stability and Performace. HostForLIFE.eu security team is constantly monitoring the entire network for unusual behaviour. We deliver hosting solution including Shared hosting, Cloud hosting, Reseller hosting, Dedicated Servers, and IT as Service for companies of all size.
