European ASP.NET 4.5 Hosting BLOG

BLOG about ASP.NET 4, ASP.NET 4.5 Hosting and Its Technology - Dedicated to European Windows Hosting Customer

European ASP.NET Core Hosting :: How to Calling Web API Using HttpClient?

clock August 16, 2021 07:28 by author Peter


HttpClient class provides a base class for sending/receiving the HTTP requests/responses from a URL. It is a supported async feature of .NET framework. HttpClient is able to process multiple concurrent requests. It is a layer over HttpWebRequest and HttpWebResponse. All methods with HttpClient are asynchronous.

In this example, I have created a console application.

To call Web API methods from the console Application, the first step is to install the required packages, using NuGet Package Manager. The following package needs to be installed in the console Application.

Install-Package Microsoft.AspNet.WebApi.Client

Next step is to create HttpClient object. In the following code snippet, the main function calls private static method "CallWebAPIAsync" and this blocks until CallWebAPIAsync completes the process, using wait function.
static void Main(string[] args)
{
    CallWebAPIAsync()
        .Wait();
}
static asyncTaskCallWebAPIAsync()
{
    using(var client = newHttpClient())
    {
        //Send HTTP requests from here.
    }
}


Afterwards, we have set the base URL for the HTTP request and set the Accept header. In this example, I have set Accept header to "application/json" which tells the Server to send the data into JSON format.
using(var client = newHttpClient())
{
    client.BaseAddress = newUri("http://localhost:55587/");
    client.DefaultRequestHeaders.Accept.Clear();
    client.DefaultRequestHeaders.Accept.Add(newMediaTypeWithQualityHeaderValue("application/json"));
}

HTTP GET Request
Following code is used to send a GET request for department, as shown below:
using(var client = newHttpClient())
{
    client.BaseAddress = newUri("http://localhost:55587/");
    client.DefaultRequestHeaders.Accept.Clear();
    client.DefaultRequestHeaders.Accept.Add(newMediaTypeWithQualityHeaderValue("application/json"));
    //GET Method
    HttpResponseMessage response = awaitclient.GetAsync("api/Department/1");
    if (response.IsSuccessStatusCode)
    {
        Departmentdepartment = awaitresponse.Content.ReadAsAsync < Department > ();
        Console.WriteLine("Id:{0}\tName:{1}", department.DepartmentId, department.DepartmentName);
        Console.WriteLine("No of Employee in Department: {0}", department.Employees.Count);
    }
    else
    {
        Console.WriteLine("Internal server Error");
    }
}


In the code given above, I have used GetAsync method to send HTTP GET request asynchronously. When the execution of this method is finished, it returns HttpResponseMessage,  which contains HTTP response. If the response contains success code as response, it means the response body contains the data in the form of JSON. ReadAsAsync method is used to deserialize the JSON object.

HttpClient does not throw any error when HTTP response contains an error code, but it sets the IsSuccessStatusCode property to false. If we want to treat HTTP error codes as exceptions, we can use HttpResponseMessage.EnsureSuccessStatusCode method.

When we run the code, given above, it throws the exception "Internal Server error".

We have to configure the serializer to detect then handle self-referencing loops. The following code needs to be placed in Global.asax.cs in Web API:

GlobalConfiguration.Configuration.Formatters.JsonFormatter.SerializerSettings
.PreserveReferencesHandling =Newtonsoft.Json.PreserveReferencesHandling.All;

HTTP POST request
Following code is used to send a POST request for the department:
var department = newDepartment() { DepartmentName = "Test Department" };
HttpResponseMessage response = awaitclient.PostAsJsonAsync("api/Department", department);

if (response.IsSuccessStatusCode)
{
   // Get the URI of the created resource.
   UrireturnUrl = response.Headers.Location;
   Console.WriteLine(returnUrl);
}


In this code, PostAsJsonAsync method serializes the object into JSON format and sends this JSON object in POST request. HttpClient has a built-in method "PostAsXmlAsync" to send XML in POST request. Also, we can use "PostAsync" for any other formatter.

HTTP PUT Request
Following code is used to send a PUT request for the department:

//PUT Method
var department = newDepartment() { DepartmentId = 9, DepartmentName = "Updated Department" };
HttpResponseMessage response = awaitclient.PutAsJsonAsync("api/Department", department);
if (response.IsSuccessStatusCode)
{
   Console.WriteLine("Success");
}

Same as POST, HttpClient also supports all three methods: PutAsJsonAsync, PutAsXmlAsync and PutAsync.

HTTP DELETE Request
Following code is used to send a DELETE request for the department:
intdepartmentId = 9;
HttpResponseMessage response = awaitclient.DeleteAsync("api/Department/" + departmentId);
if (response.IsSuccessStatusCode)
{
   Console.WriteLine("Success");
}


HttpClient only supports DeleteAsync method because Delete method does not have a request body.

HostForLIFE.eu ASP.NET Core Hosting

European best, cheap and reliable ASP.NET hosting with instant activation. HostForLIFE.eu is #1 Recommended Windows and ASP.NET hosting in European Continent. With 99.99% Uptime Guaranteed of Relibility, Stability and Performace. HostForLIFE.eu security team is constantly monitoring the entire network for unusual behaviour. We deliver hosting solution including Shared hosting, Cloud hosting, Reseller hosting, Dedicated Servers, and IT as Service for companies of all size.


European ASP.NET Core Hosting :: Code First Connection By Migration .NET Core

clock August 9, 2021 07:52 by author Peter

Add package by right clicking on the project. Click on manage nuget packages, browse package, search microsoft.entityframeworkcore.sqlserver , install it, search microsoft.entityframeworkcore.tool,microsoft.visualstudio.web.codegenerator.design , click ok and click accept on pop up.
 
This package will be added in packages. Add DataBaseContext.cs class in model inherit DbContext in the method class of DataBaseContext and use namespace. Microsoft.EntityFrameworkCore forDbContext Definition makes a constructor for connectivity with the database.
    public DataBaseContext(DbContextOptions<DataBaseContext> options) : base(options)  
    {  
    }  


In database context class add a class in the model for the table you want to make in the database. You can use a prop and double tab. For auto creating a property in class assign primary key here only on the property of class as an attribute with keyword [Key]. Use namespace System.ComponentModel.DataAnnotations for key attribute definition now link this table as DbSet type of property in DataBaseContext class LIKE this,
    public DbSet<Student> students { get; set; }   

Now use connection string in appsetting.json below "AllowedHosts": "*",
    "ConnectionStrings": {  
       "DatabaseConnection": "Data Source=DESKTOP-DCDA4OG\\SQLEXPRESS; Initial Catalog=CodeFirst; Integrated Security=True;"  
    }   

Now create a new database in SQL server rest of table will automatically be created by the project itself

add,
    string connection = Configuration.GetConnectionString("DataBaseConnection");  
    services.AddDbContext<DataBaseContext>(options => options.UseSqlServer(connection));  

in Configuresrevices in startup.cs use namespace microsoft.entityframeworkcore for usesqlserver connectivity keyword now add controller lets say with name usercontroller add model class add datacontext class click add you can auto create add update delete list by scaffolding now do migration,

select tools - > nugetpackage manager -> package manager console

write Add-Migration InitialCreate and enter

Write update-database enter

Now run controllers.

HostForLIFE.eu ASP.NET Core Hosting

European best, cheap and reliable ASP.NET hosting with instant activation. HostForLIFE.eu is #1 Recommended Windows and ASP.NET hosting in European Continent. With 99.99% Uptime Guaranteed of Relibility, Stability and Performace. HostForLIFE.eu security team is constantly monitoring the entire network for unusual behaviour. We deliver hosting solution including Shared hosting, Cloud hosting, Reseller hosting, Dedicated Servers, and IT as Service for companies of all size.


European ASP.NET Core Hosting :: How to Building Secure REST API?

clock August 5, 2021 07:14 by author Peter

In this article, we build a secure REST API in ASP.NET Core using JWT Authentication. We begin with what essentially a JWT is and its structure.

Sections 1 - 4 of the article explain what a JWT token is, how to set it with .Net Core, Installing Required Packages, creating Application models, Migrations & Updating the Database

Sections 5 - 9  focus on generating Secure JWT tokens, making secure calls with and without the generated token, and registering users. Have used Postman for testing and firing Web requests to secure API.

1. JWT Structure
See the below JWT token. It is broken down and explained below as Header, Payload, Signature,
eyJhbGciOiJIUzI1NiIsInR5cCI6IkpXVCJ9.eyJzdWIiOiI1Njc3OCIsIm5hbWUiOiJSYWp1IEt1bWFyIiwiaWF0IjozNDU2Njd9.eJBP0IBy20JT9iwP6pHiKkFfHcbMPg_gVYKH-e5j0qk

Header
Provides details on the type of Token (JWT) and the algorithm used to sign the token, such as RSA, SHA256.  In the above example, it is,
eyJhbGciOiJIUzI1NiIsInR5cCI6IkpXVCJ9

Payload
Contains user details also known as claims, this is the data to be secured. In the above example, it is,
eyJzdWIiOiI1Njc3OCIsIm5hbWUiOiJSYWp1IEt1bWFyIiwiaWF0IjozNDU2Njd9

Signature
Encryption between the header, payload, and a secret key. In the above example, it is,
eJBP0IBy20JT9iwP6pHiKkFfHcbMPg_gVYKH-e5j0qk

See this site JSON Web Tokens - jwt.io to decode this JWT token.

2. Let's start by Installing Required Packages

Create a new ASP.NET Core application using the API template and install the following packages. The target framework is 3.1 and above.
Install-Package Microsoft.AspNetCore.Authentication.JwtBearer
Install-Package Microsoft.AspNetCore.Identity.EntityFrameworkCore
Install-Package Microsoft.EntityFrameworkCore
Install-Package Microsoft.EntityFrameworkCore.Design
Install-Package Microsoft.EntityFrameworkCore.SqlServer
Install-Package Microsoft.EntityFrameworkCore.Tools
Install-Package Microsoft.VisualStudio.Web.CodeGeneration.Design
Install-Package System.IdentityModel.Tokens.Jwt


3(a). Configure JWT in code as shown
Add the following to appsettings.json,
"JWT": {
    "key": "C1CF4B7DC4C4175B6618DE4F55CA4",
    "Issuer": "MySecureRestApi",
    "Audience": "AsecureRestApiUser",
    "DurationInMinutes": 20
}


Create a corresponding class for the above settings, namely, Settings/JWT.cs which will be used to read data from our previously created JWT Section of appsettings.json using the IOptions feature of ASP.NET Core.
public class JWTSettings {
    public string Key {
        get;
        set;
    }
    public string Issuer {
        get;
        set;
    }
    public string Audience {
        get;
        set;
    }
    public double DurationInMinutes {
        get;
        set;
    }
}

Then, add the following classes to your project:
    DbContext - Add connection string in appsettings.json
    ApplicationUser which derives from IdentityUser

3(b). Configure JWT in code as shown
To configure the authentication, add code to ConfigureServices method as shown below-
public void ConfigureServices(IServiceCollection services) {
    Line 1 //The JWT Configuration from AppSettings
    services.Configure < JWTSettings > (_configuration.GetSection("JWT"));
    //The User Manager Service
    services.AddIdentity < ApplicationUser, IdentityRole > ().AddEntityFrameworkStores < ApplicationDbContext > ();
    services.AddScoped < IUserService, UserService > ();
    //Adding DB Context with MSSQL
    services.AddDbContext < ApplicationDbContext > (options => options.UseSqlServer(_configuration.GetConnectionString("DefaultConnection"), b => b.MigrationsAssembly(typeof(ApplicationDbContext).Assembly.FullName)));
    //The JWT Athentication
    services.AddAuthentication(options => {
        options.DefaultAuthenticateScheme = JwtBearerDefaults.AuthenticationScheme;
        options.DefaultChallengeScheme = JwtBearerDefaults.AuthenticationScheme;
    }).AddJwtBearer(oa => {
        oa.RequireHttpsMetadata = false;
        oa.SaveToken = false;
        oa.TokenValidationParameters = new TokenValidationParameters {
            ValidateIssuerSigningKey = true,
                ValidateIssuer = true,
                ValidateAudience = true,
                ValidateLifetime = true,
                ClockSkew = TimeSpan.Zero,
                ValidIssuer = _configuration["JWT:Issuer"],
                ValidAudience = _configuration["JWT:Audience"],
                IssuerSigningKey = new SymmetricSecurityKey(Encoding.UTF8.GetBytes(_configuration["JWT:Key"]))
        };
    });
    services.AddControllers();
}


4. For DB Migration
Add a Connection String in APP Settings.json. For creating the database, using Code First Approach of Entity Framework Core.

Before executing the application, please run the following commands on the Package Manager Console to apply migrations.

add-migration "migrationDB"
update-database

Following the set of ASPNET users and roles tables are created post a successful migration, see below


5. Registering a User
Create a Models/RegisterModel.cs with the following properties. The user has to post data with this object to register.
public class RegisterModel {
    [Required]
    public string FirstName {
        get;
        set;
    }
    [Required]
    public string LastName {
        get;
        set;
    }
    [Required]
    public string Username {
        get;
        set;
    }
    [Required]
    public string Email {
        get;
        set;
    }
    [Required]
    public string Password {
        get;
        set;
    }
}


In IUserService.cs, add the following 2 function definitions to Register users accepting a Register Model.
Task<string> RegisterAsync(RegisterModel model);
Task<AuthenticationModel> GetTokenAsync(TokenRequestModel model);

Go to Concrete class, UserService to implement the Register Function.
public async Task < string > RegisterAsync(RegisterModel model) {
    var user = new ApplicationUser {
        UserName = model.Username,
            Email = model.Email,
            FirstName = model.FirstName,
            LastName = model.LastName
    };
    var userWithSameEmail = await _userManager.FindByEmailAsync(model.Email);
    if (userWithSameEmail == null) {
        var result = await _userManager.CreateAsync(user, model.Password);
        if (result.Succeeded) {
            return $ "Success: User Registered with username {user.UserName}";
        } else {
            string descr = "";
            if (result.Errors.Any()) {
                foreach(var item in result.Errors) {
                    descr += item.Description;
                }
            }
            return $ "Error(s), registering user : {descr}";
        }
    } else {
        return $ "Error(s), Email {user.Email } is already registered.";
    }
}

In the above code snippet, we accept the RegisterModel object, perform validations and create the user in DB, else return the appropriate error message.

From the controller, the call will go as below,
[HttpPost("CreateUser")]
public async Task < ActionResult > RegisterAsync(RegisterModel model) {
    var result = await _userService.RegisterAsync(model);
    return Ok(result);
}

6. Test with Postman

Open up Postman and define a raw JSON object that is to be posted to <localhost>/api/user/CreateUser. Check the following screenshot, on success, we get a confirmed user-created message.


7. Generate JWT Token
Let’s try to fetch the JWT Token. We will build a Token Generation function that accepts a TokenRequestModel (email, password), validates them, and builds a token for us.

Following are model classes for token Models/TokenRequestModel.cs and Models/AuthenticationModel.cs,
public class TokenRequestModel {
    [Required]
    public string Email {
        get;
        set;
    }
    [Required]
    public string Password {
        get;
        set;
    }
}

Another class, AuthenticationModel.cs which is basically the response from the API endpoint. This endpoint will return a status message, user details, and finally our token.
public class AuthenticationModel {
    public string Message {
        get;
        set;
    }
    public bool IsAuthenticated {
        get;
        set;
    }
    public string UserName {
        get;
        set;
    }
    public string Email {
        get;
        set;
    }
    public string Token {
        get;
        set;
    }
}


Check below implementation in the concrete class of UserService for the token generation,
public async Task < AuthenticationModel > GetTokenAsync(TokenRequestModel model) {
    var authenticationModel = new AuthenticationModel();
    var user = await _userManager.FindByEmailAsync(model.Email);
    if (user == null) {
        authenticationModel.IsAuthenticated = false;
        authenticationModel.Message = $ "No Accounts Registered with {model.Email}.";
        return authenticationModel;
    }
    if (await _userManager.CheckPasswordAsync(user, model.Password)) {
        authenticationModel.IsAuthenticated = true;
        JwtSecurityToken jwtSecurityToken = await CreateJwtToken(user);
        authenticationModel.Token = new JwtSecurityTokenHandler().WriteToken(jwtSecurityToken);
        authenticationModel.Email = user.Email;
        authenticationModel.UserName = user.UserName;
        return authenticationModel;
    }
    authenticationModel.IsAuthenticated = false;
    authenticationModel.Message = $ "Incorrect Credentials for user {user.Email}.";
    return authenticationModel;
}
private async Task < JwtSecurityToken > CreateJwtToken(ApplicationUser user) {
    var userClaims = await _userManager.GetClaimsAsync(user);
    var roles = await _userManager.GetRolesAsync(user);
    var roleClaims = new List < Claim > ();
    for (int i = 0; i < roles.Count; i++) {
        roleClaims.Add(new Claim("roles", roles[i]));
    }
    var claims = new [] {
        new Claim(JwtRegisteredClaimNames.Sub, user.UserName),
            new Claim(JwtRegisteredClaimNames.Jti, Guid.NewGuid().ToString()),
            new Claim(JwtRegisteredClaimNames.Email, user.Email),
            new Claim("uid", user.Id)
    }.Union(userClaims).Union(roleClaims);
    var symmetricSecurityKey = new SymmetricSecurityKey(Encoding.UTF8.GetBytes(_jwt.Key));
    var signingCredentials = new SigningCredentials(symmetricSecurityKey, SecurityAlgorithms.HmacSha256);
    var jwtSecurityToken = new JwtSecurityToken(issuer: _jwt.Issuer, audience: _jwt.Audience, claims: claims, expires: DateTime.UtcNow.AddMinutes(_jwt.DurationInMinutes), signingCredentials: signingCredentials);
    return jwtSecurityToken;
}

Following are the activities in the above code function,

Line #4 to #11 check the validity of provided email and password and return a message if not.

Line #14 Calls the CreateJWTToken function. This function builds the JWT. It gets all the claims of the user ( user details ) as well as roles if any.

Finally, Line #51 to #57 creates a new JWT Security Token and returns them.

Now, wire this function to Controllers/UserController.cs

[HttpPost("GenerateToken")]
public async Task < IActionResult > GetTokenAsync(TokenRequestModel model) {
    var result = await _userService.GetTokenAsync(model);
    if (string.IsNullOrEmpty(result.Token)) return NotFound(" " + result.Message);
    return Ok(result.Token);
}

Next, post a valid email and password request to ../api/user/GenerateToken. See below Postman screenshot for the successful response of JWT token and AuthenticationModel object containing user details. The validity of this token is 20 minutes (as an expiration time is set to 20 minutes in app.json).

On Posting an invalid password for the same user, PostMan returns the following message: "Incorrect Credentials for user: [email protected]".

8. Access Database information securely, i.e. using the generated token.
I have earlier created few cities in my Database which I shall access using this bearer token. For this, I need to decorate the Get City endpoint with the [Authorize] keyword in the Controller class. Refer below codebase,
[Authorize]
[HttpGet]
[Route("AllCities")]
public IActionResult GetAllCities(string Email) {
    if (appdbcontext.CountryInfos == null || !appdbcontext.CountryInfos.Any()) return Ok("No Country-Cities created as yet.");
    var res = appdbcontext.CountryInfos.Where(aa => aa.Email == Email).
    Select(xx => new {
        City = xx.City,
            Email = xx.Email,
            Isfavourite = xx.Isfavourite
    });
    if (res.Count() < 1) {
        return NotFound("No records against this UserEmail" + Email);
    } else return Ok(res);
}

Now copy the bearer token in the previous snippet and fire this GET Request, ..api/user/allcities?email in POSTMAN to return cities. For a successful response, refer to the screen below,


European ASP.NET Core Hosting :: Generate HTML From MJML Syntax In ASP.NET Core API Using Mjml.AspNetCore Package

clock August 2, 2021 07:49 by author Peter

In this article, you will learn how to integrate Mailjet Markup Language (MJML) in your ASP .Net Core Web API through the NuGet package. MJML sums up everything Mailjet has learned about HTML email creation over the past few years and includes a whole layer of complexity related to responsive email creation.

Make your speed and productivity enhanced with MJML semantic syntax. Say get rid of the endless HTML table or email client email. Creating a responsive email is much easier with tags like <mj-section>, <mj-image>, <mj-text> and <mj-column>. MJML is designed with responsiveness in mind. The abstraction it offers ensures you stay up-to-date with industry practice and responsiveness.

The only thing we do in our API is to add the NuGet package of MJML. Then we will write the MJML syntax for our email template and then we will call the “Render” method of the MJML Service which returns the HTML. We will simply pass it to our email body and it will be rendered in our email.

Let’s see how to do it in simple steps.
Steps

First of all open visual studio and click on create a new project.


Select ASP .NET Core Web API and click Next.


Enter the project name and click Next.


Select target framework as 3.1 and click on Create.


It will take few seconds and your project will be created. There will be a few folders and files in the project already. Right-click on the Controller folder and add a new empty MVC Controller.


Name the controller as “EmailController”. After creating the EmailController right-click on your project and click on manage NuGet packages. Write MJML in the browse tab and install the latest stable version of Mjml.AspNetCore package.


After installing the package add the namespace of “using Mjml.AspNetCore” in EmailController. You can use dependency injection which will make it much easier to use Mjml Services. For this purpose, write the below code in your “ConfigureServices” method in the startup.cs class and also add namespace “using Mjml.AspNetCore”.
services.AddMjmlServices(o => {
    o.DefaultKeepComments = true;
    o.DefaultBeautify = true;
});

We have successfully created the Mjml service now it’s time to inject it into our controller. Inject “MjmlServices” through the constructor and create a HttpGet method by the name “Send” which returns Ok in case of successful email send. After that write the Mjml syntax for your email template and call the “Render” method of the Mjml service. It will return HTML in response. Simply pass that HTML as your email body. Below is the complete code of the EmailController.
using Microsoft.AspNetCore.Mvc;
using Mjml.AspNetCore;
using System;
using System.Net;
using System.Net.Mail;
using System.Threading.Tasks;
namespace MJMLTestAPI.Controllers {
    [ApiController]
    [Route("[controller]")]
    public class EmailController: ControllerBase {
        public readonly IMjmlServices _mjmlServices;
        public EmailController(IMjmlServices _mjml) => (_mjmlServices) = (_mjml);
        [HttpGet]
        public IActionResult Send() {
            SendEmail();
            return Ok();
        }
        public async Task SendEmail() {
            var prehtml = "<mjml><mj-body><mj-container><mj-section><mj-column><mj-text>Hello World!</mj-text></mj-column></mj-section></mj-container></mj-body></mjml>";
            var result = await _mjmlServices.Render(prehtml);
            SendEmail(result.Html);
        }
        public void SendEmail(string emailBody) {
            try {
                SmtpClient objsmtp = new SmtpClient(EmailServer, Port);
                objsmtp.UseDefaultCredentials = false;
                objsmtp.Credentials = new NetworkCredential(UserName, Password);
                objsmtp.DeliveryMethod = SmtpDeliveryMethod.Network;
                MailMessage msg = new MailMessage(EmailFrom, EmailTo, "MJML Test", emailBody);
                msg.IsBodyHtml = true;
                objsmtp.Timeout = 50000;
                objsmtp.Send(msg);
            } catch (Exception ex) {}
        }
    }
}


Note that the variables (EmailServer, Port, UserName, Password, EmailFrom, EmailTo) in the above SendEmail method will be the settings of your SMTP email server. “prehtml” will be the MJML syntax by which you designed your email template. I used a sample syntax here. You can see sample email templates and their MJML code by visiting this link.

Now, just run your project and replace the weatherforecast in the URL with Email, and press enter button. The email will be sent to your desired email address with the generated email template in the email body.


European ASP.NET Core Hosting :: What Is Caching And How It Works?

clock July 30, 2021 05:35 by author Peter

A cache is a temporary storage used to store the results of frequently accessed data so that subsequent requests load faster. Most applications use the database as the main storage. Every time you load user data, one or more database calls are executed to get the particular data, which can hamper the performance.

Advantages
    One of the key benefits of having a separate cache is the ability to scale the cache system independently.
    The use of cache reduces latency for active data. This results in higher performance for a system or application.
    It reduces the overhead from server resources.
    It increases reliability

Disadvantage
Caching is not recommended for the system that performs more write operation than the read operation because every time to perform a write operation, you also have to update the cache.
Recommendations

Consistency
Keep the main data source and cache in sync, usually, inconsistency occurs when the write operation on the main data storage and the write/update on cache is not in a single transaction.

Eviction Policy
If you keep adding the items in the cache, there would be a time when you face a memory out-of-bounds exception so it’s recommended to clear the unwanted keys/items on the basis of eviction policies. There are multiple policies available to remove the keys from the cache, the most used is the Least-recently-used (LRU), which allows you to quickly identify which item hasn’t been used for the longest amount of time and removes it. Other eviction policies are Least Frequently Used (LFU), First in First Out (FIFO).

Single Point of Failure(SPOF)
Single point of failure refers to a part of the system which in the case failed will hamper the whole system and can entirely stop the system. To avoid this, deploy multiple cache systems across the different data centers/locations.

Expiration
It’s a good practice to have an expiration policy against every item. If you don’t provide it, the cached data will remain in the memory permanently or until the system restarts. There are different ways you can have an expiration policy. One of them is Absolute Time. In this, we provide the expiry time against every time and it will expire in that given time. Suppose you have set 5 mins absolute expiry time for item1. As soon as the 5 mins are over for item1. The system will remove the item1 from the cache and calls the eviction call back function. The other option is the Sliding Time, it will ensure that if the item is accessed within the specified time interval, the cache time span will be extended by the same interval value.

The above diagram is high level, we have used a load balancer to distribute the load among different web servers. All the write operations are redirected to the Master DB (SQL Server, NoSql, etc) and all the read operations are handled by the cache.


European ASP.NET Core Hosting :: Setting and Configuration Of .NET Core Web Application

clock July 22, 2021 07:16 by author Peter

Today we will learn some basic settings/configurations to be made before we actually start development in the .net core web application (3.0). Let's get started.


Refreshing MVC Views

By default .Net Core web application does not allow changes made in the MVC view to appear directly on the browser when we refresh the page. To make changes appear on the browser we need to perform few steps as below.

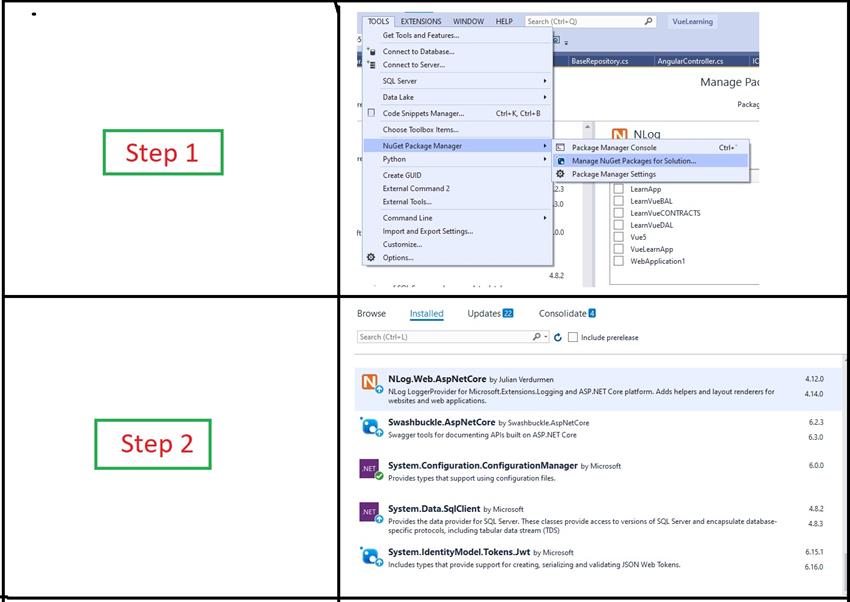
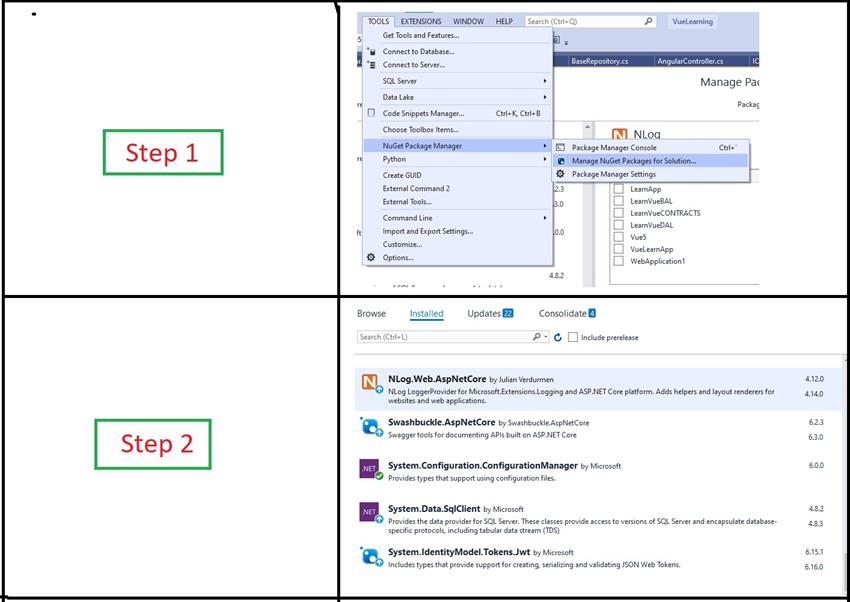
Add/Install Microsoft.AspNetCore.Mvc.Razor.RuntimeCompilation into your project/application with the help of NuGet Package Manager as below,

Basic settingsconfiguration of .Net Core Web Application

By clicking the above option, the NuGet package manager will appear then click on the Browse option and search for Microsoft.AspNetCore.Mvc.Razor.RuntimeCompilation as below,

Once the search is done, please click on this option, and on the right side of the panel select your project and before you click on the install button please choose the appropriate version and then click on the install button.

Note
For .Net Core Version 3.0 please choose 3.1.17 version.

By clicking the install button, it will install/add "Microsoft.AspNetCore.Mvc.Razor.RuntimeCompilation" into your application/project, you can see the progress in the output pane of the Visual Studio as below. When the install button is clicked it will prompt the library to be installed into your project. Click on OK and then accept License Acceptance.

Basic settingsconfiguration of .Net Core Web Application

Once the above process is done please add the below line into your startup.cs file as below,

public void ConfigureServices(IServiceCollection services)
{
    services.AddControllersWithViews().AddRazorRuntimeCompilation();
}

As per the below screen.

Please run and check the application to see the real-time changes of views to appear on the browser on refresh.

MVC Views folder when Publish

By default .Net Core web application does not append/add Views folder when publishing the application. To have that folder when publish we need to perform the below steps.

Right-click on root project and click on Edit Project File as below.

Once click that option below screen will have appeared.

Add the below settings to the Property Group node as below,

<MvcRazorCompileOnPublish>false</MvcRazorCompileOnPublish>
<CopyRazorGenerateFilesToPublishDirectory>true</CopyRazorGenerateFilesToPublishDirectory>

Once done it will add the Views folder when publishing the application.


European ASP.NET Core Hosting :: Building Lightweight APIs In .NET 6

clock July 19, 2021 08:37 by author Peter

The next major release is .NET 6. It has support for MAUI, Improved SPA templates, Blazor Enhancements, Lightweight API development, and much more. In this tutorial, we are going to cover how .NET 6 will allow us to develop lightweight APIs.

The good thing about this lightweight API is that no additional template and no extra effort are required. You can start from an empty web project and be up and running without any extra configuration. So, let’s get started with development.

Software and Packages Required

  1. Visual Studio Code
  2. .NET 6 SDK Preview 4

What we are building,

URL VERB MAP OVERLOAD
/ GET MapGet
/ POST MapPost
/id DELETE MapDelete


Solution Setup

Check .NET version

D:\LightweightDotnetAPI>dotnet --version

6.0.100-preview.4.21255.9

dotnet new sln #create new solution
dotnet new web -o Api #create API Project
dotnet sln add Api/Api.csproj #Add Project in Solution
dotnet add package Microsoft.AspNetCore.Mvc.NewtonsoftJson --version 5.0.7

The result project structure will look like this,

Code Walkthrough

Now, our Program.cs will be like the below file.

Program.cs

using System;
using Microsoft.AspNetCore.Builder;
using Microsoft.Extensions.Hosting;
using Microsoft.AspNetCore.Http;
using Newtonsoft.Json;
using System.IO;
using System.Text;
var builder = WebApplication.CreateBuilder(args);
await using
var app = builder.Build();
if (app.Environment.IsDevelopment()) {
    app.UseDeveloperExceptionPage();
}
app.MapGet("/", (Func < string > )(() => "Hello World!"));
app.MapPost("/", (Func < PostBody, string > )((body) => {
    string text = JsonConvert.SerializeObject(body);
    return text;
}));
app.MapDelete("/{id}", (Func < int, string > )((id) => "Delete Request for " + id));
await app.RunAsync();
public class PostBody {
    public string Data {
        get;
        set;
    }
}

That’s it, we have built an API that can accept GET, POST, and DELETE with very few lines of code. You can see in the above code that all the things have been done in one file and with minimal effort. With less overhead, we get more performance. Microservices can be built using this simple structure. It is very simple and easy to understand. 

We have built a lightweight API in .NET 6 (currently in Preview). We have covered the new Routing APIs that use Map Overloads in .NET 6 starting from Preview 4. We built API using GET, POST, and DELETE verbs in the Program.cs file. The lines of code were minimal. With minimum lines of code, we have better performance. So far we have covered,

  1. Setting up the project in .NET CLI
  2. Creating lightweight API in Program.cs
  3. Advantages


European ASP.NET Core Hosting :: How to Create A .NET 5 Client To Call An API Protected By Certificates?

clock July 16, 2021 05:43 by author Peter

As we all know, security is particularly important for all applications especially APIs as these expose our business logic to be consumed by various clients over the web. We created the .NET API server and then used Postman to call the .NET API endpoints. We attached the certificate to our request in Postman. In today’s article, we will see how to create a .NET client application which makes the call to the same .NET API server endpoint by using a certificate.

Creating the Client Application
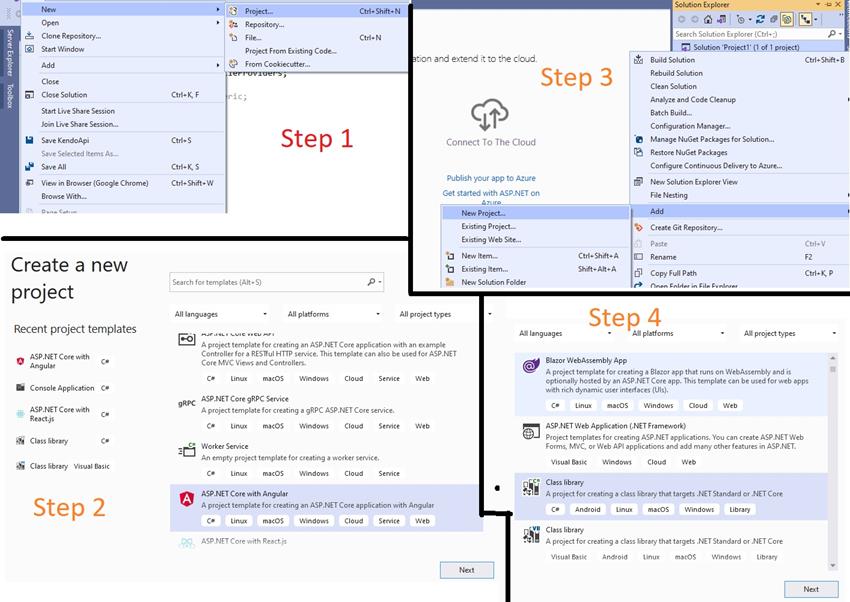
To our existing solution, add a new C# console application project as below,


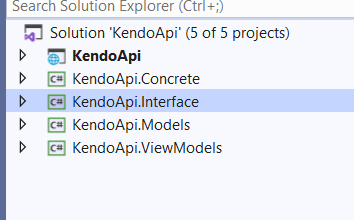
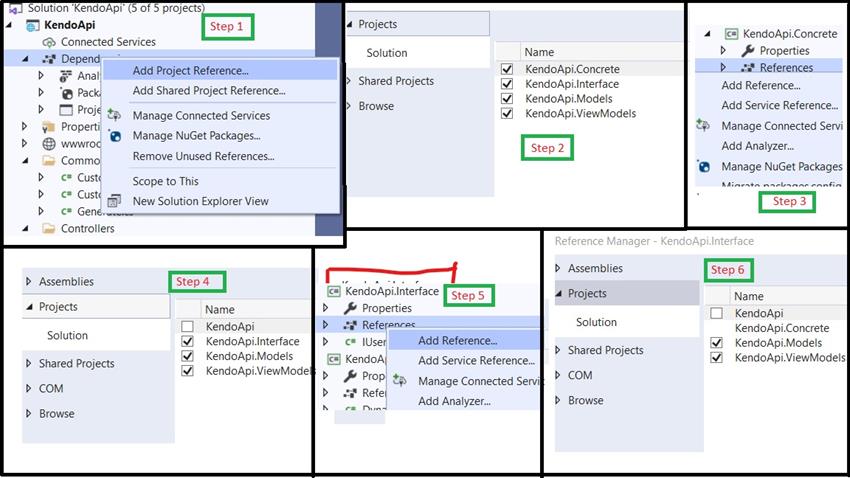
You will see the solution as below,


Add the below code to the “Program.cs” file,
using System;
using System.Net.Http;
using System.Security.Cryptography.X509Certificates;
var certificate = new X509Certificate2(@ "C:\CloudItems\Learning\CSharpCorner\Article 62\clientcert.pfx", "Client123");
var handler = new HttpClientHandler();
handler.ClientCertificates.Add(certificate);
using(var httpClient = new HttpClient(handler)) {
    using(var response = await httpClient.PostAsync("https://localhost:5001/api/Test", null)) {
        var returnValue = await response.Content.ReadAsStringAsync();
        Console.WriteLine(returnValue);
    }
}
Console.ReadLine();

Here, we see that we provide the client certificate and password to the client who then attaches it to the request. The server then validates the certificate and if all looks good, the request is processed. We run the server application and then the client application and make the request as below. Please note that I ran the server app from Visual Studio and the client application from the command line.

In this article, we looked at how to attach the client certificate we generated in the previous article and make an API call to the server using a .NET 5 client. Happy coding!


European ASP.NET Core Hosting :: How to Fix Error While Upgrading Solution From ASP.NET Core 2.1 To ASP.NET Core 3.1?

clock July 14, 2021 07:51 by author Peter

I was upgrading the project framework from ASP.NET Core 2.1 to ASP.NET Core 3.1 and I got the below exception error in my Startup.cs class.


Error Details
“System.InvalidOperationException HResult=0x80131509 Message=Endpoint Routing does not support ‘IApplicationBuilder.UseMvc(…)’. To use ‘IApplicationBuilder.UseMvc’ set ‘MvcOptions.EnableEndpointRouting = false’ inside ‘ConfigureServices(…). Source=Microsoft.AspNetCore.Mvc.Core StackTrace: at Microsoft.AspNetCore.Builder.MvcApplicationBuilderExtensions.UseMvc(IApplicationBuilder app, Action`1 configureRoutes) at ProjectName.Startup.Configure(IApplicationBuilder app, IHostingEnvironment env) in ProjectDirectoryPath\Startup.cs:line 89 at System.RuntimeMethodHandle.InvokeMethod(Object target, Object[] arguments, Signature sig, Boolean constructor, Boolean wrapExceptions) at System.Reflection.RuntimeMethodInfo.Invoke(Object obj, BindingFlags invokeAttr, Binder binder, Object[] parameters, CultureInfo culture) at Microsoft.AspNetCore.Hosting.ConfigureBuilder.Invoke(Object instance, IApplicationBuilder builder) at Microsoft.AspNetCore.Hosting.ConfigureBuilder.<>c__DisplayClass4_0.<Build>b__0(IApplicationBuilder builder) at Microsoft.AspNetCore.Hosting.ConventionBasedStartup.Configure(IApplicationBuilder app)”

When I continued to run the project, the page loaded with the below error message.


Solution
Inside Configuration() method of Startup.cs file, we need to change the below code.
app.UseMvc(routes => {
    routes.MapRoute(name: "default", template: "{controller=Home}/{action=Index}/{id?}");
});

To
app.UseEndpoints(endpoints => {
    endpoints.MapControllerRoute(name: "default", pattern: "{controller=Home}/{action=Index}/{id?}");
});


Thing is after migration to ASP.NET Core 3.1, we have to use UseEndPoints() instead of UseMVC().

I hope this helps you resolve your issue after upgrading your project framework from ASP.NET Core 2.1 to ASP.NET Core 3.1.


European ASP.NET Core Hosting :: Asynchronous Calls And Thread-Safe Control Usage In .NET

clock July 12, 2021 08:18 by author Peter


When using asynchronous programming with Windows Forms controls, you need to remember that background threads cannot directly invoke controls that were not created by them. If you want a control to be manipulated from within a background thread, you first need to check if the call to the control is safe or not and then make a call to it. To achieve this, you use a combination of the InvokeRequired property and Invoke() method of the Control class.
Working of InvokeRequired Property

The InvokeRequired property returns false if the current thread is one that created the control and no special invoke is required to use the control. The property returns true if the control is being accessed from a different thread than the one it was created on and has to be invoked using the Invoke() method. The following code demonstrates this,
public delegate void SetColorDelegate()
public void setColor() {
    MessageBox.Show(pnlstatus.InvokeRequired.ToString());
    if (pnlStatus.InvokeRequired) {
        Set ColorDelegate del = new SetColorDelegate(SetColor);
        this.Invoke(del);
    } else {
        pnlStatus.BackColor = Color.Tomato;
    }
}
private void bgWrkrDownload_DoWork(object sender, DoWorkEventArgs e) {
    //some background action
    set Color();
}

When the background task is in progress, the panel background color needs to change. However, if you try to access the panel control directly through the background thread, an error may occur because the owner of the control is different from the one invoking it. To avoid the error, you check the InvokeRequired property and create a delegate for the method containing the action and call Invoke with that delegate. Within Invoke, you pass a delegate to a method that will actually perform the action desired on the control. For example, in this case, you want to change the background color of the panel. Instead of doing it directly, you change it within a method named SetColor() and call SetColor() in the DoWork event handler. This way, you can be sure that you are making thread-safe calls to the control.

The InvokeRequired property returns false if the current thread is one that created the control and no special invoke is required to use the control. Use InvokeRequired property and create a delegate for the method containing the action and call Invoke with that delegate.


About HostForLIFE

HostForLIFE is European Windows Hosting Provider which focuses on Windows Platform only. We deliver on-demand hosting solutions including Shared hosting, Reseller Hosting, Cloud Hosting, Dedicated Servers, and IT as a Service for companies of all sizes.

We have offered the latest Windows 2019 Hosting, ASP.NET 5 Hosting, ASP.NET MVC 6 Hosting and SQL 2019 Hosting.


Month List

Tag cloud

Sign in