Middleware is a newly introduced concept in asp.net core. I have split this topic into two parts. In the first part we will cover,
HTTP Request Pipeline
What is Middleware?
How to configure Middleware
Run() Method
Use() Method
Next() Method
Map() Method
This article can be used by beginners, intermediates, and professionals.
Before we start with Middleware, we should have a good understanding of the HTTP Pipeline hence we will discuss the HTTP pipeline first and then move to Middleware.
HTTP Request Pipeline
Let’s say, we have an MVC application, and we got a request from the browser.
Please see the below diagram for the HTTP request pipeline of the above scenario.
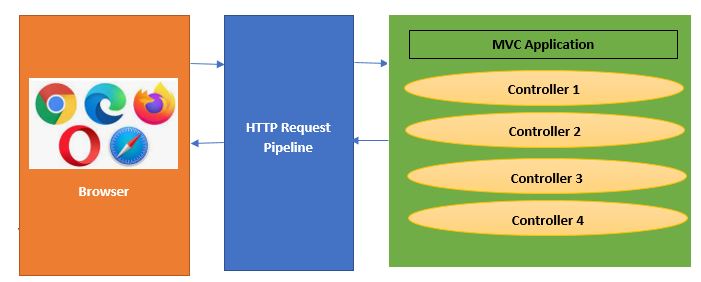
As per the above diagram, the flow of the execution would be,
The browser sent a request to the HTTP request pipeline.
HTTP pipeline will execute.
Once HTTP pipeline execution will be completed, the request goes to the MVC application.
MVC Application executes the request and sends the response back to the HTTP Request pipeline -> Browser.
Now we will discuss Middleware.
What is Middleware?
Middleware is a core functionality of Asp.net Core. It is nothing but a class or component that will execute on each request.
If you worked on Asp.net before, you might be aware of HTTPhandler and HTTPModular which were part of the HTTP Request Pipeline. Middleware is like that only in the Asp.net Core HTTP request pipeline.
Let’s see the below image to get a better understanding of Middleware.
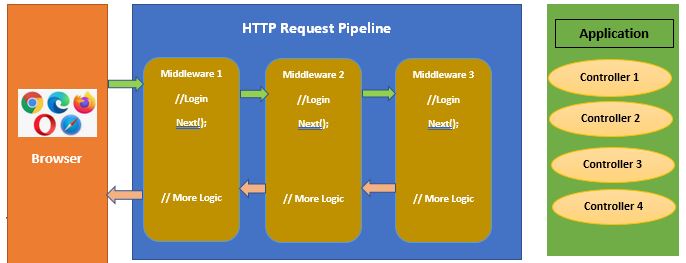
As we can see in the above diagram, There will be multiple middlewares in the asp.net core application and each middleware will be called one after the others in the pre-defined sequence. Please note that the order of the middleware matters a lot in the HTTP pipeline execution.
Each middleware will complete the task before and after the next middleware in the pipeline. It will also decide whether to pass the request to the next middleware or not.
We can have multiple middlewares in Asp.net Core Applications and it can be added through
NuGet packages
Custom Middleware – Project/Application specific.
How to configure Middleware
Middleware can be configured using Run(),Use() and Map() extension Methods.
Let's discuss the below code before we start a discussion on middleware,
public void Configure(IApplicationBuilder app, IWebHostEnvironment env) {
if (env.IsDevelopment()) {
app.UseDeveloperExceptionPage();
} else {
app.UseExceptionHandler("/Home/Error");
// The default HSTS value is 30 days. You may want to change this for production scenarios, see https://aka.ms/aspnetcore-hsts.
app.UseHsts();
}
app.UseHttpsRedirection();
app.UseStaticFiles();
app.UseRouting();
app.UseAuthorization();
app.UseEndpoints(endpoints => {
endpoints.MapControllerRoute(name: "default", pattern: "{controller=Home}/{action=Index}/{id?}");
});
}
We have created the Asp.net core MVC application. Open StartUp.cs file -> Configure method.
Now we will add new middleware in the above code,
In Asp.Net core 5.0, we can configure middleware in the configure method of the startup class using IApplicationBuilder and Run/Use/Map extension methods.
In Asp.Net core 6.0, We don’t have to configure the method hence we can add the same middleware code after the builder.build() method.
We have used Asp.net core 5.0 in the below example,
public void Configure(IApplicationBuilder app, IWebHostEnvironment env) {
app.Run(async (context) => {
await context.Response.WriteAsync("Hello world!");
});
if (env.IsDevelopment()) {
app.UseDeveloperExceptionPage();
} else {
app.UseExceptionHandler("/Home/Error");
// The default HSTS value is 30 days. You may want to change this for production scenarios, see https://aka.ms/aspnetcore-hsts.
app.UseHsts();
}
app.UseHttpsRedirection();
app.UseStaticFiles();
app.UseRouting();
app.UseAuthorization();
app.UseEndpoints(endpoints => {
endpoints.MapControllerRoute(name: "default", pattern: "{controller=Home}/{action=Index}/{id?}");
});
}
In the above code, we have created simple Middleware using the Run() method. We will execute the code and see the output,
Output
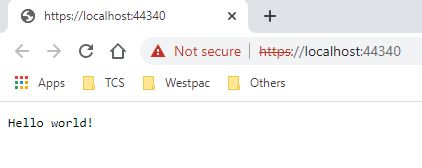
You must notice that only the first middleware executes, and is then completed, other middlewares are not executed after the first middleware. This happened because we have used the Run () extension method to add middleware in the pipeline.
Let's discuss extension methods to configure middleware in the Request Pipelines.
Run() Method
Run() method is used to complete the middleware execution.
Syntax
using Microsoft.AspNetCore.Http;
namespace Microsoft.AspNetCore.Builder {
//
// Summary:
// Extension methods for adding terminal middleware.
public static class RunExtensions {
//
// Summary:
// Adds a terminal middleware delegate to the application's request pipeline.
//
// Parameters:
// app:
// The Microsoft.AspNetCore.Builder.IApplicationBuilder instance.
//
// handler:
// A delegate that handles the request.
public static void Run(this IApplicationBuilder app, RequestDelegate handler);
}
}
We have used the same method to create middleware in the last example.
Use() Method
Use() method is used to insert a new middleware in the pipeline.
Syntax
using Microsoft.AspNetCore.Http;
using System;
using System.Threading.Tasks;
namespace Microsoft.AspNetCore.Builder {
//
// Summary:
// Extension methods for adding middleware.
public static class UseExtensions {
//
// Summary:
// Adds a middleware delegate defined in-line to the application's request pipeline.
//
// Parameters:
// app:
// The Microsoft.AspNetCore.Builder.IApplicationBuilder instance.
//
// middleware:
// A function that handles the request or calls the given next function.
//
// Returns:
// The Microsoft.AspNetCore.Builder.IApplicationBuilder instance.
public static IApplicationBuilder Use(this IApplicationBuilder app, Func < HttpContext, Func < Task > , Task > middleware);
}
}
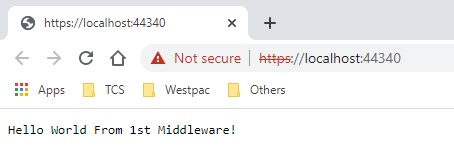
Let's see the below code to get a better understanding,
public void Configure(IApplicationBuilder app, IWebHostEnvironment env) {
app.Use(async (context, next) => {
await context.Response.WriteAsync("Hello World From 1st Middleware!");
});
if (env.IsDevelopment()) {
app.UseDeveloperExceptionPage();
} else {
app.UseExceptionHandler("/Home/Error");
// The default HSTS value is 30 days. You may want to change this for production scenarios, see https://aka.ms/aspnetcore-hsts.
app.UseHsts();
}
app.UseHttpsRedirection();
app.UseStaticFiles();
app.UseRouting();
app.UseAuthorization();
app.UseEndpoints(endpoints => {
endpoints.MapControllerRoute(name: "default", pattern: "{controller=Home}/{action=Index}/{id?}");
});
}
Output
Next Method
The next () method is used to pass the execution to the next middleware.
We will use the next method to call the next middleware. We will add one more middleware in the previous example and call the next method.
Let’s see the below code of the same,
public void Configure(IApplicationBuilder app, IWebHostEnvironment env) {
app.Use(async (context, next) => {
await context.Response.WriteAsync("Hello World From 1st Middleware!");
await next();
});
app.Run(async (context) => {
await context.Response.WriteAsync("Hello World From 2st Middleware!");
});
if (env.IsDevelopment()) {
app.UseDeveloperExceptionPage();
} else {
app.UseExceptionHandler("/Home/Error");
// The default HSTS value is 30 days. You may want to change this for production scenarios, see https://aka.ms/aspnetcore-hsts.
app.UseHsts();
}
app.UseHttpsRedirection();
app.UseStaticFiles();
app.UseRouting();
app.UseAuthorization();
app.UseEndpoints(endpoints => {
endpoints.MapControllerRoute(name: "default", pattern: "{controller=Home}/{action=Index}/{id?}");
});
}
You might notice the Next() method in the middleware. This method is responsible to invoke the next middleware component from the current Middleware.
public void Configure(IApplicationBuilder app, IWebHostEnvironment env) {
app.Use(async (context, next) => {
await context.Response.WriteAsync("Hello World From 1st Middleware!");
await next();
});
app.Run(async (context) => {
await context.Response.WriteAsync("Hello World From 2st Middleware!");
});
if (env.IsDevelopment()) {
app.UseDeveloperExceptionPage();
} else {
app.UseExceptionHandler("/Home/Error");
// The default HSTS value is 30 days. You may want to change this for production scenarios, see https://aka.ms/aspnetcore-hsts.
app.UseHsts();
}
app.UseHttpsRedirection();
app.UseStaticFiles();
app.UseRouting();
app.UseAuthorization();
app.UseEndpoints(endpoints => {
endpoints.MapControllerRoute(name: "default", pattern: "{controller=Home}/{action=Index}/{id?}");
});
}
Output
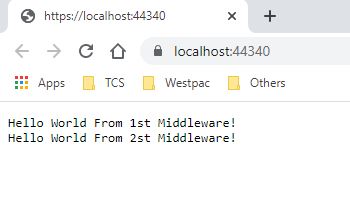
As we have used the next method hence both middlewares is called.
Map()
Map() method is used to map the middleware to a specific URL
Syntex
using Microsoft.AspNetCore.Http;
using System;
namespace Microsoft.AspNetCore.Builder {
//
// Summary:
// Extension methods for the Microsoft.AspNetCore.Builder.Extensions.MapMiddleware.
public static class MapExtensions {
//
// Summary:
// Branches the request pipeline based on matches of the given request path. If
// the request path starts with the given path, the branch is executed.
//
// Parameters:
// app:
// The Microsoft.AspNetCore.Builder.IApplicationBuilder instance.
//
// pathMatch:
// The request path to match.
//
// configuration:
// The branch to take for positive path matches.
//
// Returns:
// The Microsoft.AspNetCore.Builder.IApplicationBuilder instance.
public static IApplicationBuilder Map(this IApplicationBuilder app, PathString pathMatch, Action < IApplicationBuilder > configuration);
//
// Summary:
// Branches the request pipeline based on matches of the given request path. If
// the request path starts with the given path, the branch is executed.
//
// Parameters:
// app:
// The Microsoft.AspNetCore.Builder.IApplicationBuilder instance.
//
// pathMatch:
// The request path to match.
//
// preserveMatchedPathSegment:
// if false, matched path would be removed from Request.Path and added to Request.PathBase.
//
// configuration:
// The branch to take for positive path matches.
//
// Returns:
// The Microsoft.AspNetCore.Builder.IApplicationBuilder instance.
public static IApplicationBuilder Map(this IApplicationBuilder app, PathString pathMatch, bool preserveMatchedPathSegment, Action < IApplicationBuilder > configuration);
}
}
Let's discuss the below example for more understanding of the Map extension method.
public void Configure(IApplicationBuilder app, IWebHostEnvironment env) {
app.Map("/testMap", testExample);
if (env.IsDevelopment()) {
app.UseDeveloperExceptionPage();
} else {
app.UseExceptionHandler("/Home/Error");
// The default HSTS value is 30 days. You may want to change this for production scenarios, see https://aka.ms/aspnetcore-hsts.
app.UseHsts();
}
app.UseHttpsRedirection();
app.UseStaticFiles();
app.UseRouting();
app.UseAuthorization();
app.UseEndpoints(endpoints => {
endpoints.MapControllerRoute(name: "default", pattern: "{controller=Home}/{action=Index}/{id?}");
});
}
private void testExample(IApplicationBuilder app) {
app.Run(async (context) => {
await context.Response.WriteAsync("\n" + "Hello World From TestExample!");
});
}
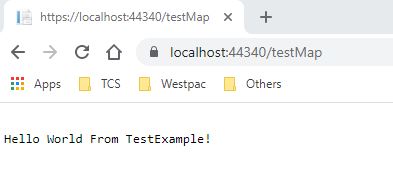
In the above example,
app.map method, “/testMap” is a path and the second parameter (“testExample”) is a function name.
Once you will pass “testMap in the requested path, it will try to match and call the testExample function in case of matching.
Output
That’s all for this article. We will discuss this more in the next article.