This kind of testing includes evaluating several software components simultaneously, from beginning to end, and evaluates them collectively. Integration testing in the structured development process uses unit-tested modules as input, aggregates them into a bigger set, and runs integration tests according to the test plan's specifications to produce output results that trigger system testing. Because it allows you to test the system in real-time and gain valuable insights into how it functions, integration testing is crucial.
Difference between unit testing and integration testing
In unit testing, we concentrate on a brief section of code, typically one function or method. Verifying that a piece of code is functioning and delivering the desired outcome is the aim. In order to test the logic using fictitious data, external dependencies like as databases, APIs, or services are typically mocked.
Integration testing examines how various system components interact with one another. Integration tests, as opposed to unit tests, verify that the integrated components function as intended in a realistic setting by using real or in-memory databases and other services. For a deeper understanding, let's dive right into the code.
Setting Up the .NET Core Project for Integration Testing
In this project, we will create a test environment using docker containers to create the test db using Postgres docker image. Create a test project inside your project solution using the .NET XUnit template.
Let's install all the necessary Nuget packages. Below is a list of packages that are required for testing.
- Microsoft.AspNetCore.Mvc.Testing
- AutoFixture
- AutoFixture.AutoMoq
- Testcontainers
- Test containers.PostgreSQL
For setting up the test environment we need to use the WebApplicationFactory class provided by Microsoft.Net.
Understanding the WebApplicationFactory
WebApplicationFactory<TEntryPoint> is used to create a TestServer for integration tests. `TEntryPoint` refers to the entry point class of the System Under Test (SUT), which is usually the Program.cs class.
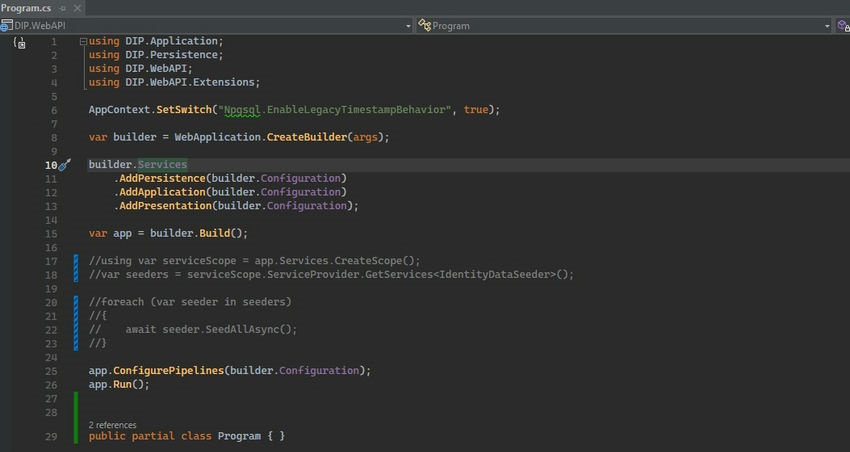
To use this in our testing project, we first need to expose the Program.cs class. The reason for this is to inform the testing project that this is the entry point of the system.
There are two ways to expose the Program.cs class to the testing project.
First, add the below XML in your starting project (WebAPI project).

The second is to create a partial class with the name public partial class Program { }
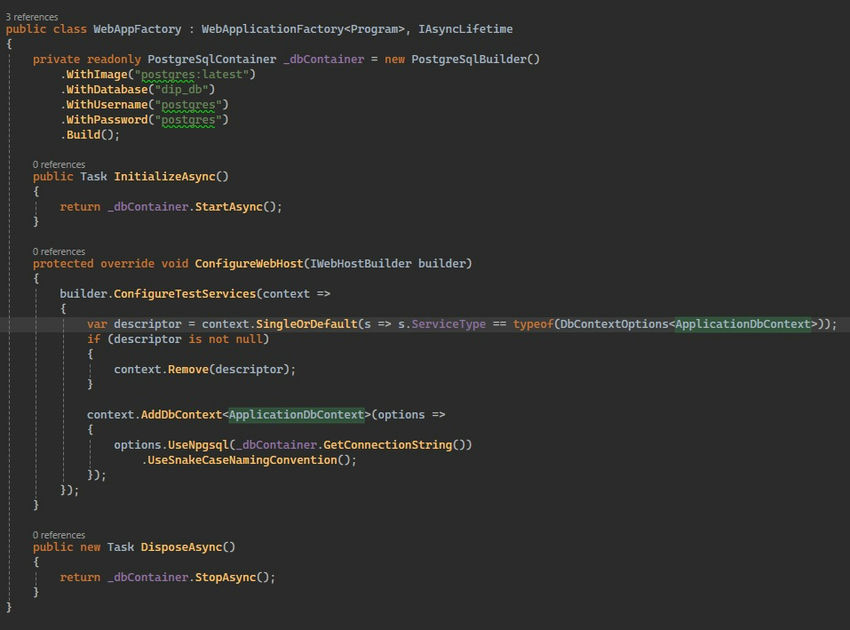
Setting up the Postgres container for our testing environment requires us to construct a customized version of our WebApplicationFactory class. The WebApplicationFactory class, which is inherited and implements the IAsyncLifetime interface, is modified in the version shown below. With this implementation, all resources acquired by the test environment or Docker container are released once our tests in Visual Studio Test Explorer have concluded, ensuring that the Postgres container is disposed of appropriately.
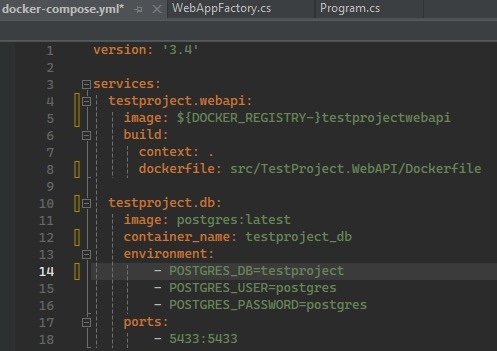
We also need to set up Docker Compose to fetch the latest PostgreSQL image. Right-click on the solution, then choose the "Container Orchestration Support" option and select Docker Compose. This will automatically add the required files to your solution. Add the below to your docker-compose.yml file.
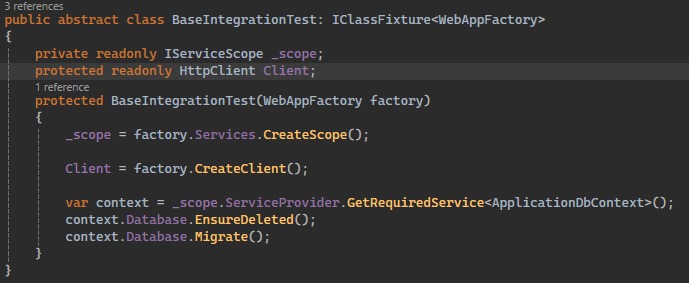
To signal that the class contains tests and to offer shared object instances among the tests in the class, test classes implement the IClassFixture class fixture interface. To do that, let's implement IClassFixture<TWebAppFactory> and create a BaseIntegrationTest Class.
To construct a completely functional test environment, we must create a database and the necessary tables inside it after retrieving the Postgres image. Include migration code in the BaseIntegrationTest class's constructor as well.
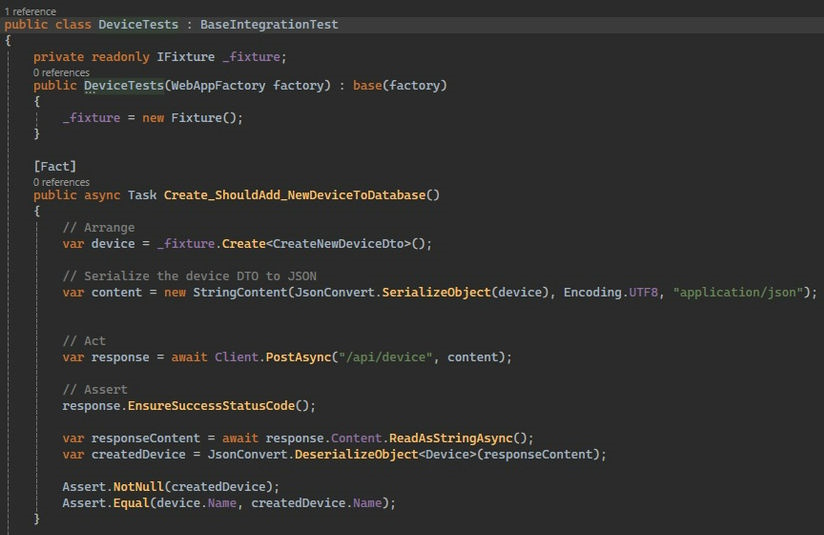
Now we are all set with the test environment and let's move to the actual test. Create a test class in my case.
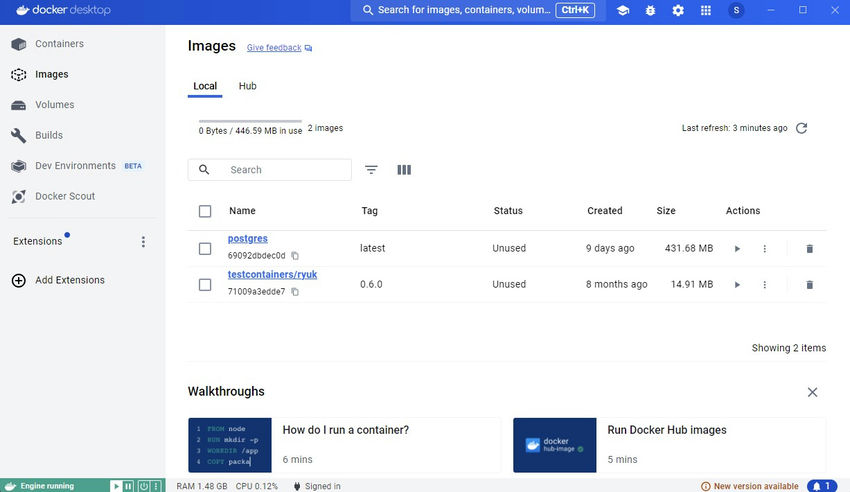
Now let's run the test from VisualStudio Test Explorer; also, add a docker desktop to your PC. When we run the test first it will fetch the image from the docker hub with the label "postgres: label" and set up the container with our provided configuration in the docker-compose.yml file.
Docker fetched the PostgreSQL image for us.
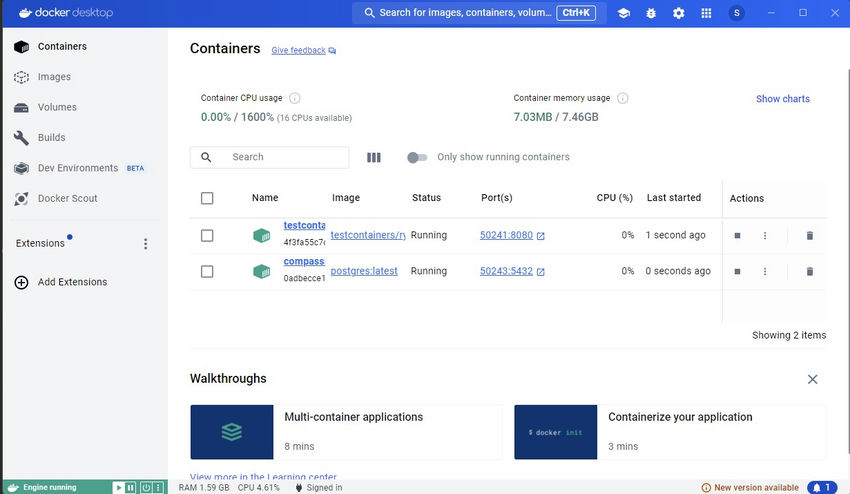
Here, you can also create containers, and those containers will automatically be disposed of after the test finishes.
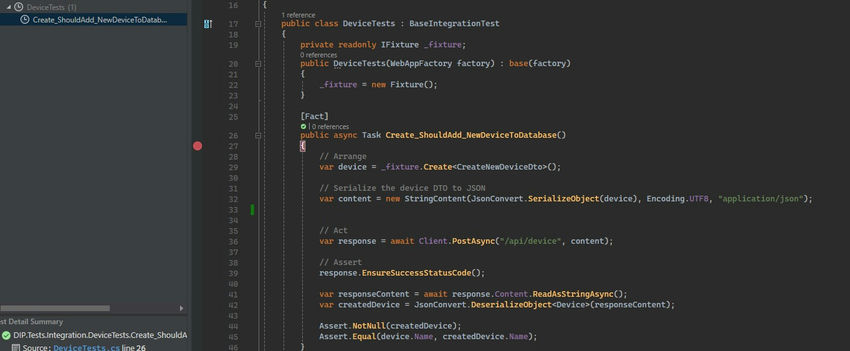
As you can see from the result, our test has also been passed also.

Conclusion
Integration testing ensures that different components of an application work together correctly, validating end-to-end functionality and detecting issues not covered by unit tests. It is crucial for identifying integration problems and verifying that the system meets its requirements as a whole. Thanks for reading!