European ASP.NET 4.5 Hosting BLOG

BLOG about ASP.NET 4, ASP.NET 4.5 Hosting and Its Technology - Dedicated to European Windows Hosting Customer

European ASP.NET Core Hosting :: Working With Async/Await/Task Keywords In Depth

clock January 13, 2022 06:43 by author Peter

Modern systems are becoming more powerful with multiple processors. Similarly,  modern server application development  has also improved to leverage the host CPU power for processing multiple requests in parallel to achieve more scalability.

Earlier we had many limitations on asynchronous calls and not utilizing the complete CPU cores. The Task Parallel Library (TPL) that was introduced in the .NET Framework 4 made rapid changes to our asynchronous development and utilization of infrastructure.

Still, most of the developers are not very familiar with understanding these keywords and make regular mistakes during usage. Here, we will concentrate more on understanding how these keywords work with asynchronous calls. At the end we will see some of the recommendations needed for regular usage.

Every .NET/.NET Core application is associated with a thread pool and is a collection of threads that effectively executes asynchronous calls of an application. These threads on the thread pool are known as Worker threads.

Threadpool will work as a software-level thread management system for the .NET runtime. It is a queuing mechanism for all application requests.

When the application is initiated, the .NET runtime will spawn the worker threads and keep them in the thread pool queue as available threads. Once any request comes, the runtime will pick one worker thread from this queue and assign this incoming request to it and it will be retained to the queue once this request process is completed. The number of threads the runtime will spawn depends on how many logical processors are available on the host system by default. If needed we can increase the minimum worker threads to spawn by using the below statement at the startup of the application.

ThreadPool.SetMinThreads(100, 100);

The first parameter is the number of worker threads that need to be created and the second parameter defines the completion port thread count. Please find my other article on completion ports in detail here.

Let us understand Async, Await and Task keywords in detail here with the following example code block.
public async Task<decimal> TotalGiftBudget()
{
  decimal totalBudgetAmount = 0;
  decimal percentageAmount = GetGiftPercentage();
  List<Employee> lstEmployees = new List<Employee>();
  //Fetch all active employees from Hyderabad Branch
  List<Employee> lstHyd = await GetHyderabadEmployeesListAsync();
  lstEmployees.AddRange(lstHyd);
  //Fetch all active employees from Banglore Branch
  List<Employee> lstBglre = await GetBangloreEmployeesListAsync();
  lstEmployees.AddRange(lstBglre);
  foreach(var emp in lstEmployees)
  {
    totalBudgetAmount += (emp.Salary * percentageAmount) / 100.0m;
  }
  return totalBudgetAmount;
}

Let say a company decided to pay a Christmas gift to all their employees with a certain percentage of their monthly salary. Before announcing to the employees they want to check the budget for this bonus amount. This asynchronous method will give this information by fetching all the employees from their Hyderabad and Bangalore branches asynchronously and calculating the expected gift amount based on each employee's salary.

When this method is called, the following actions will happen at the runtime.

When runtime finds the async keyword, it will allocate some memory on the RAM to store the state information of the method.

Next, Runtime will divide this method into three parts as follows

Once it executes or processes part-1 and founds asynchronous statement to get employees from the Hyderabad branch, then immediately creates an I/O thread and returns the Task object which points to its IOCP and the current worker thread will be retained to the available worker threads queue i.e., thread pool so that runtime will utilize this worker thread to serve other requests.

Once the Hyderabad list is ready (for example, it might get from an external API) our completion port will keep this in its queue. The await keyword is used so that the runtime will keep getting the status of the I/O process using the GetQueuedCompletionStatus function and once it is ready, a new available worker thread will be allocated to continue the rest of the actions. This new worker thread will fetch the state machine information from the RAM and continue the remaining process of the method.

In our case, once the list of Hyderabad is available and added to the listEmployee list and again runtime found another asynchronous statement and repeat the same as above. Once we get the Bangalore list too, there is no other asynchronous statement and this time runtime will complete the next actions to calculate the total gift amount and returns successfully.

Here the point of interest is until we get the list of employees from Hyderabad and Bangalore the worker thread is retained and utilized to serve other requests. In the case of a synchronous call, the worker thread will be blocked until it returns the budget amount. Here is the advantage of these asynchronous calls using async/await keywords to improve the performance of the application and to make it more scalable.

Recommendations

If possible avoid the Async keyword and use only Task. When we use Async, some memory will be allocated to the Ram and it will impact the performance. For example, the below code doesn’t need any async and await.
publc Task<int> GetSum(int a, int b)
{
    int c = a + b;
   return c;
}


In case, if we have a method non-async and we need to call an async method. The following statements are very BAD and they will block the thread and it will lead to perf issues.
Task.Result; //bad
Task.Wait(); //bad
Task.GetAwaiter().GetResult(); //bad

Instead, we can write like below

Public string Getsomething()
{
   var task1 = Do1Async();
   var task2 = Do2Async();

   Task.WaitAll(new[] {task1, task2});
  //or
   Task.WhenAll(new[] {task1, task2});
}
Public async Task<string> do1Async()
{}
Public async Task<string> do2Async()
{}


Hope this article is helpful to you in understanding the best usage of Async, Await and Task keywords in an asynchronous world.

HostForLIFE.eu ASP.NET Core Hosting

European best, cheap and reliable ASP.NET hosting with instant activation. HostForLIFE.eu is #1 Recommended Windows and ASP.NET hosting in European Continent. With 99.99% Uptime Guaranteed of Relibility, Stability and Performace. HostForLIFE.eu security team is constantly monitoring the entire network for unusual behaviour. We deliver hosting solution including Shared hosting, Cloud hosting, Reseller hosting, Dedicated Servers, and IT as Service for companies of all size.


European ASP.NET Core Hosting :: JWT Authentication In Microservices

clock January 3, 2022 06:16 by author Peter

As with any Web Service, the microservices need to be protected from unauthorized access. So how do you protect each of your services? How does one share the token that is received from the Auth service? Exposing your microservices directly to the client and allowing them to directly communicate with all your services would have its own problems, so in this example, we will also add a layer of API Gateway which would be the single point of contact for all your clients.

The Gateways, in addition to providing a single point of access, also adds a security layer over your microservices. It could also support load balancing and reducing round trips when the client requires calls to multiple microservices. With regard to authentication, the gateway could pass the authentication token to the downstream paths. In this example, we would be using Ocelot for building our gateway.

The Working
The typical authentication process could be outlined as shown in the diagram below.

The authentication request from the client is redirected to the dedicated Auth service. This service would be responsible for validating the user and granting the authentication token. The authentication token is then returned back to the client via the gateway. In each of the subsequent requests, the client would pass the Authentication token along with the request. The API Gateway would be processed the incoming request, and if the downstream service requires an authenticated path, would pass the received token along.

We could also add BFF and other layers in the architecture, but for this article, we will keep it to a bare minimum. Let us now get our hands dirty and start building our sample application which would comprise of an API Gateway, two microservices - an auth service, and a User Service. For the sake of example, we will use Postman as our client and use Minimal API for building our services.

Auth Service

As mentioned earlier, the Auth Service would be responsible for authenticating the User and generating the Auth token. We will begin by defining our Token Service and registering it.
internal interface ITokenService
{
    string BuildToken(string key, string issuer, IEnumerable<string> audience, string userName);
}
internal class TokenService : ITokenService
{
    private TimeSpan ExpiryDuration = new TimeSpan(0, 30, 0);
    public string BuildToken(string key, string issuer, IEnumerable<string> audience, string userName)
    {
        var claims = new List<Claim>
        {
            new Claim(JwtRegisteredClaimNames.UniqueName, userName),
        };

        claims.AddRange(audience.Select(aud => new Claim(JwtRegisteredClaimNames.Aud, aud)));

        var securityKey = new SymmetricSecurityKey(Encoding.UTF8.GetBytes(key));
        var credentials = new SigningCredentials(securityKey, SecurityAlgorithms.HmacSha256Signature);
        var tokenDescriptor = new JwtSecurityToken(issuer, issuer, claims,
            expires: DateTime.Now.Add(ExpiryDuration), signingCredentials: credentials);
        return new JwtSecurityTokenHandler().WriteToken(tokenDescriptor);
    }
}

We will go ahead and register it so that we could use it with DI.
builder.Services.AddSingleton<ITokenService>(new TokenService());

We will keep the Validate endpoint simple for sake of the example and hardcode our user credentials, but this could be easily replaced with your repositories later.
app.MapPost("/validate", [AllowAnonymous] (UserValidationRequestModel request, HttpContext http, ITokenService tokenService) =>
{
    if (request is UserValidationRequestModel { UserName: "john.doe", Password: "123456" })
    {
        var token = tokenService.BuildToken(builder.Configuration["Jwt:Key"],
                                            builder.Configuration["Jwt:Issuer"],
                                            new[]
                                            {
                                                        builder.Configuration["Jwt:Aud1"],
                                                        builder.Configuration["Jwt:Aud2"]
                                                    },
                                            request.UserName);
        return new
        {
            Token = token,
            IsAuthenticated = true,
        };
    }
    return new
    {
        Token = string.Empty,
        IsAuthenticated = false
    };
})
.WithName("Validate");


Where UserValidationRequestModel is defined as
internal record UserValidationRequestModel([Required]string UserName, [Required] string Password);

The AuthService, as you could understand from the code above, exposes a single endpoint - validate which would generate an auth token if the username/password supplied are "john.doe" and "123456". The generated and subsequently returned auth token would be then used by the succeeding requests by the client for accessing authorized routes.

API Gateway
As mentioned earlier, we would be using Ocelot for building our API Gateway. The role of Gateway as far as Authentication is concerned would be to detect if the requested downstream path requires authentication and if so, pass the authorization token which was passed in the upstream request. Let us configure the routing configuration for our sample Gateway.
{
  "Routes": [
    {
      "DownstreamPathTemplate": "/GetUsers",
      "DownstreamSchema": "https",
      "DownstreamHttpMethod": "GET",
      "RouteIsCaseSensitive": false,
      "DownstreamHostAndPorts": [
        {
          "Host": "localhost",
          "Port": "7163"
        }
      ],
      "UpstreamPathTemplate": "/user/getusers",
      "UpstreamHttpMethod": [ "Get" ],
      "AuthenticationOptions": {
        "AuthenticationProviderKey": "GatewayAuthenticationKey",
        "AllowedScopes": []
      }
    },
    {
      "DownstreamPathTemplate": "/validate",
      "DownstreamSchema": "https",
      "DownstreamHttpMethod": "POST",
      "RouteIsCaseSensitive": false,
      "DownstreamHostAndPorts": [
        {
          "Host": "localhost",
          "Port": "7075"
        }
      ],
      "UpstreamPathTemplate": "/user/validate",
      "UpstreamHttpMethod": [ "Post" ]
    }
  ],
  "GlobalConfiguration": {
    "BaseUrl": "https://localhost:7254"
  }
}


As you can observe in the configuration, there are two routes that are exposed in the API Gateway. The /validate route doesn't require any authentication, while the /GetUsers route requires authentication. When ocelot runs, it would check the routes AuthenticationOptions and if it exists, reads the AuthenticationProviderKey. This denotes the authentication key (scheme), which needs to be registered with the authentication services at the startup.

builder.Services.AddAuthentication(JwtBearerDefaults.AuthenticationScheme)
    .AddJwtBearer("GatewayAuthenticationKey", option =>
    {
        option.TokenValidationParameters = new TokenValidationParameters
        {
            ValidateIssuer = true,
            ValidateAudience = true,
            ValidateLifetime = true,
            ValidateIssuerSigningKey = true,
            ValidIssuer = builder.Configuration["Jwt:Issuer"],
            ValidAudience = builder.Configuration["Jwt:Aud"],
            IssuerSigningKey = new SymmetricSecurityKey(Encoding.UTF8.GetBytes(builder.Configuration["Jwt:Key"]))
        };
    });
builder.Configuration.AddJsonFile("ocelot.json");
builder.Services.AddOcelot(builder.Configuration);


Ocelot requires you to register the Authentication Service be registered with a name/key. Ocelot would use this key to recognize the service to use when encountered  AuthenticationProviderKey in the route declaration. If the route requires authentication, Ocelot would execute the authentication middleware registered for the provider.

UserService
The last step in this demo code would be to set up a mock User Service, a microservice that would be responsible for handling user details. We will expose a single endpoint the UserService, which would return a set of Usernames.

app.MapGet("/GetUsers", [Authorize]() =>
{
    return new[]
    {
        "John.Doe",
        "Jane.Doe",
        "Jewel.Doe",
        "Jayden.Doe",
    };
}).WithName("GetUsers");


Do not forget to register the authentication services as usual.
builder.Services.AddAuthentication(JwtBearerDefaults.AuthenticationScheme)
    .AddJwtBearer(option =>
    {
        option.TokenValidationParameters = new TokenValidationParameters
        {
            ValidateIssuer = true,
            ValidateAudience = true,
            ValidateLifetime = true,
            ValidateIssuerSigningKey = true,
            ValidIssuer = builder.Configuration["Jwt:Issuer"],
            ValidAudience = builder.Configuration["Jwt:Aud"],
            IssuerSigningKey = new SymmetricSecurityKey(Encoding.UTF8.GetBytes(builder.Configuration["Jwt:Key"]))
        };
    });


That would be what we all require in the microservice end of our demo code to test our Authentication sample.

Client
As mentioned earlier, we will be using Postman to test our sample set of services. So fire up your Postman, and first send the request to validate the user and get the auth token. Remember to use the Gateway instead of using the microservice directly.

As you can observe, we have retrieved the Auth Token from the Auth Service (via the gateway of course). We will now use the auth token to authenticate our request to access the protected route in the User Service.


It could be observed that the request was a success and then User Service has returned the required results.

In this article, we addressed how to authenticate the different individual services in the microservice architecture. We also used the wonderful Ocelot library for building API Gateways. The services and the gateways are loosely coupled with each other, while the client is having a single point of contact in the gateway.

HostForLIFE.eu ASP.NET Core Hosting

European best, cheap and reliable ASP.NET hosting with instant activation. HostForLIFE.eu is #1 Recommended Windows and ASP.NET hosting in European Continent. With 99.99% Uptime Guaranteed of Relibility, Stability and Performace. HostForLIFE.eu security team is constantly monitoring the entire network for unusual behaviour. We deliver hosting solution including Shared hosting, Cloud hosting, Reseller hosting, Dedicated Servers, and IT as Service for companies of all size.


European ASP.NET Core Hosting :: Non-Nullable Property Must Contain A Non-Null Value

clock December 21, 2021 06:51 by author Peter

Recently, I was getting this warning for most of the properties which are not specified as nullable. I was not happy with this warning, though I was able to run my .NET 6 application smoothly.

Exact Error:
    Non-nullable property ‘propername’ must contain a non-nullvalue when exiting constructor. Consider declaring the property as nullable

Non-nullable property must contain a non-null value when exiting constructor. Consider declaring the property as nullable.

After carefully observing this error message, it makes sense for those properties. In order to minimize the likelihood that our code causes the runtime to throw System.NullReferenceException, we need to resolve this warning.

Therefore, the compiler is giving warning in the solution that the default assignment of your properties (which is null) doesn’t match its state type (which is non-null string

https://docs.microsoft.com/en-us/dotnet/csharp/nullable-references

We can resolve this error in 3 ways.

Solution 1

We can simply make the properties nullable, as shown below:
public class AppSetting {
    public string? ReferenceKey { get; set; }
    public string? Value { get; set; }
    public string? Description { get; set; }
}

Solution 2
We can assign a default value to those properties as shown below:
public class AppSetting {
    public string ReferenceKey { get; set; } = “Default Key”
    public string? Value { get; set; } = “Default Value”
    public string? Description { get; set; } = “Default Description”
}

Alternatively, you can give a reasonable default value for non-nullable strings as string.empty.

Solution 3
You can disable this warning from project level. You can disable by removing the below line from project file csproj or setting.

<Nullable>enable</Nullable>

Reference: https://docs.microsoft.com/en-us/dotnet/csharp/nullable-references#nullable-contexts

These are three ways you can overcome the above warning.

HostForLIFE.eu ASP.NET Core Hosting

European best, cheap and reliable ASP.NET hosting with instant activation. HostForLIFE.eu is #1 Recommended Windows and ASP.NET hosting in European Continent. With 99.99% Uptime Guaranteed of Relibility, Stability and Performace. HostForLIFE.eu security team is constantly monitoring the entire network for unusual behaviour. We deliver hosting solution including Shared hosting, Cloud hosting, Reseller hosting, Dedicated Servers, and IT as Service for companies of all size.


European ASP.NET Core Hosting :: Custom Controls In C#

clock December 20, 2021 08:14 by author Peter

Custom controls are control that are created by user when Windows Forms controls do not fulfill their application requirements. Simple custom controls can be created by inheriting the Control class, UserControl class, or any Windows Forms controls. The developer should write the code for the custom control in the OnPaint event of the control. After writing the code, it should be saved with the .cs extension. The code can be complied into an assembly and saved into the application’s directly by executing the following command:

Syntax
csc /t:library/out:<path to your application;s directory>/<name of the assembly that contains the custom control class> /r:System.dll
/r: System.Windows.Form.dll /r: System.Drawing.dll <name of the custom control class file>

Where,
    /t:library, Instructs the compiler that the assembly that is being created is a library and it is cannot be executed.
    /out : Specifies the name and path of the assembly file that contains the custom control.
    /r: Specifies the names of all the assemblies that are used by the code.

Control Class

The Control class includes functionalities to handle user input, define position and size of controls, and so on. The control class can be inherited by other classes to display information to the user. The properties of Control class.

    Bounds
    Specifies or retrieves the size and location of the specified control with respect to its parent control.
    CanFocus
    Retrieves a value that indicates whether the specified control can receive focus.
    CanSelect
    Retrieves a value that indicates whether the specified control can be selected.
    Created
    Retrieved a value that indicates whether the specified the specified control has been created.
    Dock
    Specifies or retrieves the control borders, which are docked to its parent control. It also identifies the way a control is resized with its parent.
    Left
    Retrieves the distance between the left edge of specified control and the left edge of the container’s client area.
    Right
    Retrieves the distance between the right edge of specified control and the left edge of the container’s client area.
    TabIndex
    Specifies or retrieves the tab order of the specified control within a container.

Table below the list of methods of control class.

Method Description
Contains specifies control is a child of the control
CreateControl Forcibly creates a control along with its handle and child controls.
CreateGraphics Creates a graphic for the specified control.
GetNextControl It retrieves the next control according to the specified tab order of child controls.
GetPreferredSize It retrieves the size of the rectangular area.
Hide Hides the specified control from the user.

Below are the lists of events of Control class.

Event Description
ControlAdded Occurs when a new control is added to a collection of controls.
ControlRemoved Occurs when a specified control is removed from a collection of controls.
Validated Occurs when the validation process of the specified control is complete.

Code below creates a rectangular custom control and changes its appearance when the control is validated.

public partial class CustomControl: Control {
    Graphics graphics;
    protected override void OnPaint(PaintEventArgs pe) {
        this.Bounds = new Rectangle(15, 15, 30, 15);
        if (this.CanFocus) {
            this.Focus();
        }
        this.Dock = DockStyle.None;
        graphics = this.CreateGraphics();
        graphics.FillRectangle / (Brushes.CornflowerBlue, ClientRectangle);
    }
    protected override void OnValidated(EventsArgs e) {
        graphics.FillRectangle(Brushes.MediumOrchid, ClientRectangle);
        graphics.DrawRectangle(new Pen(Color.Black, ClientRectangle);
    }
}

In this code, the custom control is created by inheriting the Control class. When the OnPaint() method is invoked, the Bounds property is used to set a rectangular region. This is done by invoking the constructor of the Rectangular class, which takes the x and y coordinates, width and height as the parameters. The CanFocus property is used to check whether the control can receive focus. By default, it returns true and the focus() method is used to focus the control. The dock style for the control is set to None, which means that control cannot be dragged to some other location on the form. The graphics object Brush, is used to create the custom control within the specified rectangular bounds. When the validations are successfully made to the control, the OnValidated() method is invoked. This event changes the appearance of the control by changing its back color and border color.

The following code demonstrates how to override the Text and BackColor properties of the Control class. This is useful in setting the default values of the properties when the custom control appears on the form.

The Text property of the Control class is overridden. The BackColor property is also overridden to set the default color as dark blue. When the custom control is added to the form, the control appears with dark blue as the background color and customLabel as the default text. This text and background color appear on the label due to the Invalidate() method, which in turn, calls the OnPaint() method. This method redraws the control within the given client area along with the specified text and background color.
UserControl Class

The UserControl class allows the user to create controls that can be used in many places within an application of across multiple applications.


Table shows the properties of UserControl class

Property Description
AutoSizeMode Specifies or retrieves the way a control will resize itself.
AutoValidate Specifies or retrieved the way a control performs validation when the focus is switched to another control
HorizontalScroll Retrieves the characteristics of the horizontal scroll bar.
VerticalScroll Retrieves the characteristics of the vertical scroll bar.

Table below the methods of UserControl class.

Method Description
PerformAutoScale Performs automatic scaling of the specified container control and its child controls.
ScrollControlView Scrolls the specified control into view.

Table shows the events of UserControl class.

Event Description
AutoValidateChanged It occurs when the value of AutoValidate property is changed.
Load Before the specified control becomes visible for the first time.

Code below shows how to create custom scroll bars using the UserControl class.

public partial class ScrollControl: UserControl {
    protected override void OnPaint(PaintEventArgs e) {
        this,
        VerticalScroll,
        Visible = true;
        this.HorizontalScroll.Visible = true;
        this.PerformAutoScale();
    }
    private void ScrollControl_Load(object sender, EventArgs e) {
        this.VericalScroll.Minimum = 0;
        this.VerticalScroll.Maximum = 100;
        this.HorizontalScroll.Minimum = 0;
        this.HorizontalScrollMaximum = 60;
    }
}


The OnPaint() method is invoked to set the vertical and horizontal scroll bars. This is done using the VerticalScroll and HorizontalScroll properties of the UserControl class. The PerformAutoScale() method automatically scales the control and its container control. When the created custom control is loaded, the Load event is raised. When this event is raised, the Minimum and Maximum properties sets the minimum and maximum limits for both the scroll bars.
Control Type Recommendations

Windows Forms provide the user with a variety of options while working with controls. The user can either use the Windows Forms controls or create a new control. But, sometimes, the user might get confused about the type of control to be used in the application. The difference between various types of controls from which the user can inherit are listed as follows:

Inheriting Windows Forms Controls
Inheriting Windows Forms controls allows the user to implement the functionalities of the inherited control. The user can also extend the functionalities of the inherited control. The user can inherit from the Windows Forms control if the inheriting control fulfills most of the application’s requirements.

Inheriting the Control Class

The user can inherit from the Control class while customizing the appearance of the control. Also, inheriting the control class allows the user to implement the functionalities that are not provided by the standard controls.

Inheriting the UserControl Class
When the user wants to combine the functionalities of several Windows Forms controls, a user can create a composite control by inheriting the UserControl class.

Property- Changed Events

Windows Forms allows the user to send notifications when the value of the property is changed. The user can send notifications by defining an event and then a method that raises the event. The event name is the name of the property by appending the word, Changed, to the name of the property. For example, if the name of the property is BackColor, the user can define an event named BackColorChanged and the event-handler method named OnBackColorChanged.

Event handlers can be created to respond to property- change events. This allows developers to define various actions that can take place when a property of the control is changed.

Code below creates a custom TextBox control and raises an event when a value in the control is changed

public partial class TxtPrincipal: TextBox {
    int years;
    float rate;
    double principal;
    double interest;
    protected override void OnTextChanged(EventArgs e) {
        years = 10;
        rate = 8.5 F;
        principal = 0;
        interest = 0;
        try {
            principal = Convert.ToDouble(this.Text);
            interest = (principal * years * rate) / 100;
            this.Parent.Text = ”Interest is: ”+interest.ToString();
        } catch (Exception ex) {
            MessageBox.Show(“Enter the numeric value only.”, ”ABCDBank”, MessageBoxButtons.OK, MessageBoxIcon.Error);
            this.Focus();
        }
    }
}

In this code, a custom textbox namely, TxtPrincipal is created. The OnTextChanged event is overridden and is raised when the value in the control is changed. The code calculated the interest using the values specified in the control.

User-defined controls can be created by inheriting the control class. UserControl class, or any windows forms existing control’s class. The HorizontalScroll and VerticalScroll properties of the UserControl class can be used to define custom scroll bars. The GetImage() method of the ToolBoxBitmapAttribute class retrieves the image icon associated with the custom control. Composite controls are user controls that are created using one or more Windows Forns controls. Property-changed events allows the user to send notification whenever the value of the property is changed.

HostForLIFE.eu ASP.NET Core Hosting

European best, cheap and reliable ASP.NET hosting with instant activation. HostForLIFE.eu is #1 Recommended Windows and ASP.NET hosting in European Continent. With 99.99% Uptime Guaranteed of Relibility, Stability and Performace. HostForLIFE.eu security team is constantly monitoring the entire network for unusual behaviour. We deliver hosting solution including Shared hosting, Cloud hosting, Reseller hosting, Dedicated Servers, and IT as Service for companies of all size.


European ASP.NET Core Hosting :: The Downsides Of Using The Repository Pattern

clock December 13, 2021 06:46 by author Peter

The Repository Pattern is one of the most popular design patterns used for abstracting the data persistence in the database or retrieving from the database. The fundamental objective of the Repository Pattern is to help you decouple the data access and business logic layers of an application.

In this article, we’ll discuss the Repository Pattern. We'll learn why it is considered an anti-pattern and when we can use it in applications. Also, we'll illustrate its implementation with code examples in C#.

Let’s start.

Pre-requisites

You’ll need the following tools to deal with code examples,

    Visual Studio 2019 Community Edition (download)
    SQL Server 2019 Developer Edition (download)
    Entity Developer (download)

The Community Edition of Visual Studio 2019 and the Developer Edition of SQL Server 2019 are free editions. Entity Developer offers a fully functional 30-days Free Trial which we’ll use in our scenarios.
What is a Repository Pattern and Why We Should Care?

A Repository Pattern is a design pattern used to decouple the application's business logic and data access layers.

It was first introduced as part of Domain-Driven Design in 2004. Since then, it has become very popular. Now, it is the design pattern of choice for abstracting calls from the application to the underlying database.
But why is Repository Pattern so essential?

A repository, in essence, acts as a bridge between your application's domain and data mapping layers. When used correctly, it improves testability, code extensibility, and maintenance. With the Repository design pattern applied, the business logic layer of the application does not need to understand how data persistence works beneath the surface.

In other words, a repository abstracts the data storage and retrieval mechanism from the application.

This isolation enables the developers to focus on the business logic components rather than write boilerplate code to perform CRUD operations against databases. It also helps in unit testing the application's code since the business logic code is abstracted from the data access logic. You can change the data access code without impacting the work of the application works.

Assume that you introduce new database objects (tables, stored procedures, etc.). You can create a corresponding entity class in your application and write a few lines of data mapping code. You might (though, rarely) also need to change the database type altogether (from Oracle to SQL Server, PostgreSQL, etc.).

By leveraging the Repository Pattern, you can build and test the data access logic and the business logic of an application separately. It helps you to adhere to the Don't Repeat Yourself (DRY) principle since you don't need to repeat the code for performing CRUD operations.

In that case, you would need to change your data access code – update the repository classes. You might also want to change a few lines of code in the application, but that would be minimal.

What is an Anti-Pattern?
An anti-pattern is usually an ineffective solution to a problem. Anti-patterns are ineffective programming techniques that create issues rather than solve them and emerge due to over-engineering, incorrect application of design patterns, not following recommended practices, etc. On the other hand, anti-patterns are recurring solutions to common software application problems. Some common examples are spaghetti code, dead code, God object, etc.

The objective observation of functional and non-functional requirements will help you choose correct application patterns, frameworks, and platforms. You might not select a design pattern simply because you saw someone else use it or because someone told you there was no harm in using it. But an anti-pattern can help you determine the appropriate pattern you can use for your problem statement and available solutions.
An Extra Layer of Abstraction

One of the biggest downsides of the Repository Pattern is adding an extra layer of abstraction which eventually can become overkill for your application. Besides, you would typically need to create a repository for each entity in your application.

Things deteriorate as you include additional methods and complex search capabilities in your repository. You'll wind up with a repository that closely matches the permanent storage layer in use underneath. As an example, you might need methods such as FindProductById, FindCustomerById, etc. Such methods are present in the mature ORM frameworks. It implies that you are creating an abstraction on top of another abstraction for no good reason.
Downsides of a Generic Repository

In an application, the domain model and the persistence model have separate roles. The domain model’s behavior deals with real-world issues and solutions. The persistence model serves to represent how the application's data is saved in the data storage.

The Repository Pattern should encapsulate the persistence logic and conceal the underlying implementations of the data storage ways. The operations in repositories should be expressive rather than generic.

For instance, you cannot have a Generic Repository containing operations that you may use in any situation. As a result of this needless abstraction, the generic repository design becomes an anti-pattern.

A Generic Repository does not provide a meaningful contract. Therefore, you need to create a specific repository that extends the Generic Repository and offers a precise set of operations relevant to that particular entity.
Create a new ASP.NET Core Web API Project

Earlier, we mentioned the necessary tools to proceed to the practical scenarios. The time has come to use those tools.

First, we need to create a new ASP.NET Core Web API project,

    Open Visual Studio 2019.
    Click Create a new project.
    Select ASP.NET Core Web Application and click Next.
    Specify the project name and location to store that project in your system. Optionally, checkmark the Place solution and project in the same directory checkbox.
    Click Create.
    In the Create a new ASP.NET Core Web Application window, select API as the project template.
    Select ASP.NET Core 3.1 or later as the version.
    Disable the Configure for HTTPS and Enable Docker Support options (uncheck them).
    Since we won’t use authentication in this example, specify authentication as No Authentication.
    Click Create to finish the process.

We’ll use this project in this article.
A Generic Repository is an Anti-Pattern

You can take advantage of the Entity Developer tool to generate the Entity Data Model and repository classes. Using this tool simplifies the tasks significantly.

Select the project that we have created earlier. Specify Repository and Unit of Work as the code generation template when creating the Entity Data Model:

This would generate the Irepository and IProductRepository interfaces, and the EntityFrameworkRepository (the generic repository) and ProductRepository classes. It would also generate the entity classes and the unit of work classesandinterfaces.

The Generic Repository generated by Entity Developer would look like below:

public partial class EntityFrameworkRepository < T > : IRepository < T > where T: class {
    private DbContext context;
    protected DbSet < T > objectSet;
    public EntityFrameworkRepository(DbContext context) {
        if (context == null) {
            throw new ArgumentNullException("context");
        }
        this.context = context;
        this.objectSet = context.Set < T > ();
    }
    public virtual void Add(T entity) {
        if (entity == null) {
            throw new ArgumentNullException("entity");
        }
        objectSet.Add(entity);
    }
    public virtual void Remove(T entity) {
        if (entity == null) {
            throw new ArgumentNullException("entity");
        }
        objectSet.Remove(entity);
    }
    public DbContext Context {
        get {
            return context;
        }
    }
}

The code generator will generate the IRepositoryinterface as well:
public partial interface IRepository < T > {
    void Add(T entity);
    void Remove(T entity);
}

You can register an instance of the EntityFrameworkRepositoryclass as a scoped service to use it in the controller classes or elsewhere in the application.

public void ConfigureServices(IServiceCollection services) {
    services.AddScoped < IRepository < Product >> (x => {
        return new EntityFrameworkRepository < Product > (new DataModel());
    });
    services.AddControllers();
}

Now, you can use the dependency injection in your controllers to retrieve this instance.

The Generic Repository works fine as long as you perform simple CRUD operations. If you need specific methods, such as GetAllExpiredProducts, you’ll have to write a custom code in the ProductRepositoryclass. The generated class would look as follows:

public partial class ProductRepository {}

Here you have to write your own implementation of the GetAllExpiredProducts.

So, besides the generic repository that you can use in simple cases only, you'll always need specific repository classes for each entity class in your application to address such issues.

Use the Repository Pattern for applications that don’t perform complex operations.
Summary

In this article, we've discussed the pros, cons, and some common pitfalls you may face when using the Repository Pattern. Hope this information will be helpful in your further work.

HostForLIFE.eu ASP.NET Core Hosting

European best, cheap and reliable ASP.NET hosting with instant activation. HostForLIFE.eu is #1 Recommended Windows and ASP.NET hosting in European Continent. With 99.99% Uptime Guaranteed of Relibility, Stability and Performace. HostForLIFE.eu security team is constantly monitoring the entire network for unusual behaviour. We deliver hosting solution including Shared hosting, Cloud hosting, Reseller hosting, Dedicated Servers, and IT as Service for companies of all size.


European ASP.NET Core Hosting :: Deserialize JSON Format In An ASP.NET GridView Using System.Text.Json Library

clock December 7, 2021 08:03 by author Peter

JSON is an open standard file format and data interchange format that uses human-readable text to store and transmit data objects consisting of attribute-value pairs and arrays.

About System.Text.Json
System.Text.Json library provides high-performance and low-allocating types that serialize objects to JavaScript Object Notation (JSON) text and deserialize JSON text to objects, with UTF-8 support built-in. Also provides types to read and write JSON text encoded as UTF-8, and to create an in-memory document object model (DOM), that is read-only, for random access of the JSON elements within a structured view of the data.

Now, let's install and use JSON library in the ASP.NET website.

Install System.Text.Json library from NuGet
To install library, go to "Microsoft Visual Studio 2022" => "Tools" menu => "NuGet Package Manager" => "Manage NuGet Packages for solution", search for "System.Text.Json" and click "Install" as in below picture.

What is JSON Deserialization?
Deserialization is the process of parsing a string into an object of a specific type. The JsonSerializer.Deserialize() method converts a JSON string into an object of the type specified by a generic type parameter.

Below is the JSON format that will be used as an example:
string JsonString = @"{
        ""Version"": 1,
        ""Key"": ""314929"",
        ""Type"": ""City"",
        ""Rank"": 30,
        ""LocalizedName"": ""Stockholm"",
        ""EnglishName"": ""Stockholm"",
        ""PrimaryPostalCode"": """",
        ""Region"": {
            ""ID"": ""EUR"",
            ""LocalizedName"": ""Europe"",
            ""EnglishName"": ""Europe""
        },
        ""Country"": {
            ""ID"": ""SE"",
            ""LocalizedName"": ""Sweden"",
            ""EnglishName"": ""Sweden""
        },
        ""TimeZone"": {
            ""Code"": ""CET"",
            ""Name"": ""Europe/Stockholm"",
            ""GmtOffset"": 1.0,
            ""IsDaylightSaving"": false,
            ""NextOffsetChange"": ""2022-03-27T01:00:00Z""
        },
        ""DataSets"": [
            ""AirQualityCurrentConditions"",
            ""AirQualityForecasts"",
            ""Alerts"",
            ""DailyPollenForecast"",
            ""ForecastConfidence"",
            ""FutureRadar"",
            ""MinuteCast"",
            ""Radar""
        ]
 }";

And here are Class Properties for converting JSON string,

public class Cities {
    public int Version {
        get;
        set;
    }
    public string Key {
        get;
        set;
    }
    public string Type {
        get;
        set;
    }
    public string EnglishName {
        get;
        set;
    }
    public Region Region {
        get;
        set;
    }
    public Country Country {
        get;
        set;
    }
    public TimeZone TimeZone {
        get;
        set;
    }
    public string[] DataSets {
        get;
        set;
    }
}
public class Region {
    public string ID {
        get;
        set;
    }
    public string LocalizedName {
        get;
        set;
    }
    public string EnglishName {
        get;
        set;
    }
}
public class Country {
    public string ID {
        get;
        set;
    }
    public string LocalizedName {
        get;
        set;
    }
    public string EnglishName {
        get;
        set;
    }
}
public class TimeZone {
    public string Code {
        get;
        set;
    }
    public string Name {
        get;
        set;
    }
    public float GmtOffset {
        get;
        set;
    }
}

Now, the following is JsonSerializer.Deserialize() method to convert JSON string, which will be added to a datatable to use it in the GridView.

Cities cities = JsonSerializer.Deserialize<Cities>(JsonString);
int Version = cities.Version;
string Key = cities.Key;
string Type = cities.Type;
string City = cities.EnglishName;
string Region = cities.Region.EnglishName;
string Country = cities.Country.EnglishName;
string TimeZone = cities.TimeZone.Name;
string Alerts = cities.DataSets[2];

DataTable dt = new DataTable();
dt.Columns.Add("Version", typeof(string));
dt.Columns.Add("Key", typeof(string));
dt.Columns.Add("Type", typeof(string));
dt.Columns.Add("City", typeof(string));
dt.Columns.Add("Region", typeof(string));
dt.Columns.Add("Country", typeof(string));
dt.Columns.Add("TimeZone", typeof(string));
dt.Columns.Add("Alerts", typeof(string));

DataRow row;
row = dt.NewRow();
row["Version"] = Version;
row["Key"] = Key;
row["Type"] = Type;
row["City"] = City;
row["Region"] = Region;
row["Country"] = Country;
row["TimeZone"] = TimeZone;
row["Alerts"] = Alerts;
dt.Rows.Add(row);

GridView1.DataSource = dt;
GridView1.DataBind();

After running ASP.NET website, the following image is the result of JSON deserialization process.

In this article, System.Text.Json library was introduced, we saw how to install it and use it in an ASP.NET website. Also we discussed the steps to deserialize JSON string in an ASP.NET GridView. In conclusion, this was a demonstration of the concept of JSON deserialization and how System.Text.Json library helps achieve this process.

HostForLIFE.eu ASP.NET Core Hosting

European best, cheap and reliable ASP.NET hosting with instant activation. HostForLIFE.eu is #1 Recommended Windows and ASP.NET hosting in European Continent. With 99.99% Uptime Guaranteed of Relibility, Stability and Performace. HostForLIFE.eu security team is constantly monitoring the entire network for unusual behaviour. We deliver hosting solution including Shared hosting, Cloud hosting, Reseller hosting, Dedicated Servers, and IT as Service for companies of all size.


European ASP.NET Core Hosting :: How To Add JWT Bearer Token Authorization Functionality In Swagger?

clock December 1, 2021 07:18 by author Peter

Swagger (Open API) is a language-agnostic specification for describing and documenting the REST API. Swagger Allows both the Machine and Developer to understand the working and capabilities of the Machine without direct access to the source code of the project. The main objectives of swagger (Open API) are to:

    Minimize the workload to connect with Microservice.
    Reduce the Time Needed to accurately document the Microservice.

Default Addition of Swagger in .NET 5 & .NET 6
Swagger open API is used for developing APIs using ASP.Net Core versions .Net 5 and .Net 6. We can test our all-API Endpoints in a default functionality because it's directly integrated with our API for testing like.

Swagger revealed all our endpoints in the Default view, and we can test them using JSON Schema. Like

However, we have a challenge in that we wish to retrieve data from a secured endpoint that requires a Token as well as a Role-based Token. After submitting a JWT Token and a Role, the endpoint shown below will return data.

[HttpGet]
[Authorize(Roles = "Admin")]
public IEnumerable < WeatherForecast > Get() {
    var rng = new Random();
    return Enumerable.Range(1, 5).Select(index => new WeatherForecast {
        Date = DateTime.Now.AddDays(index),
            TemperatureC = rng.Next(-20, 55),
            Summary = Summaries[rng.Next(Summaries.Length)]
    }).ToArray();
}

Demo
We'll test the endpoint listed below without a token or a role.

After hitting the endpoint, we have the output like


Unauthorized Access because the endpoint requires a JWT Token and a Role in order to access data from the database. By default, Swagger does not provide capability for token-based authorization of endpoints. We are currently adding JWT Token-based functionality to our API.

Default View


Adding JWT Token Functionality in Our API
First and foremost, you must change the default swagger functionality in our startup.cs class

public void ConfigureServices(IServiceCollection services) {
    services.AddDbContext < ApplicationDbContext > (options => options.UseSqlServer(Configuration.GetConnectionString("ConnStr")));
    services.AddControllers();
    services.AddControllers();
    //Default Functionality Added by Swagger
    services.AddSwaggerGen();
    // For Entity Framework
    // For Identity
    services.AddIdentity < ApplicationUser, IdentityRole > ().AddEntityFrameworkStores < ApplicationDbContext > ().AddDefaultTokenProviders();
    // Adding Authentication
    services.AddAuthentication(options => {
            options.DefaultAuthenticateScheme = JwtBearerDefaults.AuthenticationScheme;
            options.DefaultChallengeScheme = JwtBearerDefaults.AuthenticationScheme;
            options.DefaultScheme = JwtBearerDefaults.AuthenticationScheme;
        })
        // Adding Jwt Bearer
        .AddJwtBearer(options => {
            options.SaveToken = true;
            options.RequireHttpsMetadata = false;
            options.TokenValidationParameters = new TokenValidationParameters() {
                ValidateIssuer = false,
                    ValidateAudience = false,
                    ValidAudience = Configuration["JWT:ValidAudience"],
                    ValidIssuer = Configuration["JWT:ValidIssuer"],
                    IssuerSigningKey = new SymmetricSecurityKey(Encoding.UTF8.GetBytes(Configuration["JWT:Secret"]))
            };
        });
    //services.AddTransient<PersonService, PersonService>();
}

Modifying the Functionality
Just add given below line and replace the,
services.AddSwaggerGen();

With given below lines,
services.AddSwaggerGen(c => {
    c.SwaggerDoc("v1", new OpenApiInfo {
        Title = "JWTToken_Auth_API", Version = "v1"
    });
    c.AddSecurityDefinition("Bearer", new OpenApiSecurityScheme() {
        Name = "Authorization",
            Type = SecuritySchemeType.ApiKey,
            Scheme = "Bearer",
            BearerFormat = "JWT",
            In = ParameterLocation.Header,
            Description = "JWT Authorization header using the Bearer scheme. \r\n\r\n Enter 'Bearer' [space] and then your token in the text input below.\r\n\r\nExample: \"Bearer 1safsfsdfdfd\"",
    });
    c.AddSecurityRequirement(new OpenApiSecurityRequirement {
        {
            new OpenApiSecurityScheme {
                Reference = new OpenApiReference {
                    Type = ReferenceType.SecurityScheme,
                        Id = "Bearer"
                }
            },
            new string[] {}
        }
    });
});


Now we can see the Authorize Option for JWT Token Authorization

Step 1
Get the JWT Token for the user by hitting the Login endpoints:
How To Add JWT Bearer Token Authorization Functionality in Swagger

Step 2
Get the JWT Token using Login EndPoint:
How To Add JWT Bearer Token Authorization Functionality in Swagger


We now have the token, which we will add to our application using the Swagger JWT Token Authorization functionality.


Step 3
Hit the Authorize Button and add JWT Token in your application:


Now our all endpoints are authorized,


View after adding JWT Token Authentication in Application,


Now you see that we have the lock sign with all our endpoints so let’s try to access the same endpoint data now.


Now you can see that we have a JWT Token and that we have accessed data from a secured API using this token.


After adding the JWT Function in our Application now you can test all the secured endpoint using JWT Token Authentication

We covered how to enable JWT token capabilities in our application and then how to retrieve data from a secured endpoint in this article.

JWT Token Authentication in Asp.net Web API will be the subject of the next article.

“Happy Coding”

HostForLIFE.eu ASP.NET Core Hosting

European best, cheap and reliable ASP.NET hosting with instant activation. HostForLIFE.eu is #1 Recommended Windows and ASP.NET hosting in European Continent. With 99.99% Uptime Guaranteed of Relibility, Stability and Performace. HostForLIFE.eu security team is constantly monitoring the entire network for unusual behaviour. We deliver hosting solution including Shared hosting, Cloud hosting, Reseller hosting, Dedicated Servers, and IT as Service for companies of all size.


European ASP.NET Core Hosting :: How To Enable SSL In Visual Studio?

clock November 26, 2021 06:43 by author Peter

What is SSL Certificate?
SSL stands for Secure Sockets Layer, a global standard security technology that enables encrypted communication between a web browser and a web server.
Create ASP.NET Web Application

  • Start Visual Studio 2019 and select Create a new project.
  • In the Create a new project dialog, select ASP.NET Web Application (.NET Framework) > Next.
  • In the Configure your new project dialog, enter SSLSample for Project name. It's important to name the project SSLSample. Capitalization needs to match each namespace when code is copied.
  • Select Framework (.NET Framework 4.7.2)
  • Select Create.
  • In the Additional Information dialog, select MVC
  • Select Create.

There are two ways, you can configure SSL in your application. If you are creating your application from scratch, then select the option Configure for HTTPs when creating a new project. For this sample, please uncheck Configure for HTTPs.

In this article, we are going to discuss if your application is already built, and you are planning to enable SSL in Visual Studio.
So, when you run your application, you see the URL like this (http://localhost:44345/):

But we would like to see like this (https://localhost:44345/). Let’s configure SSL in our application.
The first step is easy. You just select the project name in the solution and locate the property called “SSL Enabled” in properties window:

The same properties window will also show the HTTPS URL for the application. In the above example, it’s https://localhost:65440/. Copy that URL and go to the project properties window. Locate the Web tab and override the Project URL property with the https address:

After that, you need to setup a trusted certificate for Visual Studio. You can locate the certificate in the Personal folder of the computer-level certificates in the certificates snap-in:

If you double-click the certificate, you’ll see that it’s not trusted:

The message also provides the solution: the certificate must be imported into the trusted root certification authority’s folder. You’ll see that as a folder in the same snap-in just below “Personal”. So how can we do that?

EXPORT

  • Right-click the certificate
  • Select All Tasks
  • Export… from the context menu.
  • Click Next on the certificate export wizard.
  • Leave the “Do not export the private key” option untouched, click Next.
  • Accept the default on the next screen, i.e., “DER encoded binary X.509” should stay selected, then click Next.
  • Provide a name and a location for the exported file. Call it “localhost” and save it in a location where you can easily find it.
  • Click Next and then Finish.

There should be a popup message saying that the export was successful.

IMPORT

  • Next right-click the folder called Trusted Root Certification Authorities and select All Tasks
  • Import… from the context menu.
  • Leave the “Local Machine” option untouched in the certificate import wizard, click Next.
  • Browse to the certificate you saved just before.
  • Click Next and accept all the default values along the way until you reach the end of the wizard.

There should be a message saying that the import was successful.

OK, let’s start the .NET web project again, the opening page should open without any warning. If you still see the same issue, then test it in a brand-new browser session.

You can also view the extracted certificate from the browser window. Here’s an example:


As you can see, the website URL is SSL secured and protected.

Conclusion
In this article, we have learned how to setup an SSL certificate in Visual studio for Local applications.

HostForLIFE.eu ASP.NET Core Hosting

European best, cheap and reliable ASP.NET hosting with instant activation. HostForLIFE.eu is #1 Recommended Windows and ASP.NET hosting in European Continent. With 99.99% Uptime Guaranteed of Relibility, Stability and Performace. HostForLIFE.eu security team is constantly monitoring the entire network for unusual behaviour. We deliver hosting solution including Shared hosting, Cloud hosting, Reseller hosting, Dedicated Servers, and IT as Service for companies of all size.


European ASP.NET Core Hosting :: How To Consume Web API In An ASP.NET Gridview Using HttpClient?

clock November 24, 2021 09:02 by author Peter

Integrating Web API and ASP.NET has been the subject in many discussions and for this, I wrote this article to demonstrate an example of how to consume Web API in an ASP.NET website and how to view the information in a GridView.

If you are not familiar with ASP.NET and Visual Studio and how to setup an environment please refer to the following article.

Now, let's start consuming the Web API in an asp.net website step by step.

Step 1 - Create ASP.NET Website
Search "All Programs" and select "Microsoft Visual Studio 2022".
Click "Create a new project". Select "ASP.NET Empty Web Site", click "Next", give the website a name and click ok.
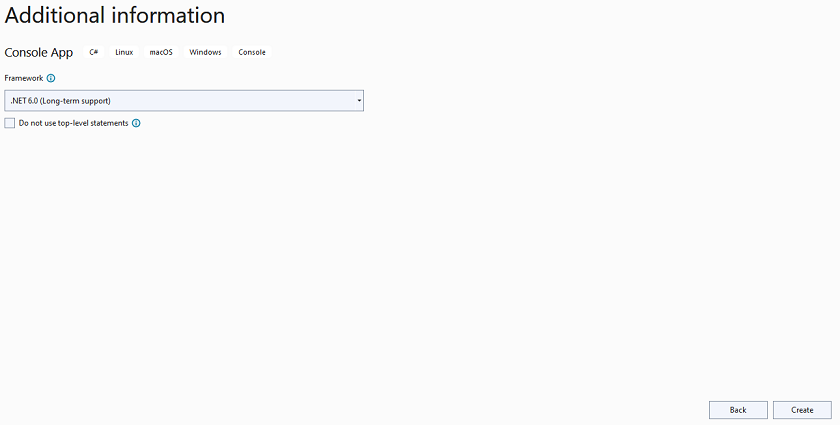
The following window will appear.

The next step creates the empty ASP.NET Web Site without adding the default page, and the project will look like the following.

Step 2 - Install HttpClient library from NuGet
In order to consume HttpClient, this library needs to be installed from package manager as in the following picture.

Step 3 - Install WebAPI.Client library from NuGet
This package adds support for formatting and content negotiation to System.Net.Http, To install, go to package manager and search for "Microsoft.AspNet.WebApi.Client" and click install as in the following image.

Installing the previous two packages will allow us to consume Web API in our project. Now, let's move to the next steps.

Step 4 - Create A New Web Form
Now, right-click on the project node and go to "Add" and then "Add New Item", choose "Web Form" and click add, the solution explorer will look like the following.

Step 5 - Add GridView To Web Form
Go to Toolbox on the left hand menu and choose "GridView", drag it to the HTML page, and click save as in the following picture.

Step 6 - Add Class to Web Form Page
Now, let's add the class and code to consume to Web API to Web Form Page.

After modifying the code of Default.aspx.cs class, the code will look like the following.

Default.aspx.cs

using System;
using System.Collections.Generic;
using System.Linq;
using System.Web;
using System.Web.UI;
using System.Web.UI.WebControls;
using System.Net.Http;
using System.Net.Http.Headers;
using System.Data;
public partial class _Default: System.Web.UI.Page {
    public class DataObject {
        public string Version {
            get;
            set;
        }
        public string Key {
            get;
            set;
        }
        public string Type {
            get;
            set;
        }
        public string Rank {
            get;
            set;
        }
        public string EnglishName {
            get;
            set;
        }
    }
    protected void Page_Load(object sender, EventArgs e) {
        populateWebApiGridView();
    }
    public void populateWebApiGridView() {
        string URL = "API_URL";
        string urlParameters = "API_KEY";
        DataTable dt = new DataTable();
        dt.Columns.Add("Version", typeof(string));
        dt.Columns.Add("Key", typeof(string));
        dt.Columns.Add("Type", typeof(string));
        dt.Columns.Add("Rank", typeof(string));
        dt.Columns.Add("City", typeof(string));
        HttpClient client = new HttpClient();
        client.BaseAddress = new Uri(URL);
        client.DefaultRequestHeaders.Accept.Add(new MediaTypeWithQualityHeaderValue("application/json"));
        HttpResponseMessage response = client.GetAsync(urlParameters).Result;
        if (response.IsSuccessStatusCode) {
            var dataObjects = response.Content.ReadAsAsync < IEnumerable < DataObject >> ().Result;
            foreach(var d in dataObjects) {
                dt.Rows.Add(d.Version);
                dt.Rows.Add(d.Key);
                dt.Rows.Add(d.Type);
                dt.Rows.Add(d.Rank);
                dt.Rows.Add(d.EnglishName);
            }
        } else {
            System.Diagnostics.Debug.WriteLine("{ 0} ({1})", (int) response.StatusCode, response.ReasonPhrase);
        }
        client.Dispose();
        GridView1.DataSource = dt;
        GridView1.DataBind();
    }
}

Step 7 - Run the Web Site

HostForLIFE.eu ASP.NET Core Hosting

European best, cheap and reliable ASP.NET hosting with instant activation. HostForLIFE.eu is #1 Recommended Windows and ASP.NET hosting in European Continent. With 99.99% Uptime Guaranteed of Relibility, Stability and Performace. HostForLIFE.eu security team is constantly monitoring the entire network for unusual behaviour. We deliver hosting solution including Shared hosting, Cloud hosting, Reseller hosting, Dedicated Servers, and IT as Service for companies of all size.


European ASP.NET Core Hosting :: Using Log4net To Log Exceptions In ASP.NET

clock November 22, 2021 09:05 by author Peter

Log4net is an amazing library to perform logging in our applications in a petty simple way.

To start with log4net in ASP.NET we need to install the nuget package.
dotnet add package log4net

Then we need to include the log4net.config file. This is an XML file that contains all the settings for our Log. We can specify the format, filename, maximum file size, and others.

This is an example,
<?xml version="1.0" encoding="utf-8" ?>
<configuration>
    <log4net>
        <root>
            <level value="ALL" />
            <appender-ref ref="RollingLogFileAppender" />
        </root>
        <appender name="RollingLogFileAppender" type="log4net.Appender.RollingFileAppender">
            <file value="api.log" />
            <appendToFile value="true" />
            <rollingStyle value="Composite" />
            <maxSizeRollBackups value="5" />
            <maximumFileSize value="10MB" />
            <layout type="log4net.Layout.PatternLayout">
                <conversionPattern value="%date %5level %class - MESSAGE: %message%newline"/>
            </layout>
        </appender>
    </log4net>
</configuration>


Markup
    file: Name of the file created with the log
    level: Used to Specify the level error to save in the log. Other levels are going to be ignored and ALL includes all the levels.
    maximumFileSize: Maximum size of the log file if the log exceeds this limit, log4net is going to create a new file.

This is an example where the file is located,

Now, we need to set up the log in the program.cs class to start the log when the API starts.  
public static void Main(string[] args)
{
var host = CreateHostBuilder(args).Build();
ILoggerRepository repository = log4net.LogManager.GetRepository(Assembly.GetEntryAssembly());
var fileInfo = new FileInfo(@"log4net.config");
log4net.Config.XmlConfigurator.Configure(repository, fileInfo);
host.Run();
}


Finally, we are ready to create a filter in our project in order to catch all the possible exceptions in our application.
using System;
using System.Collections.Generic;
using System.Linq;
using System.Threading.Tasks;
using log4net;
using Microsoft.AspNetCore.Mvc.Filters;
using Microsoft.Extensions.Logging;

namespace Api.Attributes
{
public class LogFilterAttribute : ExceptionFilterAttribute
{
    ILog logger;
    public LogFilterAttribute()
    {
        logger =  LogManager.GetLogger(typeof(LogFilterAttribute));
    }
    public override void OnException(ExceptionContext Context)
    {
        logger.Error(Context.Exception.Message + " - "  + Context.Exception.StackTrace);
    }
}
}


Add to the services the filter created:
services.AddControllersWithViews(p=> p.Filters.Add(new LogFilterAttribute()));

Now, all the exceptions are going to be saved in the log file. This log is on Api\bin\Debug\net5.0

Log Example

You still can use the .NET Logger class when you want to log something manually.

HostForLIFE.eu ASP.NET Core Hosting

European best, cheap and reliable ASP.NET hosting with instant activation. HostForLIFE.eu is #1 Recommended Windows and ASP.NET hosting in European Continent. With 99.99% Uptime Guaranteed of Relibility, Stability and Performace. HostForLIFE.eu security team is constantly monitoring the entire network for unusual behaviour. We deliver hosting solution including Shared hosting, Cloud hosting, Reseller hosting, Dedicated Servers, and IT as Service for companies of all size.


About HostForLIFE

HostForLIFE is European Windows Hosting Provider which focuses on Windows Platform only. We deliver on-demand hosting solutions including Shared hosting, Reseller Hosting, Cloud Hosting, Dedicated Servers, and IT as a Service for companies of all sizes.

We have offered the latest Windows 2019 Hosting, ASP.NET 5 Hosting, ASP.NET MVC 6 Hosting and SQL 2019 Hosting.


Month List

Tag cloud

Sign in